To uninstall drivers in Windows 11, go to Device Manager, right-click the driver, and select Uninstall. This will remove the driver from your system.
Uninstalling device drivers in Windows 11 can be necessary for troubleshooting or updating purposes. Whether you need to remove a malfunctioning driver or want to install a new version, understanding the process is essential. By following the steps to uninstall drivers in Windows 11, you can ensure that your system functions properly and stays up-to-date with the latest driver versions.
This guide will provide a clear and concise explanation of how to navigate the Device Manager and remove drivers from your Windows 11 system effortlessly. Read on to learn the step-by-step process for uninstalling drivers and gain a better understanding of this essential maintenance task for your computer.
Why Uninstall Drivers In Windows 11
Uninstalling drivers in Windows 11 can be a crucial step in maintaining the performance and stability of your system. Whether it’s to resolve compatibility issues or to address performance concerns, knowing when and how to uninstall drivers can make a significant difference in the functionality of your device.
Outdated Or Incompatible Drivers
Outdated or incompatible drivers can lead to various issues such as system crashes, hardware malfunctions, and overall sluggish performance. When these drivers are left unaddressed, they can create a negative impact on the user experience and the functionality of the system. By identifying and uninstalling these problematic drivers, you can ensure that your hardware components are running optimally and without any compatibility conflicts.
Resolving Performance Issues
When your system experiences performance issues, it can oftentimes be attributed to faulty or outdated drivers. Uninstalling these problematic drivers can help resolve these issues and potentially improve the overall speed and responsiveness of your system. By keeping your drivers up-to-date and removing any that are causing performance bottlenecks, you can ensure that your Windows 11 system operates at its best.
Identifying Problematic Drivers
Identifying problematic drivers is a crucial step in optimizing your Windows 11 system performance. Faulty or outdated drivers can cause various issues, including system crashes, hardware malfunctions, and poor overall stability. By accurately pinpointing problematic drivers, you can take the necessary steps to uninstall and replace them, ensuring your system runs smoothly and efficiently.
Device Manager
Device Manager is a built-in Windows utility that allows you to view and manage hardware devices and their drivers. To access Device Manager, simply right-click on the Start button and select “Device Manager” from the context menu. Once opened, you can expand the categories to reveal the installed devices and their corresponding drivers. Look for any yellow exclamation marks or error symbols next to the device names, indicating problematic drivers that may require uninstallation.
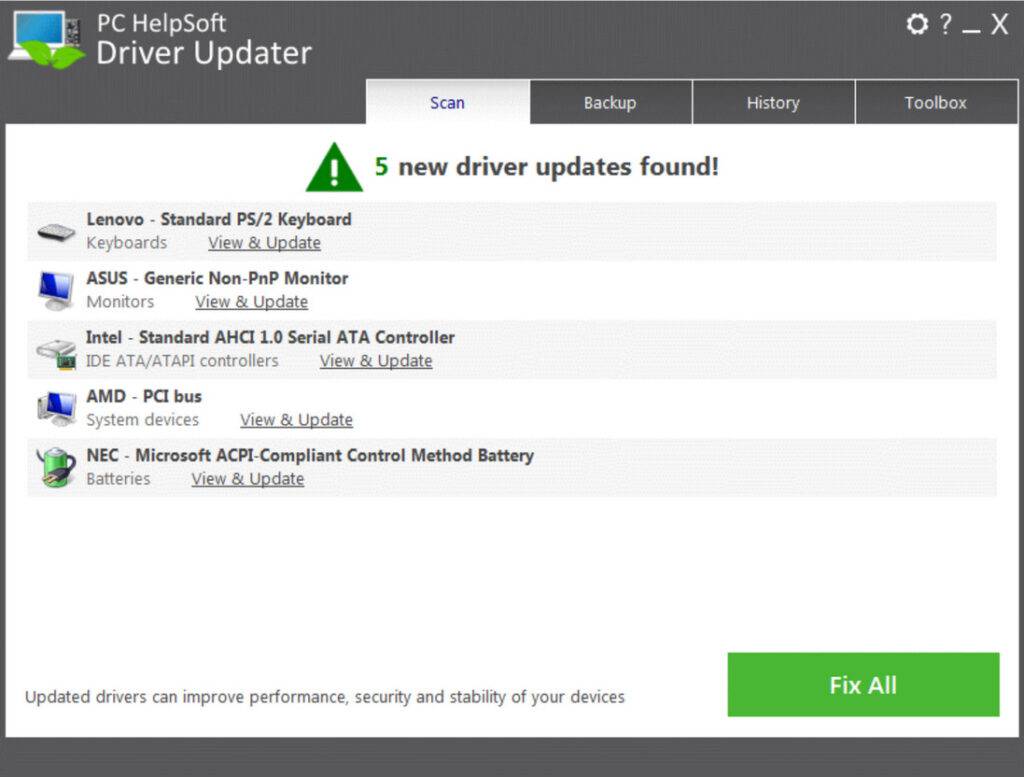
Third-party Driver Management Tools
Third-party driver management tools offer additional features and functionalities for identifying and uninstalling problematic drivers. These tools can streamline the process by providing comprehensive driver scanning, analysis, and removal capabilities. Some popular third-party tools include Driver Booster, Snappy Driver Installer, and Driver Easy. Utilizing these tools can simplify the identification and uninstallation of problematic drivers, improving system stability and performance.
Uninstalling Drivers Using Device Manager
Uninstalling drivers in Windows 11 can be a useful troubleshooting step if you’re experiencing issues with a particular device or you simply want to clean up your system. The Device Manager is a built-in Windows tool that allows you to manage hardware devices and their drivers. In this guide, we’ll walk you through the steps to uninstall drivers using the Device Manager in Windows 11.
Accessing Device Manager
To start the process of uninstalling a driver, you need to access the Device Manager. Fortunately, it’s just a few clicks away:
- Press the Windows key + X on your keyboard to open the Power User Menu.
- From the menu, select Device Manager. This will launch the Device Manager window.
Locating And Selecting The Driver
Once you are in the Device Manager window, you can locate and select the driver you want to uninstall:
- In the Device Manager window, you’ll see a list of hardware categories. Expand the category that contains the driver you want to uninstall.
- Within the expanded category, right-click on the specific device you want to uninstall the driver for.
- From the context menu, select Uninstall device. This will open a confirmation dialog.
- In the confirmation dialog, check the box that says Delete the driver software for this device. This ensures that the driver files are completely removed from your system.
- Click Uninstall to confirm and proceed with the driver uninstallation.
Restarting The Computer
After you have successfully uninstalled the driver, it’s a good idea to restart your computer. This allows Windows to automatically reinstall the driver if it’s needed or install an updated version of the driver. To restart your computer:
- Click on the Start button in the bottom left corner of your screen.
- In the Start menu, click on the Power icon.
- From the options presented, select Restart.
Once your computer restarts, the driver will either be reinstalled automatically or remain uninstalled, depending on the device and its compatibility with Windows. By following these simple steps, you can easily uninstall drivers using the Device Manager in Windows 11 and keep your system running smoothly.

Credit: www.thespectrum.com
Uninstalling Drivers With Third-party Tools
Uninstalling drivers in Windows 11 can sometimes be a daunting task, especially when the traditional methods prove to be ineffective. In such cases, third-party tools can provide a convenient solution to remove problematic drivers from your system. These tools offer advanced features and a user-friendly interface, making the uninstallation process quick and efficient.
Downloading And Installing The Tool
To get started, you’ll need to download and install a reliable third-party tool specifically designed for driver removal. Various options are available online, so make sure to choose a reputable one that matches your system’s requirements. Once downloaded, run the installer and follow the on-screen instructions to complete the installation process.
Scanning For Problematic Drivers
After successfully installing the tool, launch it to initiate a scan for problematic drivers on your Windows 11 system. The tool will comprehensively analyze your system’s drivers and identify any that may be causing issues or conflicts. This scan is necessary to ensure that you target the correct driver for removal.
Selecting And Uninstalling The Driver
Once the scan is complete, the tool will present you with a list of drivers that it has identified as potentially problematic. Take your time to review this list carefully, as removing the wrong driver could result in functionality issues. When you have identified the driver you wish to uninstall, select it from the list and proceed to the uninstallation step.
The third-party tool will guide you through the process of uninstalling the selected driver. Follow the prompts and ensure that you carefully read and understand each step before proceeding. Upon completion, the tool will remove the driver from your system, effectively resolving any issues it may have been causing.
Verifying Successful Removal
It is essential to verify the successful removal of the driver to ensure that it no longer poses any issues to your system. Restart your computer and perform a thorough check to confirm that the driver has been completely uninstalled. If you no longer experience any related problems, consider the removal successful.
Uninstalling drivers with third-party tools can greatly simplify the process and provide a reliable solution when traditional methods fail. These tools offer advanced scanning capabilities, precise driver selection, and a straightforward uninstallation process. By using such tools, you can effectively manage and maintain your Windows 11 system’s drivers with ease and efficiency.
Reinstalling Drivers In Windows 11
Uninstalling drivers in Windows 11 can sometimes be necessary when troubleshooting issues or upgrading hardware. However, once you’ve uninstalled a driver, you may need to reinstall it to ensure proper functionality of your device. In this post, we’ll explore two methods for reinstalling drivers in Windows 11: automatic driver installation and manual driver installation.
Automatic Driver Installation
Windows 11 has a built-in feature that allows for automatic driver installation. This means that when you connect a new device to your computer or update an existing device, Windows will automatically search for and install the appropriate driver.
This process is typically seamless and requires minimal user intervention. Windows will search for the driver online and download it, ensuring you have the most up-to-date version. It’s important to note that automatic driver installation relies on an active internet connection.
Here’s how you can ensure automatic driver installation is enabled:
- Open the Start menu and navigate to the Settings app.
- Click on ‘Windows Update’ in the left-hand menu.
- Select ‘Advanced options’.
- Under the ‘Optional updates’ section, ensure the ‘Automatically download drivers for new devices’ checkbox is checked.
Manual Driver Installation
In some cases, you may prefer to manually install drivers in Windows 11. This can be useful if you have a specific driver version you want to use or if automatic installation fails to find the correct driver.
Manual driver installation involves downloading the driver file from the manufacturer’s website and installing it on your computer. Here’s a step-by-step guide:
- Identify the device for which you want to install the driver and note its model and manufacturer.
- Visit the manufacturer’s website and navigate to the support or driver download section.
- Search for the appropriate driver by specifying the device model and operating system (Windows 11).
- Download the driver file to your computer.
- Once the download is complete, locate the file and double-click on it to start the installation.
- Follow the on-screen instructions to complete the installation process.
- Restart your computer to ensure the new driver is applied.
By following these steps, you’ll be able to manually install drivers in Windows 11 and ensure compatibility with your devices.

Credit: www.pcmag.com
Credit: malwaretips.com
Frequently Asked Questions On Uninstall Drivers In Windows 11
How Do I Uninstall Drivers In Windows 11?
To uninstall drivers in Windows 11, go to Device Manager, right-click on the driver you want to uninstall, and select “Uninstall device. ” Confirm the uninstallation and restart your computer if prompted. This will remove the driver from your system.
Can I Uninstall Graphics Drivers In Windows 11?
Yes, you can uninstall graphics drivers in Windows 11. Open Device Manager, locate your graphics card under the Display adapters section, right-click on it, and select “Uninstall device. ” Follow the on-screen instructions to complete the uninstallation process.
How To Uninstall Printer Drivers In Windows 11?
To uninstall printer drivers in Windows 11, open Control Panel, select “Devices and Printers,” right-click on the printer you want to remove, and choose “Remove device. ” Confirm the uninstallation and restart your computer if prompted. The printer drivers will be uninstalled.
Can I Uninstall Audio Drivers In Windows 11?
Yes, you can uninstall audio drivers in Windows 11. Open Device Manager, expand the “Sound, video, and game controllers” section, right-click on your audio device, and select “Uninstall device. ” Restart your computer, and Windows will automatically reinstall the audio drivers.
Conclusion
To sum up, uninstalling drivers in Windows 11 is a straightforward process that can help resolve various hardware issues and ensure optimal performance. By following the steps mentioned in this blog post, you can easily uninstall drivers from your system.
Remember to exercise caution and consult official manufacturer documentation, if needed, to avoid any compatibility issues. Enjoy a smoother and more efficient computing experience with a well-maintained driver system!