For Singer sewing machine troubleshooting, check for common issues like thread tension, needle problems, and bobbin placement. Regular maintenance prevents many sewing machine problems.
Singer sewing machines are renowned for their reliability and durability. Yet, like any machine, they can encounter issues that interrupt your sewing projects. Addressing these problems efficiently ensures your machine runs smoothly. Common issues include incorrect thread tension, needle problems, and bobbin placement errors.
Regular maintenance and proper usage prevent most of these troubles. Cleaning the machine, oiling parts, and using high-quality thread and needles are essential steps. By understanding and resolving these common issues, you can keep your Singer sewing machine in top working condition, ensuring it continues to serve your sewing needs effectively.

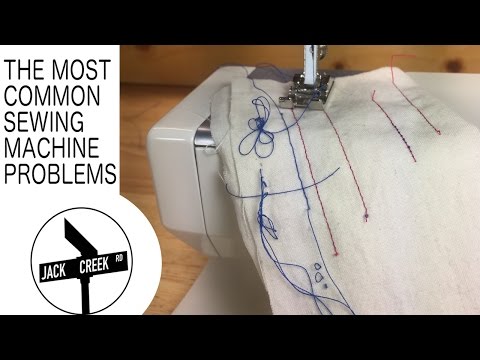
Credit: www.youtube.com
Common Issues
Common Issues with Singer sewing machines can disrupt your creative flow. Addressing these problems quickly ensures smooth sewing sessions. Here, we cover two main issues: Thread Breakage and Skipped Stitches. Let’s dive into these common problems and their solutions.
Thread Breakage
Thread breakage can be frustrating. Understanding its causes helps fix it faster.
- Incorrect Thread Tension: Adjust the tension dial to match your fabric type.
- Poor-Quality Thread: Use high-quality thread to prevent breakage.
- Needle Issues: Ensure the needle is not bent and is the correct size.
- Dirty Machine: Clean the bobbin area and threading path regularly.
Table for Thread Breakage Troubleshooting:
| Problem | Solution |
|---|---|
| Incorrect Thread Tension | Adjust the tension dial |
| Poor-Quality Thread | Use better quality thread |
| Needle Issues | Change to correct needle size |
| Dirty Machine | Clean the machine |
Skipped Stitches
Skipped stitches can ruin your sewing project. Identifying the cause is key.
- Worn or Bent Needle: Replace the needle if it is old or bent.
- Incorrect Needle Type: Use the right needle for your fabric type.
- Threading Issues: Re-thread the machine to ensure correct threading.
- Tension Problems: Adjust the tension to match the fabric and thread.
Table for Skipped Stitches Troubleshooting:
| Problem | Solution |
|---|---|
| Worn or Bent Needle | Replace the needle |
| Incorrect Needle Type | Use the correct needle |
| Threading Issues | Re-thread the machine |
| Tension Problems | Adjust the tension |
Addressing these common issues ensures a smoother sewing experience. Happy sewing!
Machine Won’t Turn On
When your Singer sewing machine won’t turn on, it can be frustrating. There are a few common reasons why this happens. Here, we’ll explore key troubleshooting steps to get your machine running again.
Power Supply Check
First, ensure your machine is properly plugged in. Inspect the power cord for any visible damage. Use a different power outlet to rule out socket issues.
Steps to Check Power Supply:
- Ensure the power cord is securely plugged into the machine.
- Check the connection to the wall socket.
- Try using a different outlet to test power flow.
- Inspect the cord for frays or cuts.
Fuse Replacement
If the power supply is intact, the fuse might be the problem. A blown fuse can prevent the machine from turning on. Follow these steps to replace it:
Steps to Replace the Fuse:
- Unplug the machine from the power source.
- Locate the fuse compartment, usually found near the power switch.
- Open the compartment using a screwdriver.
- Remove the old fuse and inspect it.
- If the fuse looks burnt or broken, replace it with a new one.
- Close the compartment and plug the machine back in.
Note: Ensure you use a fuse with the correct rating for your machine model.
Bobbin Problems
Many sewing enthusiasts encounter issues with their bobbins. These problems can disrupt your sewing projects. Understanding common bobbin problems helps you fix them quickly. This section covers two major bobbin issues: Incorrect Bobbin Placement and Tangled Bobbin Thread.
Incorrect Bobbin Placement
Incorrect bobbin placement can lead to sewing machine malfunctions. Ensure the bobbin is placed correctly in its case. Follow these steps:
- Open the bobbin case.
- Place the bobbin inside, ensuring the thread unwinds counterclockwise.
- Pull the thread through the slot in the bobbin case.
- Secure the bobbin case in the machine.
Always check the manual for specific instructions. Proper placement prevents many issues.
Tangled Bobbin Thread
Tangled bobbin thread is frustrating. It can ruin your fabric. Address this problem by following these tips:
- Ensure the bobbin is wound evenly.
- Check for any loose threads.
- Use the correct bobbin size for your machine.
If the thread still tangles, rethread the bobbin. Also, clean the bobbin area regularly. Dust and lint can cause tangling.
| Common Issue | Solution |
|---|---|
| Thread bunching under fabric | Check bobbin placement |
| Uneven stitches | Rewind bobbin properly |
| Bobbin not spinning | Clean bobbin case |
Tension Troubles
Facing tension troubles with your Singer sewing machine? Don’t worry. Understanding and fixing tension issues can be simple. Let’s break it down step-by-step.
Adjusting Upper Tension
The upper tension controls the top thread. Incorrect settings can cause problems.
Follow these steps to adjust it properly:
- Turn off your sewing machine for safety.
- Locate the tension dial, usually on the front.
- Check the current setting. It should be between 3 and 5.
- If needed, turn the dial to adjust tension.
- Test on a scrap fabric. Adjust until stitches are even.
Balancing Bobbin Tension
Bobbin tension affects the bottom thread. Balancing it is crucial for smooth stitching.
Here’s how you can balance bobbin tension:
- Remove the bobbin case from your machine.
- Locate the small screw on the bobbin case.
- Use a tiny screwdriver to adjust. Right to tighten, left to loosen.
- Insert the bobbin back and test on a scrap fabric.
- Adjust until the top and bottom stitches are balanced.
Here’s a quick table to summarize:
| Step | Action |
|---|---|
| Upper Tension | Turn dial between 3-5, Test on fabric |
| Bobbin Tension | Adjust screw, Test on fabric |
Remember, balance is key. Both tensions should work together for perfect stitches.
Needle Issues
Needle issues are common with Singer sewing machines. They can disrupt your sewing projects. Understanding and fixing these problems is crucial. This section addresses common needle issues. Learn how to troubleshoot them effectively.
Bent Or Broken Needles
Bent or broken needles can cause many problems. They can damage your fabric. They can also harm your machine. Check your needle if you hear strange noises. If your stitches are uneven, the needle might be bent.
Follow these steps to address bent or broken needles:
- Turn off your sewing machine.
- Remove the needle carefully.
- Inspect the needle for bends or breaks.
- Replace it with a new, matching needle.
Always use the right needle type for your fabric. Using the wrong needle can lead to breaks.
Incorrect Needle Insertion
Incorrect needle insertion can cause thread bunching. It can also lead to skipped stitches. Proper needle placement is vital for smooth sewing.
Follow these steps for correct needle insertion:
- Turn off your sewing machine.
- Loosen the needle clamp screw.
- Insert the needle with the flat side facing the back.
- Push it up as far as it will go.
- Tighten the needle clamp screw firmly.
Ensure the needle is secure before sewing. A loose needle can cause many issues.

Credit: mermaidsden.com
Fabric Jamming
Fabric jamming is a common issue for many users of Singer sewing machines. It can disrupt your sewing project and cause frustration. Understanding how to handle and prevent fabric jams can save you time and stress.
Removing Jammed Fabric
Follow these steps to remove jammed fabric from your Singer sewing machine:
- Turn off your sewing machine and unplug it.
- Lift the presser foot to release the fabric.
- Gently pull the fabric away from the needle. Use tweezers if needed.
- Remove the bobbin case and clean out any thread pieces.
- Re-thread the machine and test on a scrap piece of fabric.
Preventing Future Jams
Here are some tips to prevent fabric jams:
- Use the correct needle for your fabric type.
- Check and adjust the tension settings regularly.
- Use high-quality thread to avoid breakage.
- Clean your machine often to remove dust and lint.
- Ensure the bobbin is wound evenly and placed correctly.
| Problem | Solution |
|---|---|
| Needle breaks | Use the correct needle size and type. |
| Thread bunching | Re-thread the machine and check tension. |
| Fabric puckering | Lower the tension setting and use a stabilizer. |
By following these steps, you can keep your Singer sewing machine running smoothly. Happy sewing!
Strange Noises
Sewing machines can sometimes make strange noises. These noises can be unsettling and can cause concern. They often indicate underlying issues that need attention. Ignoring these sounds can lead to bigger problems. This section will help you troubleshoot strange noises in your Singer sewing machine.
Identifying Noise Sources
To fix a noisy machine, first identify the source. Common sources include the needle area, bobbin, and motor. Listen closely to pinpoint where the noise is coming from.
- Needle Area: Check if the needle is bent or dull.
- Bobbin: Ensure the bobbin is correctly inserted and wound.
- Motor: Listen for unusual sounds from the motor.
Lubrication Tips
Proper lubrication can reduce noise. Always use the recommended oil for your Singer sewing machine. Follow these steps to lubricate your machine:
- Turn off the machine and unplug it.
- Remove the needle and presser foot.
- Access the machine’s moving parts.
- Apply a few drops of oil to the specified areas.
- Reassemble the machine and run it slowly to distribute the oil.
Lubricate your sewing machine regularly. This helps maintain smooth operation and reduces noise.
| Component | Lubrication Frequency |
|---|---|
| Needle Area | Every 8 hours of use |
| Bobbin Area | Every 6 hours of use |
| Motor | Every 12 hours of use |
Regular maintenance can keep your sewing machine quiet and efficient. Always refer to your machine’s manual for specific instructions.
Regular Maintenance
Regular maintenance keeps your Singer sewing machine in top shape. Simple steps help avoid costly repairs and ensure smooth operation. Follow these guidelines for a well-functioning machine.
Cleaning Routine
A clean machine works better and lasts longer. Start by unplugging the sewing machine. Remove any fabric and thread from the machine. Use a small brush to remove dust and lint from the bobbin area. Clean the feed dogs and under the needle plate.
Use a soft cloth to wipe down the exterior. Avoid using harsh chemicals. For stubborn dirt, use a mild soap solution. Rinse and dry thoroughly. Keeping the machine clean prevents thread jams and uneven stitches.
Parts Inspection
Regularly inspect the key parts of your sewing machine. Check the needle for any signs of wear. Replace it if it is bent or dull. Inspect the bobbin and bobbin case for damage. Ensure they fit snugly and are free from cracks.
Look at the presser foot and feed dogs. Ensure they move smoothly and are not damaged. Check the tension settings and adjust if needed. Ensure all screws and bolts are tight. Loose parts can cause issues during sewing.
Oil the machine as per the manufacturer’s instructions. Use only the recommended sewing machine oil. Do not over-oil as it can attract dirt.
| Part | Action | Frequency |
|---|---|---|
| Needle | Replace | Every 8 hours of sewing |
| Bobbin | Inspect and clean | Weekly |
| Presser Foot | Inspect | Monthly |
Follow these steps for a reliable sewing machine. A little care ensures your machine runs smoothly.

Credit: sewingmastery.com
Frequently Asked Questions
Why Is My Singer Sewing Machine Bunching Thread On The Bottom?
Your Singer sewing machine may bunch thread on the bottom due to incorrect threading. Re-thread the machine properly. Check the bobbin tension and ensure it is set correctly. Clean the bobbin area to remove any lint or debris. Use the correct needle and thread for your fabric.
What Are Common Sewing Machine Problems?
Common sewing machine problems include thread bunching, needle breakage, uneven stitches, machine jamming, and tension issues. Regular maintenance and proper setup can prevent these issues.
How To Adjust Tension On Singer Sewing Machine?
Turn the tension dial to adjust thread tension. Increase for tighter stitches, decrease for looser stitches. Test on fabric.
Why Is My Singer Machine Not Stitching?
Check the needle, thread tension, and bobbin. Ensure the machine is properly threaded and clean. Verify settings.
Conclusion
Mastering Singer sewing machine troubleshooting saves time and frustration. Proper care ensures your machine runs smoothly. Follow these tips to keep sewing projects on track. Regular maintenance and prompt fixes enhance your sewing experience. Happy sewing with your reliable Singer machine!