Running Check Disk from BIOS is not possible, as it’s a Windows tool. To use it, boot into Windows and then run the command.
Check Disk, commonly referred to as “chkdsk,” is a Windows utility that users run to repair hard drive errors and file system issues. Since it’s integrated into the Windows operating system, you cannot directly execute it from the BIOS (Basic Input/Output System), which is a firmware interface independent of the OS.
The BIOS helps start up your computer and manages data flow between the computer’s operating system and attached devices like the hard disk, video adapter, keyboard, mouse, and printer. If you’re experiencing hard drive issues, you’ll want to access Windows Recovery Environment or use installation media to reach the necessary tools that can run a disk check. This utility is vital for maintaining the integrity of your data and ensuring the overall health of your storage device. Remember, preventing data loss and resolving system errors starts with regular system maintenance, which includes running tools like Check Disk.
Introduction To Boot-time Disk Checks
Computers carry crucial data. It is vital to check their hard drives for errors regularly. Running a disk check before Windows starts is like a health check-up for your computer’s hard drive. This process can find and fix problems early. It helps prevent data loss and system crashes. Boot-time disk checks delve deep, scanning the drive thoroughly before the operating system loads.
The Necessity Of Disk Health
Good disk health is critical for a smooth computing experience. Think of it as the foundation of your computer’s function. Without it, risks like system failures and data loss increase. Boot-time checks are essential because they work outside of the operating system. This enables them to access and repair parts of the disk that are not available when the system is running. It can be a lifesaver for computers that struggle to start due to disk errors.
Benefits Of Pre-os Scans
- Thorough error detection: Scans can reach every corner of the drive, ensuring comprehensive problem identification.
- Repair capabilities: They can fix issues that can’t be addressed within the OS environment.
- Prevention: Regular boot-time checks can catch small issues before they turn into big problems.
- Performance: Maintaining disk health can enhance the overall performance of the computer.
When the computer boots up, it is free from the constraints of the running system. The scanning tool can operate with greater freedom and efficiency. This means a more complete and effective check than can be achieved while Windows is in use.

Credit: en.wikipedia.org
Preparation Steps Before Running Check Disk
Before launching the Check Disk utility, there are important steps to take. These ensure the safety and integrity of your data. Follow these guidelines to prepare your system for the task ahead.
Backing Up Crucial Data
Keep your valuable data secure.
Before running Check Disk, creating backups is key. These simple steps can save your data:
- Connect an external drive or use cloud storage.
- Select all essential files and folders.
- Copy and paste them to your chosen backup location.
- Verify that all files transfer successfully.
Now, your data is safe. You can proceed without worry.
Identifying Symptoms Of Disk Issues
Spot early signs of disk problems.
Before booting from BIOS, recognize trouble signs:
| Symptom | Possible Issue |
|---|---|
| Regular crashes | Disk integrity loss |
| Slow file access | Fragmentation or errors |
| Error messages | Potential disk failure |
| Missing files | Data corruption |
Identifying these issues early can help prevent data loss.
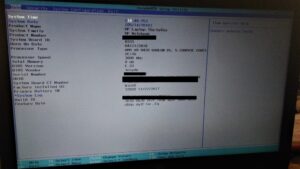
Accessing Bios To Run Disk Checks
When your computer acts up, running a disk check can be a lifesaver. The BIOS, a key to your PC’s hardware, lets you do just that before your system boots up. This step-by-step guide provides the essentials to access BIOS for disk checks, even if you’re not a tech wizard!
Navigating Bios Settings
To begin, restart your computer. As it powers back up, immediately press the key your PC associates with BIOS access. Often, this is F2, DEL, ESC, or F10. Keep an eye on the screen for a prompt that says “Press X to enter Setup” where X is your specific key. Are you in? Great, let’s move around!
- Use your keyboard’s arrow keys to navigate through the menu.
- Select Advanced, Boot, or Tools options.
- Be cautious and avoid changing settings you’re unfamiliar with.
Locating The Disk Check Utility
Within the BIOS, the disk check utility may go by different names such as ‘HDD Self-Test’ or ‘Diagnostics’. Follow these steps to locate it:
- Search through the tabs like ‘Main’ or ‘Diagnostics’.
- Find an option that suggests testing or diagnosing the hard drive.
- Once located, select it and press Enter.
- Follow on-screen instructions to initiate the disk check.

Credit: en.wikipedia.org
Step-by-step Guide To Run Check Disk
Encountering computer troubles can be alarming, but a ‘Check Disk’ function can help. This utility checks the integrity of the disk and fixes various file system errors. Follow this guide for simple steps.
Initiating Disk Scans
Checking your disk might seem daunting, but it’s straightforward.
- Restart your computer and open the BIOS setup. This is often done by pressing a key like F2, F12, DEL, or ESC.
- In BIOS, navigate to the boot menu. Look for ‘Boot Device Options’ or similar.
- Select your hard drive as the primary boot device.
- Save changes and exit the BIOS setup. Your PC will restart.
- As the computer restarts, press F8 to access advanced boot options.
- Choose ‘Safe Mode with Command Prompt’.
- A command prompt window will open. Type ‘chkdsk’ followed by the drive letter, colon, and parameters (if any).
- Press Enter to start the disk checking process.
Interpreting Check Disk Results
The Check Disk utility provides results that give insights into your disk’s health.
- 0x0: Indicates no errors found.
- Bad sectors: Shows parts of the disk that are physically damaged.
- Lost clusters: Points to clusters on the disk with no links.
- File system errors: Highlights structure issues that need fixing.
Most problems are fixable by Check Disk. For persistent issues, consider professional help. This guide is a first step to maintain your system’s health.
Troubleshooting Common Check Disk Errors
Running Check Disk from BIOS helps fix hard drive errors. Sometimes, issues arise during this process. This guide focuses on solving these problems.
Resolving Scan Interruptions
Check Disk may stop scanning unexpectedly. Here’s how to prevent interruptions:
- Ensure Stable Power: Use a UPS to avoid power failures.
- Close Programs: Quit all unnecessary applications before starting.
- Run in Safe Mode: This reduces the chance of conflicts.
Still facing issues? Boot into Safe Mode and try running Check Disk again.
Dealing With Unrepairable Sectors
Sometimes, Check Disk finds sectors it can’t fix. Follow these steps:
| Step | Action |
|---|---|
| 1 | Back up data immediately to prevent loss. |
| 2 | Use disk manufacturer tools to assess drive health. |
| 3 | Consider replacing the drive if errors persist. |
Note: This may indicate a failing hard drive. Act quickly to secure data.
:max_bytes(150000):strip_icc()/change-the-boot-order-in-bios-2624528-13c3bd01c02c4a669b03c72b4d1793fd.png)
Credit: www.lifewire.com
Post-check Disk Actions
After running Check Disk from BIOS, certain steps should follow. These actions ensure sustained hard drive performance and data safety. Here’s what to do once the scan completes.
Assessing Disk Health After Scans
Once Check Disk finishes its job, it’s time to assess your disk’s health accurately. Look at the scan’s summary for errors or bad sectors. The tool may fix some issues automatically. But critical signs should not be ignored. Let’s break down the elements you’ll assess:
- Error Reports: Are there unfixable errors?
- Bad Sectors: Did the scan find bad sectors on the disk?
- Performance: Is the disk’s response time slower than before?
Disk health software can give a clearer picture of ongoing issues. Use this software regularly to monitor disk status.
Considering Disk Replacement
If Check Disk reports continuous errors or bad sectors, consider a disk replacement. Persisting issues often predict imminent disk failure. Before making a decision, evaluate these points:
- Determine the disk’s age and warranty status.
- Compare the cost of repair against a new purchase.
- Back up crucial data to prevent loss.
| Action | Scenario | Recommendation |
|---|---|---|
| Backup Data | Irregular disk behavior | Immediate backup to avoid data loss |
| Evaluate Cost | Cost of repair is high | Consider buying a new disk |
| Check Warranty | Disk still under warranty | Seek manufacturer’s assistance |
Ultimately, securing data should be the priority. New disks offer reliability and peace of mind. They come with the latest technology for better performance.
Frequently Asked Questions For Run Check Disk From Bios
How Do I Check My Disk In Bios?
To check your disk in BIOS, restart your computer and press the key shown to enter BIOS setup, usually F2, Del, or F10. Navigate to the Boot or Storage tab and you’ll see your disk listed.
Can You Run Chkdsk From Boot?
Yes, you can run chkdsk from boot by accessing the Advanced Startup Options in Windows and selecting Command Prompt to execute the chkdsk command.
How To Repair Disk From Bios?
Access your computer’s BIOS by restarting and pressing the designated key during boot, typically F2 or Delete. Navigate to built-in diagnostic tools or a recovery section. Use the HDD or SSD repair utility, if available, to attempt disk repair. Save changes and exit BIOS.
How Do I Manually Run Disk Check?
To manually run a disk check on Windows, open Command Prompt as an administrator, then type ‘chkdsk C: /f /r’ and press Enter, replacing ‘C’ with your specific drive letter.
Conclusion
Checking your disk for errors is an essential maintenance task. Launching Check Disk from BIOS might seem daunting, but this guide simplifies each step. By following these instructions, you ensure your system’s health and data integrity. Remember, regular checks can prevent unforeseen data loss.
Keep your computer running smoothly with these proactive measures.