To remove bloatware from Windows 11 or 10, go to Settings > Apps and find the unwanted program. Click on it and select Uninstall.
Bloatware, or pre-installed software that is unnecessary for most users, can slow down your computer and take up valuable storage space. In this guide, we will explore how to effectively remove bloatware from Windows 11 and 10. By following these steps, you can improve your system’s performance and declutter your device.
Removing bloatware can also enhance your overall user experience and streamline the functionality of your computer. Let’s delve into the process of eliminating bloatware to optimize your Windows operating system.
Why Remove Bloatware?
Bloatware, often pre-installed on Windows 11 & 10, can significantly slow down your system and consume valuable storage space. Removing bloatware not only improves the overall performance but also frees up storage space for essential files and applications. Let’s delve into the specific reasons why you should prioritize removing bloatware from your Windows 11 & 10 system.
Improve Performance
Bloatware can hog system resources and cause sluggish performance. By removing this unnecessary software, you can enhance the speed and responsiveness of your Windows 11 & 10 operating system. A cleaner system with only essential programs can lead to a smoother and more efficient user experience.
Free Up Storage Space
Unused pre-installed apps and trial software can clutter your system, occupying valuable storage space. Removing bloatware frees up space for important files, documents, and applications, allowing your system to function more optimally. This can also prevent your storage from becoming overloaded, potentially leading to performance issues.

Credit: www.amazon.com
Identify Bloatware
When it comes to optimizing the performance of your Windows 11 or Windows 10 computer, removing unnecessary bloatware is an essential step. Bloatware refers to the pre-installed software that comes with your operating system, often taking up valuable storage space and slowing down your system. In this section, we will discuss how to identify bloatware and the different tools and software you can use to remove it.
Built-in Tools
Windows 11 and Windows 10 come equipped with built-in tools that can help you identify and uninstall bloatware. One such tool is the “Programs and Features” option within the Control Panel. Here’s how you can access it:
- Click on the Start menu and type “Control Panel”.
- Open the Control Panel and navigate to the “Programs” or “Programs and Features” section.
- Here, you will find a list of all the installed programs on your computer. Look for any unfamiliar or unwanted programs that could be considered bloatware.
- Select the program you want to uninstall and click on the “Uninstall” button.
Another built-in tool you can use is the Task Manager. To access it, simply right-click on the taskbar and select “Task Manager” from the menu. In the Task Manager, go to the “Startup” tab. Here, you will find a list of the programs that start automatically when you boot up your computer. Disable any unnecessary programs to prevent them from running in the background and hogging system resources.
Third-party Software
If the built-in tools aren’t sufficient for identifying and removing bloatware, you can turn to third-party software for assistance. There are several reliable options available that can help you simplify the process. One popular choice is CCleaner, which not only helps you uninstall unwanted programs but also cleans up temporary files and removes other junk files that may be cluttering your system.
IObit Uninstaller is another effective tool that specializes in uninstalling stubborn programs and removing leftover files. It provides a straightforward interface and even has a batch uninstall feature, allowing you to remove multiple programs at once.
When using third-party software, it’s important to do a quick search and read reviews to ensure you choose a reputable and trustworthy tool. Additionally, always be cautious when granting any permissions or making changes to your system.
Safely Uninstall Bloatware
Are you tired of the unnecessary pre-installed programs taking up valuable space on your Windows 11 or 10 device? If so, it’s time to safely uninstall bloatware and optimize your system’s performance. Removing bloatware not only frees up storage but also improves the overall speed and efficiency of your operating system. In this article, we’ll explore two popular methods to safely uninstall bloatware from your Windows device, using Windows Settings and using PowerShell.
Using Windows Settings
If you prefer a user-friendly and straightforward method, using Windows Settings is the way to go. This method allows you to have full control over the bloatware you want to remove from your device. Here’s a step-by-step guide on how to safely uninstall bloatware using Windows Settings:
| Step | Action |
|---|---|
| 1 | Open Windows Settings by clicking on the Windows icon in the taskbar and selecting “Settings.” |
| 2 | Navigate to the “Apps” section. |
| 3 | Select the “Apps & features” option. |
| 4 | Scroll through the list of installed apps and locate the bloatware you want to remove. |
| 5 | Click on the bloatware app and select “Uninstall.” |
| 6 | Follow the on-screen prompts to complete the uninstallation process. |
By following these simple steps, you can effortlessly remove bloatware using the Windows Settings method. Now, let’s explore an alternative method using PowerShell, which provides even more control and precision.
Using Powershell
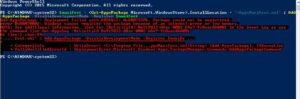
If you’re comfortable with a more advanced and powerful approach, using PowerShell is the ideal choice. PowerShell allows you to execute commands and scripts to automate various tasks, including the removal of bloatware. Here’s how you can safely uninstall bloatware using PowerShell:
- Open PowerShell by right-clicking on the Start button, selecting “Windows PowerShell,” and choosing “Run as administrator.”
- Type the command
Get-AppxPackageto retrieve a list of all installed apps on your system. - Scroll through the list and identify the package name of the bloatware app you want to remove.
- Type the command
Remove-AppxPackage [Package Name]to uninstall the bloatware app. Replace[Package Name]with the actual package name of the app. - Press “Enter” to execute the command and remove the bloatware.
Utilizing PowerShell gives you more granular control when it comes to removing bloatware from your Windows device. With these two methods at your disposal, you can now easily reclaim valuable space and optimize your system’s performance by safely uninstalling bloatware.

Credit: www.amazon.com
Prevent Bloatware Reinstallation
Once you have successfully removed bloatware from your Windows 11 or Windows 10 system, you might still encounter situations where the unwanted software resurfaces. To avoid the frustration of bloatware reinstallation, there are a few additional steps you can take. These steps involve utilizing the Group Policy Editor or modifying registry settings. By implementing these techniques, you can ensure a cleaner and more streamlined computing experience.
Utilize Group Policy Editor
The Group Policy Editor is a powerful tool that allows you to modify various system settings on your Windows computer. By using the Group Policy Editor, you can prevent bloatware from coming back on your system. Follow these steps to access and utilize the Group Policy Editor:
- Press the Windows key + R to open the Run dialog box.
- Type “gpedit.msc” and press Enter.
- Navigate to Computer Configuration > Administrative Templates > Windows Components > Windows Installer.
- Double-click on the “Prohibit User Installs” policy.
- Select the “Enabled” option.
- Click “Apply” and then “OK”.
Modify Registry Settings
Modifying registry settings is another effective method to prevent the reinstallation of bloatware on your Windows 11 or Windows 10 system. Here’s how you can modify the registry settings:
- Press the Windows key + R to open the Run dialog box.
- Type “regedit” and press Enter to open the Registry Editor.
- Navigate to the following path:
HKEY_LOCAL_MACHINE\SOFTWARE\Policies\Microsoft\Windows\Installer - Right-click on the “Installer” key, select “New”, and then choose “Key”.
- Name the new key as “AlwaysInstallElevated”.
- Double-click on the “AlwaysInstallElevated” key and set its value to “0”.
- Close the Registry Editor.
Final Steps
Now that you have successfully removed the bloatware from your Windows 11/10 device, it’s important to follow these final steps to ensure a clean and optimized system. By performing regular maintenance and considering the specifics of OEM devices, you can further enhance your computing experience. Let’s delve into these final steps:
Regular Maintenance
To keep your system running smoothly, it’s essential to perform regular maintenance tasks. Here are some key steps to include in your routine:
- Keep Windows up to date: Regularly check for and install updates from Microsoft to ensure your operating system remains secure and optimized.
- Run antivirus scans: Schedule regular scans with a reliable antivirus software to detect and eliminate any potential threats.
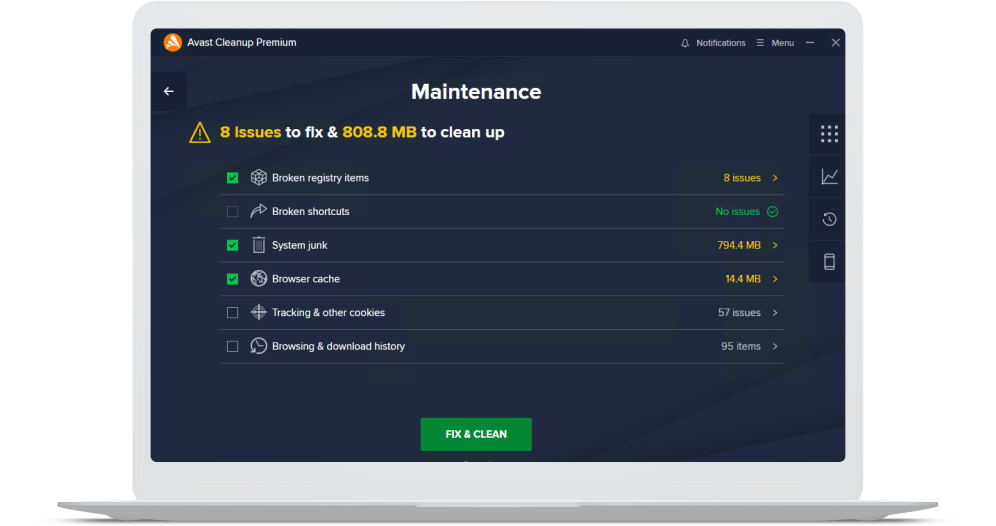
- Clean up disk space: Use the built-in Disk Cleanup tool or third-party software to remove temporary files, system cache, and other unnecessary data that can clutter your device.
- Optimize startup programs: Disable unnecessary programs from launching automatically at startup to improve system boot time.
Considerations For Oem Devices
When removing bloatware from OEM (Original Equipment Manufacturer) devices, there are a few additional factors to consider. These devices often come preloaded with a range of software provided by the manufacturer. Here’s what you should keep in mind:
- Research before removing: Before uninstalling any preinstalled software, research its purpose and ensure it is safe to remove. Some programs may provide important functionalities or drivers for your device.
- Create system restore points: Before making any changes, create a system restore point as a precautionary measure. This allows you to revert back to a stable state if any issues arise.
- Consult manufacturer’s support: If you are unsure about any specific software or need assistance, reach out to the OEM’s customer support for guidance.
Following these final steps will help you maintain a bloatware-free Windows 11/10 system, ensuring optimal performance and a clutter-free experience. By regularly performing maintenance tasks and considering OEM-specific considerations, you can enjoy a smoother and more efficient computing experience.
Credit: rambox.app
Frequently Asked Questions For Remove Bloatware From Windows 11 10
How Do I Remove Bloatware From Windows 11 And 10?
To remove bloatware from Windows 11 and 10, you can use the built-in uninstall feature or a third-party tool. Go to Settings, Apps, and then select the unwanted app to uninstall it. Alternatively, you can use programs like PC Decrapifier or CCleaner to remove multiple bloatware programs at once.
What Is Bloatware On Windows 11 And 10?
Bloatware on Windows 11 and 10 refers to pre-installed software, often unnecessary or trial versions, that come with the operating system. These apps can take up valuable storage space, slow down your computer, and potentially compromise your privacy. Removing them can optimize your system’s performance.
Can I Reinstall Bloatware On Windows 11 And 10?
Yes, although uninstalling bloatware from Windows 11 and 10 is recommended, you can reinstall them if desired. Just visit the Microsoft Store or the manufacturer’s website to find the apps you want to reinstall. However, consider if you really need these apps and how they might affect your computer’s performance.
Conclusion
Switching to Windows 11 or 10 is exciting, but dealing with pre-installed bloatware can be frustrating. Thankfully, removing bloatware is a simple task that can greatly improve your computer’s performance and streamline its functionality. By following the steps outlined in this blog post, you can easily free up valuable resources and ensure a smoother user experience.
Take control of your Windows system today and enjoy a more efficient and clutter-free computing environment.