If your Quantum X Vacuum isn’t working, check for clogs and ensure the filters are clean. Ensure the power cord is securely plugged in.
Quantum X Vacuums are known for their advanced technology and high performance. Despite their reliability, users may occasionally face issues. Addressing common problems can save time and money. Basic troubleshooting steps often resolve most issues, helping you get back to cleaning quickly.
Always start by checking for clogs and ensuring that filters are clean. A securely plugged-in power cord is crucial for proper operation. Regular maintenance and periodic checks can prevent many common problems. By understanding and following these simple steps, you can ensure your vacuum operates efficiently. Keeping your Quantum X Vacuum in top shape guarantees optimal performance and longevity.
Common Issues
The Quantum X Vacuum is a great cleaning tool. But, it can face some problems. This section will help you fix common issues. Follow these tips to get your vacuum working again.
Power Problems
Power problems are common with vacuums. They can stop working suddenly. Here are some steps to troubleshoot power issues:
- Check the power cord for any visible damage.
- Ensure the plug is firmly connected to the outlet.
- Test the outlet with another device to ensure it’s working.
- Examine the power switch for any debris or faults.
If these steps do not resolve the issue, the problem might be internal. Consider contacting customer support.
Suction Issues
Weak suction can make cleaning difficult. Follow these steps to fix suction problems:
- Empty the dustbin regularly. A full bin reduces suction power.
- Check the filters. Clean or replace them if they are dirty.
- Inspect the hose for any blockages. Use a long object to clear it if needed.
- Ensure the brush roll is free of hair and debris.
Regular maintenance helps prevent these issues. Keep your vacuum in top condition for best performance.

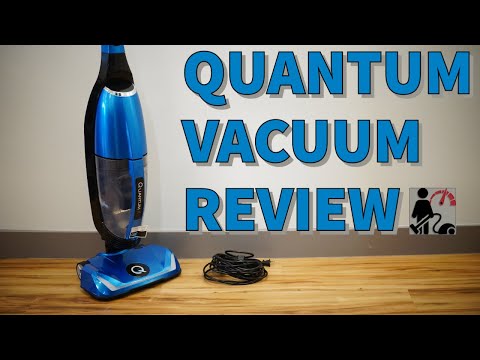
Credit: www.tiktok.com
Diagnosing Power Problems
Experiencing power issues with your Quantum X Vacuum can be frustrating. This guide helps you diagnose and fix these problems. Follow the steps to get your vacuum working again.
Checking Power Source
First, ensure your vacuum is plugged into a working outlet. Check other appliances to confirm the outlet is working. If the outlet works, move to the next step.
- Plug another device into the outlet.
- If the device works, the outlet is fine.
- If not, reset the circuit breaker or try another outlet.
Inspecting Cords And Plugs
Next, examine the vacuum’s power cord and plug. Look for visible damage or wear. A damaged cord can cause power issues.
Follow these steps to inspect the cord:
- Unplug the vacuum from the outlet.
- Check the entire length of the cord for cuts or frays.
- Inspect the plug for bent prongs or damage.
- If you find damage, replace the cord or plug.
If the cord and plug are intact, the issue might be internal. Contact a professional for further assistance.
Resolving Suction Issues
The Quantum X Vacuum is a powerful cleaning tool. Sometimes, suction issues can arise, affecting its performance. Identifying and fixing these issues is crucial for optimal operation. In this section, we will explore common causes and solutions for suction problems.
Filter Blockages
A blocked filter can reduce the vacuum’s suction power significantly. To resolve this:
- Turn off and unplug the vacuum.
- Locate the filter compartment.
- Remove the filter and inspect it for debris.
- Wash the filter with warm water.
- Allow the filter to dry completely before reinserting it.
Regular filter maintenance ensures consistent suction strength. Clean the filter every two weeks for best results.
Hose Obstructions
Hose obstructions can also cause suction issues. Follow these steps to clear the hose:
- Disconnect the hose from the vacuum.
- Inspect the hose for visible blockages.
- Use a long, flexible brush to dislodge debris.
- Rinse the hose with water to remove any remaining particles.
- Ensure the hose is dry before reattaching it to the vacuum.
Check the hose regularly to prevent future blockages. Proper hose care maintains optimal suction power.
Addressing Noisy Operation
Is your Quantum X Vacuum making more noise than usual? Don’t worry, we have some tips to help you. Noisy operation can often be traced back to a few common issues. Let’s dive into the most frequent culprits and how to fix them.
Motor Noise
The motor is the heart of your vacuum. If it’s noisy, it can be alarming. Here are a few steps to troubleshoot:
- Check if the motor is clear of debris.
- Ensure the motor is securely fastened in its housing.
- Look for signs of wear and tear on the motor parts.
If the motor seems damaged, contact a professional for repairs. Keeping the motor clean can prolong its life.
Loose Parts
Loose parts can cause rattling and other noises. To fix this issue, follow these steps:
- Turn off and unplug the vacuum.
- Inspect the vacuum for any loose screws or parts.
- Tighten any loose screws with a screwdriver.
- Check the hose and attachments for secure connections.
A table can help you keep track of the parts you check:
| Part | Status | Action |
|---|---|---|
| Motor | Secure | None |
| Hose | Loose | Tighten |
Ensuring all parts are secure can eliminate a lot of noise. Regular maintenance is key.
Battery Life Optimization
Proper battery care ensures your Quantum X Vacuum runs efficiently. Follow these tips to extend battery life.
Proper Charging
Proper charging is crucial. Always use the original charger. Avoid overcharging the battery. Disconnect it once fully charged.
- Use the charger that came with your vacuum.
- Charge the battery in a cool, dry place.
- Unplug the charger when the battery is full.
Battery Replacement
Replacing the battery can breathe new life into your vacuum. Follow these steps for a smooth replacement.
- Turn off the vacuum and unplug it.
- Locate the battery compartment.
- Remove the old battery carefully.
- Insert the new battery in the same position.
- Secure the compartment cover and plug in the vacuum.
| Step | Description |
|---|---|
| Step 1 | Turn off and unplug the vacuum. |
| Step 2 | Locate the battery compartment. |
| Step 3 | Remove the old battery. |
| Step 4 | Insert the new battery. |
| Step 5 | Secure the cover and plug in. |

Credit: www.amazon.com
Brush Roll Maintenance
Maintaining the brush roll of your Quantum X vacuum is essential for its performance. The brush roll can become clogged with hair, dirt, and debris. Regular maintenance ensures your vacuum cleans effectively. Here’s how you can keep your brush roll in top shape.
Cleaning Brushes
Regularly clean the brushes to keep them effective. Follow these steps:
- Turn off and unplug your vacuum.
- Lay the vacuum flat and locate the brush roll.
- Remove the brush roll cover.
- Take out the brush roll from its slot.
- Use scissors to cut through hair and fibers wrapped around the brush.
- Remove all debris with your hands or a brush.
- Wipe the brush roll with a damp cloth.
- Ensure the brush roll is dry before reassembling.
Replacing Brush Roll
If the brush roll is worn or damaged, replace it. Follow these steps:
- Turn off and unplug your vacuum.
- Remove the brush roll cover.
- Take out the old brush roll carefully.
- Place the new brush roll into the slot.
- Ensure it fits snugly and rotates freely.
- Reattach the brush roll cover.
- Plug in your vacuum and test the new brush roll.
Keeping your brush roll clean and replacing it when needed ensures your Quantum X vacuum works efficiently. This simple maintenance will prolong the life of your vacuum.
Advanced Troubleshooting
Having trouble with your Quantum X Vacuum? This advanced troubleshooting guide helps. Address common issues with detailed solutions. Fix your vacuum in no time.
Sensor Errors
Sensors in the Quantum X Vacuum are crucial. They help navigate and clean efficiently. When sensors fail, the vacuum may malfunction. Follow these steps to fix sensor errors:
- Check sensor lenses for dirt. Clean them with a soft cloth.
- Ensure no obstacles block the sensors. Clear any debris.
- Restart the vacuum. This can reset sensor functions.
- Update the software. New updates often fix sensor issues.
Software Updates
Software updates are essential for optimal performance. They fix bugs and enhance features. Update your Quantum X Vacuum easily:
- Connect the vacuum to Wi-Fi. Ensure a stable connection.
- Open the Quantum X app on your smartphone.
- Navigate to Settings. Find the Software Update option.
- Follow on-screen instructions to complete the update.
Software updates can solve many issues. Keep your vacuum’s software current.
| Issue | Possible Solution |
|---|---|
| Vacuum not starting | Check battery and charge level |
| Low suction power | Clean filters and empty dustbin |
| Unresponsive controls | Restart or update software |
Maintaining your Quantum X Vacuum ensures it runs smoothly. Regular cleaning and software updates are key. Follow these tips to keep your vacuum in top shape.
When To Seek Professional Help
Your Quantum X Vacuum is a crucial home tool. Sometimes, fixing issues yourself is possible. Other times, you need expert help. Knowing when to call a professional can save you time and money.
Warranty Considerations
Check your vacuum’s warranty first. Many issues may be covered. Using the warranty can save you from extra costs.
| Warranty Type | Coverage |
|---|---|
| Standard Warranty | 1 year |
| Extended Warranty | 2-3 years |
If your vacuum is still under warranty, contact the manufacturer. Trying to fix it yourself might void the warranty.
Finding A Service Center
Locate an authorized service center for repairs. This ensures your vacuum gets the best care.
- Check the manufacturer’s website for service center locations.
- Call customer service for nearby centers.
- Ask for recommended repair shops in your area.
Using an authorized center ensures genuine parts and proper repairs. This helps in keeping your vacuum working longer.
Professional help might be needed for electrical issues. Strange noises or loss of suction also need expert attention.

Credit: www.tiktok.com
Frequently Asked Questions
Where Is The Reset Button On The Quantum X Vacuum?
The reset button on the Quantum X vacuum is located underneath the vacuum near the front wheels.
Why Is My Quantum Vacuum Not Suctioning?
Your quantum vacuum may not suction due to a clogged filter, blocked hose, or low battery. Check and clean these components.
Why Is My Vacuum Not Suctioning?
Your vacuum might not be suctioning due to a clogged hose, full dustbin, or dirty filters. Check and clean these parts regularly. Ensure the brush roll is free of debris. Inspect for any blockages in the vacuum’s pathways. Proper maintenance can restore suction power.
Why Has My Vacuum Cleaner Stopped Working?
Your vacuum cleaner might have stopped working due to a clogged filter, full dustbin, or blocked hose. Check for power issues or tripped circuit breakers. Ensure all connections are secure and inspect for any damaged parts. Regular maintenance can prevent future problems.
Conclusion
Troubleshooting your Quantum X Vacuum can be straightforward with the right steps. Regular maintenance ensures optimal performance. Addressing common issues quickly can extend its lifespan. Use our tips to keep your vacuum running smoothly. Enjoy a cleaner home with less effort.
Happy cleaning!