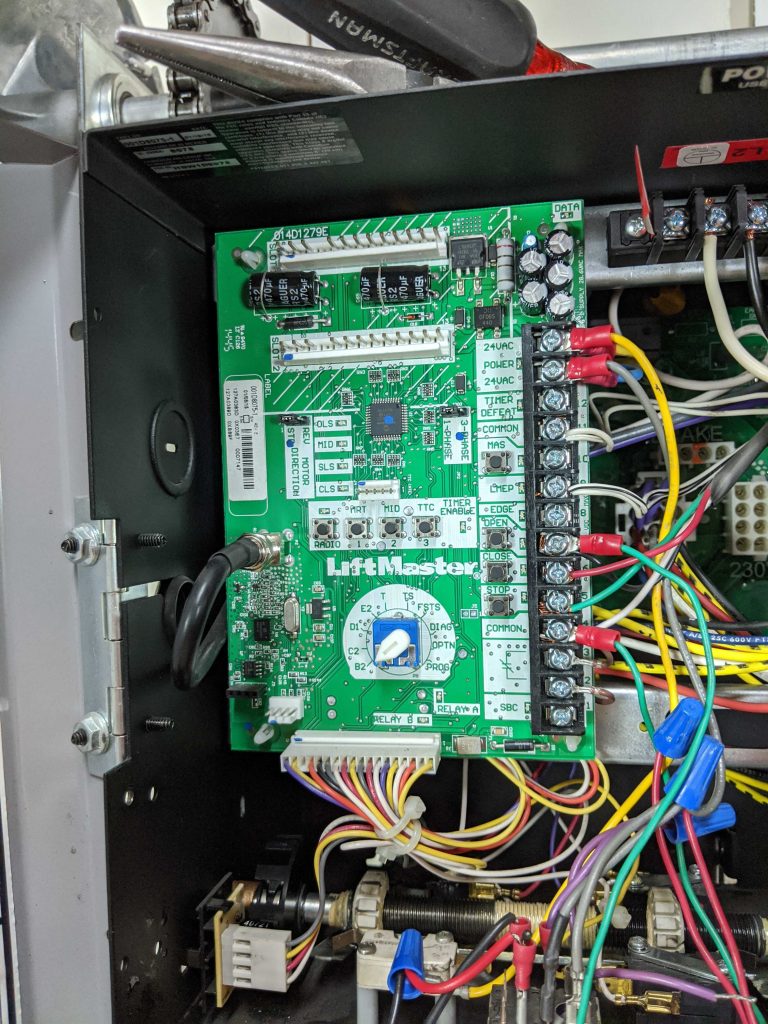
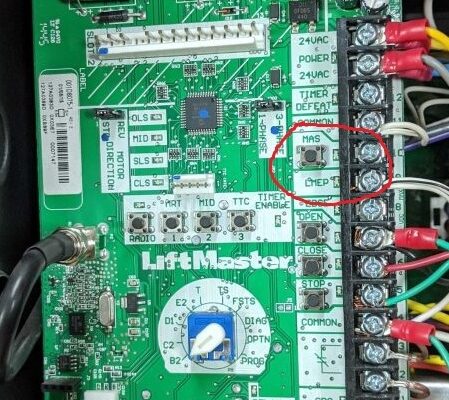
To troubleshoot a Liftmaster logic board, check power connections and inspect for visible damage or burnt components. Ensure all wires are securely connected.
Liftmaster garage door openers are reliable, but issues can arise with the logic board. The logic board is the brain of your garage door opener, controlling all its functions. Diagnosing problems with the logic board involves checking for power issues, inspecting for visible damage, and ensuring all connections are secure.
Common symptoms of a faulty logic board include unresponsive remotes, erratic door movements, or complete failure to operate. By following a systematic troubleshooting approach, you can identify and resolve issues efficiently. This guide will help you through the process of diagnosing and fixing common logic board problems, ensuring your garage door operates smoothly.

Credit: www.youtube.com
Common Issues
Troubleshooting a Liftmaster Logic Board can be challenging. This guide will help you fix common issues. Let’s address the most frequent problems, like power problems and sensor malfunctions.
Power Problems
Power problems can cause your Liftmaster to stop working. The first step is to check the power supply. Ensure the power outlet is working. Try plugging in another device to test it. If the outlet works, the problem might be with the power cord.
Inspect the power cord for any damage. Look for cuts, frays, or other signs of wear. If the cord is damaged, replace it. Make sure the power cord is securely connected to the logic board.
Another common issue is a blown fuse. Locate the fuse on the logic board. Check if it’s blown. If the fuse is blown, replace it with a new one of the same rating. Always use the correct fuse to avoid further damage.
Sensor Malfunctions
Sensor malfunctions can prevent your garage door from closing. Sensors detect obstacles and ensure safety. If the sensors are not working, the door won’t close. Start by cleaning the sensors. Dust and dirt can block the sensor’s view. Use a soft cloth to wipe them clean.
Next, check the sensor alignment. Sensors must face each other directly. If they are misaligned, the door won’t close. Adjust the sensors until they are properly aligned. Make sure the LED lights on the sensors are solid and not blinking.
Wiring issues can also cause sensor malfunctions. Inspect the wires for any damage. Look for cuts or frays. If the wires are damaged, replace them. Ensure the wires are securely connected to the logic board.
Sometimes, the sensor brackets can become loose. Check the brackets and tighten them if needed. Secure brackets help maintain proper sensor alignment.
| Problem | Solution |
|---|---|
| Power Outlet Not Working | Test with another device |
| Damaged Power Cord | Inspect and replace if needed |
| Blown Fuse | Replace with correct rating |
| Dirty Sensors | Clean with soft cloth |
| Misaligned Sensors | Adjust for proper alignment |
| Damaged Sensor Wires | Inspect and replace if needed |
| Loose Sensor Brackets | Tighten the brackets |
Tools Needed
To troubleshoot your Liftmaster Logic Board, you’ll need specific tools. These tools will help you diagnose and fix problems efficiently.
Basic Tools
- Screwdrivers: A Phillips and a flathead screwdriver are essential.
- Multimeter: Use this to check voltage and continuity.
- Wire Strippers: These help in handling and fixing wires.
- Needle Nose Pliers: Useful for reaching tight spaces and gripping small parts.
- Flashlight: A good flashlight helps you see clearly inside the unit.
Specialized Equipment
- Liftmaster Remote: Needed to test the logic board.
- Replacement Logic Board: In case the old one is beyond repair.
- Safety Goggles: Protect your eyes when working on electrical components.
Having these tools will make the troubleshooting process smoother and quicker.
Initial Checks
When troubleshooting your Liftmaster logic board, start with initial checks. These simple steps can help identify common issues early. This approach saves time and avoids unnecessary replacements.
Visual Inspection
Begin with a visual inspection of the logic board. Look for obvious signs of damage:
- Burnt marks
- Cracked components
- Loose wires
Use a flashlight for better visibility. Check for dust and debris on the board. Clean gently if needed.
Connection Verification
Next, verify all connections on the logic board. Ensure all wires are securely attached. Loose connections can cause malfunctions.
Follow these steps:
- Turn off the power supply.
- Inspect each connector for tightness.
- Re-seat any loose connections.
Use a multimeter to check for continuity. This ensures all electrical paths are complete. Replace any damaged wires or connectors.
Diagnosing Power Issues
Experiencing power issues with your Liftmaster Logic Board can be frustrating. Identifying the root cause ensures your garage door functions smoothly. This guide will help you diagnose and resolve power problems.
Circuit Breaker Check
First, ensure the circuit breaker is not tripped. A tripped breaker cuts power to the Logic Board.
- Locate your home’s circuit breaker panel.
- Find the breaker controlling the garage door opener.
- Ensure it is in the “On” position.
- If tripped, flip it to “Off” and then back to “On”.
If the breaker trips again, there may be a short circuit. Call a professional electrician for help.
Power Supply Testing
Next, test the power supply to the Logic Board. Follow these steps:
- Unplug the garage door opener from the outlet.
- Plug in a different device to check the outlet’s functionality.
- If the device works, the outlet is functional.
- If not, check the outlet’s wiring or replace it.
Use a voltage tester to ensure proper voltage. The standard voltage should be around 120 volts.
Here’s a quick reference table for voltage readings:
| Voltage Reading | Status |
|---|---|
| 0-110 volts | Underpowered |
| 110-120 volts | Normal |
| Above 120 volts | Overpowered |
If your voltage reading is off, contact a professional to inspect the wiring.
Sensor Troubleshooting
Liftmaster garage door openers have sensors for safety. Sensors detect obstacles and prevent accidents. Sometimes, these sensors face issues. This guide will help you fix sensor problems. Follow these steps to keep your garage door safe.
Alignment Issues
Sensors must face each other to work. Misaligned sensors won’t detect objects. This can stop your door from closing. To fix alignment:
- Check both sensors are at the same height.
- Use a level to ensure they are straight.
- Tighten screws to keep sensors in place.
Important: Clean the sensor lenses. Dirt can block the signal.
Wiring Problems
Faulty wires can disrupt sensor function. Inspect the wires for damage. Follow these steps to check wiring:
- Turn off the garage door opener.
- Look for loose or frayed wires.
- Use a multimeter to test wire continuity.
Tip: Replace damaged wires with new ones. Ensure tight connections.
Common Wiring Issues:
| Issue | Solution |
|---|---|
| Loose connections | Tighten all wire connections. |
| Frayed wires | Replace with new wires. |
| Corroded connectors | Clean or replace connectors. |
Logic Board Reset
The Liftmaster Logic Board is the brain of your garage door opener. Sometimes, it needs a reset to fix minor issues. This can be done through a soft reset or a hard reset. Knowing how to perform these resets can save you time and money.
Soft Reset
A soft reset is usually the first step in troubleshooting. It’s simple and quick. Follow these steps:
- Unplug the garage door opener.
- Wait for 30 seconds.
- Plug it back in.
- Test the garage door opener.
A soft reset can solve many minor issues. If the problem persists, a hard reset may be needed.
Hard Reset
A hard reset will erase all settings. This includes remote controls and keypads. Follow these steps carefully:
- Unplug the garage door opener.
- Locate the “Learn” button on the logic board.
- Press and hold the “Learn” button.
- While holding, plug the opener back in.
- Continue holding the button for 10 seconds.
- Release the “Learn” button.
After a hard reset, you need to reprogram your remotes and keypads.
Here is a quick comparison between the two reset types:
| Reset Type | Steps | Time Required | Settings Erased |
|---|---|---|---|
| Soft Reset | Unplug, wait, plug back in | 1 minute | No |
| Hard Reset | Unplug, hold “Learn” button, plug in | 2 minutes | Yes |
Understanding these reset methods can help you troubleshoot your Liftmaster Logic Board easily. Save both time and effort with these quick fixes.
Replacing Components
Replacing components on a Liftmaster logic board can fix many issues. This guide will help you with board replacement and sensor replacement. Follow these steps to ensure your Liftmaster works properly.
Board Replacement
Replacing the logic board is often necessary when facing operational issues. Follow these steps:
- Turn off the power supply to the garage door opener.
- Open the control box to access the logic board.
- Remove the screws holding the old board in place.
- Disconnect all wiring connections from the old board.
- Install the new board and secure it with screws.
- Reconnect all wiring connections to the new board.
- Close the control box and turn the power back on.
Test the garage door to ensure it works correctly.
Sensor Replacement
Replacing the sensors can resolve issues with door operation. Sensors detect obstacles and ensure safety. Follow these steps:
- Turn off the power supply to the garage door opener.
- Locate the sensors on each side of the garage door track.
- Remove the mounting brackets holding the old sensors.
- Disconnect the wires from the old sensors.
- Attach the wires to the new sensors.
- Mount the new sensors using the brackets.
- Ensure the sensors are aligned properly.
- Turn the power back on and test the sensors.
Check if the garage door responds to obstacles properly.

Credit: ddmgaragedoors.com
Preventative Maintenance
Preventative maintenance is key to keeping your Liftmaster logic board in top shape. Regular care can prevent costly repairs and ensure smooth operation. Below are some essential steps for maintaining your Liftmaster logic board.
Regular Inspections
Perform regular inspections to catch any potential issues early. Check for loose wires and signs of wear. Use a flashlight to see all parts clearly. Inspect the board monthly.
Cleaning Tips
Keep the logic board clean to avoid malfunctions. Dust and dirt can accumulate and cause problems. Follow these simple cleaning tips:
- Turn off the power supply before cleaning.
- Use a soft brush to remove dust.
- Wipe with a dry, lint-free cloth.
- Avoid using liquids near the board.
Regular cleaning ensures long-lasting performance.

Credit: www.youtube.com
Frequently Asked Questions
How Do I Reset My Liftmaster Board?
To reset your LiftMaster board, locate the “Learn” button on the motor unit. Press and hold it for six seconds until the LED light turns off. Release the button to complete the reset.
Is There A Hard Reset On Liftmaster Garage Door Opener?
Yes, you can perform a hard reset on a LiftMaster garage door opener. Unplug the unit, wait 30 seconds, then plug it back in.
How To Fix Garage Door Logic Board?
To fix a garage door logic board, first unplug the opener. Check for visible damage. Replace faulty components. Reassemble and test.
How Do You Reset The Liftmaster Logic 5 Board?
To reset the LiftMaster Logic 5 board, press and hold the “Learn” button for 6 seconds. Release it when the LED turns off.
Conclusion
Troubleshooting your Liftmaster logic board can seem daunting. With the right steps, you can resolve common issues easily. Regular maintenance ensures longevity and optimal performance. Don’t hesitate to consult professional help for complex problems. A well-functioning logic board keeps your garage door operating smoothly.
Keep these tips in mind for efficient troubleshooting.


