To install IIS in Windows 10, go to Control Panel, select “Programs,” then “Programs and Features,” and click “Turn Windows features on or off.” In the “Windows Features” window, check the box next to “Internet Information Services” and click “OK” to install IIS.
Installing Internet Information Services (IIS) on a Windows 10 operating system is a simple process that allows you to host and manage websites. By following a few steps, you can set up IIS to support web applications and services, such as ASP.
NET, PHP, and more. Whether for development, testing, or production purposes, having IIS installed on your Windows 10 machine offers a platform for web server capabilities. This guide will walk you through the essential steps to successfully install IIS and make the most of its advantages on your Windows 10 system.

Credit: www.wikihow.com
Why Install Iis In Windows 10?
Why Install IIS in Windows 10? Installing Internet Information Services (IIS) on your Windows 10 machine can greatly enhance your web development experience. IIS is a powerful and flexible web server developed by Microsoft, providing a robust platform for hosting and managing websites and web applications. Whether you’re a seasoned developer or just starting out, integrating IIS into your Windows 10 environment offers a wide range of benefits.
Benefits Of Using Iis For Web Development
When using IIS for web development, you can take advantage of its numerous benefits, such as:
- Improved Performance: IIS is designed to handle large volumes of web traffic efficiently, ensuring fast and reliable delivery of web content.
- Scalability: With IIS, you can easily scale your web applications to accommodate increasing user demands without compromising performance.
- Security Features: IIS incorporates robust security features to protect your websites and web applications from potential threats.
- ASP.NET Support: IIS seamlessly integrates with ASP.NET, providing a solid foundation for building dynamic and interactive web applications.
- Easy Configuration: The user-friendly interface of IIS makes it easy to configure and manage web server settings, reducing administrative overhead.
Installing Iis On Windows 10
To install IIS on your Windows 10 machine, follow these simple steps:
- Open the Control Panel and navigate to “Programs” > “Turn Windows features on or off.”
- Scroll down and check the box next to “Internet Information Services.”
- Click “OK” and let the installation process complete.
- Once installed, you can access and manage IIS through the “Internet Information Services (IIS) Manager” in the Windows Administrative Tools.
Credit: devblogs.microsoft.com
Step-by-step Guide To Install Iis In Windows 10
Are you looking to install Internet Information Services (IIS) on your Windows 10 system? In this step-by-step guide, we’ll walk you through the process of installing IIS, from checking Windows features to configuring IIS settings. Whether you’re a developer or simply want to host your own website, Installing IIS in Windows 10 can be a straightforward process when you follow these instructions.
Checking Windows Features
Before you begin the installation process, it’s important to ensure that the required Windows features are enabled. Here’s how you can check for these features:
- Go to the Control Panel.
- Click on Programs.
- Select Turn Windows Features on or off.
Enabling Iis
Once you’ve confirmed that the necessary Windows features are enabled, you can proceed with enabling IIS:
- Open the Control Panel.
- Click on Programs.
- Select Turn Windows Features on or off.
- Check the box next to Internet Information Services.
- Click OK to begin the installation process.
Configuring Iis Settings
After the installation is complete, you may need to configure the settings for IIS based on your specific requirements. Here are the basic steps for configuring IIS settings:
- Open Internet Information Services Manager.
- Click on the Sites node in the left-hand menu.
- Right-click on Default Web Site and select Edit Bindings to configure website bindings.
- Adjust other settings such as authentication, SSL certificates, and more based on your needs.
Customizing Iis For Enhanced Web Development
When it comes to web development on Windows 10, customizing Internet Information Services (IIS) can greatly enhance your development experience. IIS is a web server software package provided by Microsoft, and it allows you to host and manage your websites locally. In this section, we will explore some important aspects of customizing IIS to ensure optimal web development.
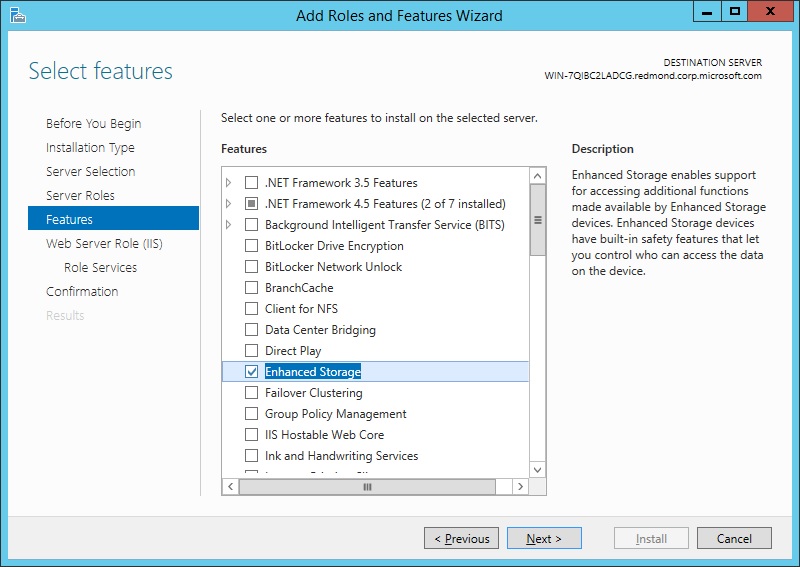
Choosing The Right Iis Components
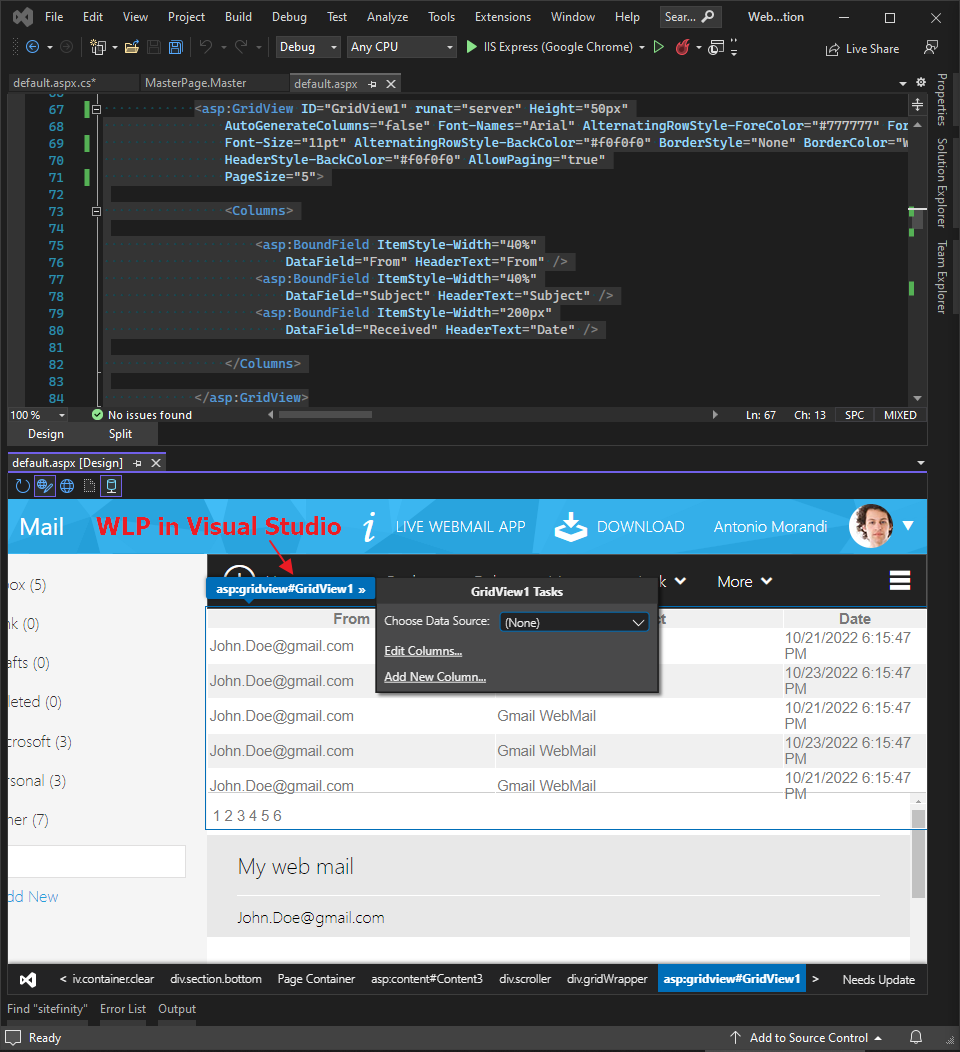
When setting up IIS on your Windows 10 machine, it’s important to choose the right components that will meet your specific web development needs. While the default installation includes the essential components, additional features can be added to enhance functionality. For example, if you are planning to develop and deploy ASP.NET applications, you will need to install the ASP.NET module. Similarly, if you require support for PHP or other scripting languages, you can add the appropriate modules. Taking the time to select and install the necessary components will ensure a smooth and efficient development process.
Setting Up Virtual Directories
Virtual directories in IIS are powerful tools that allow you to create aliases for directories located outside the root website directory. This enables you to organize your web application’s files and resources in a logical manner. By setting up virtual directories, you can easily reference files and folders from different locations without having to move them into the root directory. This flexibility is particularly useful when working with multiple websites or when integrating third-party libraries or frameworks into your projects.
Configuring Ssl Certificates
Security is a crucial aspect of modern web development. With the increasing need to protect user data and secure online transactions, configuring SSL (Secure Sockets Layer) certificates for your websites is essential. SSL certificates enable secure communication between your web server and the visitors’ browsers, providing encryption and authentication. By properly configuring SSL certificates in IIS, you can create a secure environment for your web applications, enhancing trust and credibility among your users.
In conclusion, customizing IIS for enhanced web development involves choosing the right components to match your development needs, setting up virtual directories for improved organization, and configuring SSL certificates to ensure a secure browsing experience. By utilizing these techniques, you can optimize your web development process on Windows 10 and create robust and secure web applications.
Optimizing Web Development With Iis
When it comes to web development, optimizing performance is key. One way to achieve this is by installing IIS (Internet Information Services) in Windows 10. IIS is a powerful web server that provides a host of features and tools to streamline and enhance your web development process.
Improving Performance With Caching
IIS offers built-in caching features that can significantly improve the performance of your websites. Caching allows the server to store frequently accessed files, such as images, CSS, and JavaScript, in memory. This means that when a user requests these files, IIS can serve them directly from memory rather than retrieving them from disk, resulting in faster load times.
By leveraging caching in IIS, you can reduce the load on your server and minimize network latency, ultimately providing a better user experience. Additionally, you have granular control over caching rules, allowing you to specify which files should be cached and how long they should be stored, ensuring your website always stays up-to-date.
Managing Multiple Websites With Iis
If you need to manage multiple websites or applications, IIS makes it easy to do so. With IIS, you can create separate websites with their own unique domain names, bindings, and configurations. This allows you to host multiple websites on a single server, simplifying management and reducing costs.
Furthermore, IIS provides a user-friendly interface called IIS Manager, which allows you to efficiently manage all your websites in one place. With IIS Manager, you can easily add new websites, configure SSL certificates, set up URL rewriting rules, and perform other essential tasks to ensure the smooth operation of your web applications.
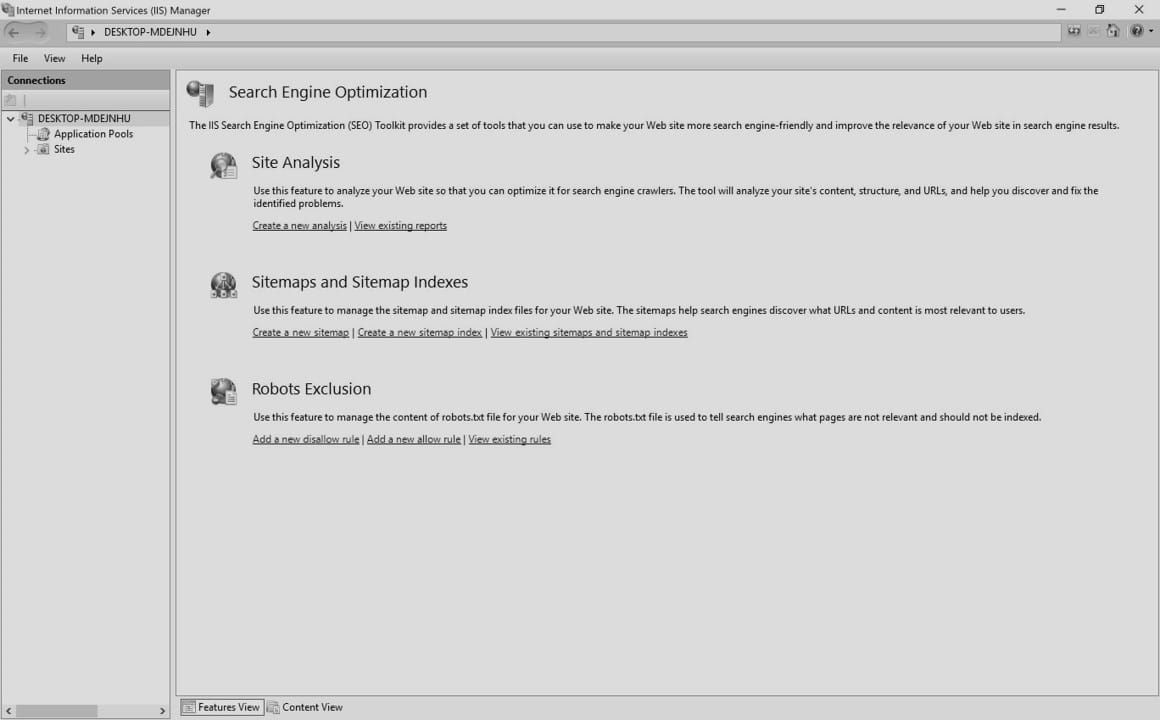
Utilizing Iis Manager
IIS Manager is a powerful tool that empowers you with complete control over your web server. It provides a graphical user interface (GUI) that simplifies the management of IIS and enables you to perform various administrative tasks efficiently.
Some of the key functionalities offered by IIS Manager include:
- Creating and managing websites
- Configuring SSL certificates for secure connections
- Setting up URL rewriting and redirect rules
- Monitoring server health and performance
- Managing application pools to ensure optimal resource allocation
By utilizing IIS Manager, you can streamline your web development workflow and enhance the performance and security of your websites.
Common Issues And Troubleshooting
Installing IIS (Internet Information Services) on Windows 10 can greatly enhance your web development capabilities. However, like any software installation, there are common issues that may arise during the process. In this section, we will address some of these problems and provide troubleshooting steps to help you resolve them.
Addressing Permission Problems
If you encounter permission problems while installing IIS on Windows 10, there are a few steps you can take to address them:
- Check User Account Control (UAC) Settings: Ensure that your User Account Control settings are properly configured to allow the installation of IIS. You can adjust these settings by following these steps:
- Open the Control Panel.
- Click on “User Accounts” and select “Change User Account Control settings”.
- Slide the bar to “Never notify” and click “OK”.
- Run Installation as Administrator: Right-click on the installation file and select “Run as administrator”. This will grant the necessary permissions to install IIS.
Troubleshooting Connection Issues
If you are experiencing connection issues with IIS after installation, follow these troubleshooting steps:
- Check Firewall Settings: Make sure that the necessary firewall ports are open to allow connections to your IIS server. Refer to your firewall documentation or network administrator for guidance on configuring the firewall settings.
- Restart IIS Service: Sometimes, restarting the IIS service can resolve connection issues. To do this, follow these steps:
- Open the Command Prompt as an administrator.
- Type the following command:
iisreset /restart - Press Enter to execute the command.
Resolving Configuration Errors
If you encounter configuration errors with IIS, try the following steps to resolve them:
- Check Configuration Files: Ensure that the configuration files for IIS are properly set up. Verify that the necessary settings, such as bindings and virtual directories, are correctly configured.
- Review Event Viewer: The Event Viewer can provide valuable information about any errors or warnings related to IIS. Open the Event Viewer and look for any IIS-related entries to identify and troubleshoot configuration errors.
By addressing these common issues and following the troubleshooting steps, you can overcome challenges that may arise during the installation and configuration of IIS on Windows 10. With a properly functioning IIS, you can enjoy a seamless web development experience.
Credit: learn.microsoft.com
Frequently Asked Questions On Install Iis In Windows 10
Does Windows 10 Come With Iis Preinstalled?
Yes, Windows 10 does come with IIS (Internet Information Services) preinstalled. This means that you don’t need to download or install any additional software to start using IIS on your Windows 10 computer.
How Do I Install Iis On Windows 10?
To install IIS on Windows 10, follow these steps:
1. Go to the Control Panel and click on “Programs”. 2. Under “Programs and Features”, click on “Turn Windows features on or off”. 3. Scroll down and find “Internet Information Services”. Check the box next to it. 4. Click on “OK” and wait for the installation to complete.
How Do I Check If Iis Is Installed On My Windows 10?
To check if IIS is installed on your Windows 10 computer, follow these steps:
1. Press the Windows key + R to open the Run dialog box. 2. Type “inetmgr” and press Enter. 3. If the IIS Manager window opens, it means IIS is installed.
Can I Install Iis On Windows 10 Home Edition?
No, you cannot install IIS on Windows 10 Home edition. IIS is only available on Windows 10 Professional, Enterprise, and Education editions.
Conclusion
Installing IIS in Windows 10 is a straightforward process that can greatly enhance your web development capabilities. With its user-friendly interface and powerful features, IIS allows you to host and manage websites with ease. By following the simple steps outlined in this guide, you can quickly get IIS up and running on your Windows 10 system.
So, take advantage of this powerful tool and unlock new possibilities for your web projects. Happy coding!