Upgrading to Windows 11 typically takes about 30 minutes to 1 hour. The time involved may vary depending on the speed of your computer and internet connection.
When considering an upgrade to Windows 11, one of the first questions that may come to mind is how long it will take to complete. Understanding the time commitment required for the upgrade process can help you plan accordingly and minimize any potential disruptions to your work or personal activities.
We will discuss the average time it takes to upgrade to Windows 11, factors that can affect the duration of the upgrade, and some tips to ensure a smooth and efficient transition to the new operating system. By the end of this read, you will have a clear understanding of what to expect when upgrading to Windows 11 and be better prepared for the transition.

Credit: support.microsoft.com
Factors Affecting Windows 11 Upgrade Time
The time it takes to upgrade to Windows 11 can vary depending on several factors. Factors such as the speed of your internet connection, the hardware specifications of your device, and the amount of data and apps that need to be transferred can all impact the upgrade time.
It is recommended to ensure a stable internet connection and back up your data before starting the upgrade process.
Factors Affecting Windows 11 Upgrade Time When upgrading to Windows 11, several factors can influence the time it takes for the process to complete smoothly. It’s important to consider these factors to ensure a seamless transition to the new operating system. Some of the key factors affecting Windows 11 upgrade time include System Requirements, Internet Speed, and the Amount of Data and Applications present on your device.System Requirements
To begin with, meeting the necessary system requirements is crucial for a swift Windows 11 upgrade. Your device needs to have a compatible CPU, RAM, and storage to support the new OS. Failing to meet these requirements may result in longer upgrade times or even unsuccessful installations.Internet Speed
Another critical factor that affects the upgrade time to Windows 11 is the speed of your internet connection. Faster internet speeds will enable the download and installation process to be completed more expediently. On the contrary, slow internet speeds can significantly prolong the upgrade, leading to frustrations.Amount Of Data And Applications
Additionally, the amount of data and applications stored on your device can impact the upgrade duration. The more data and applications present, the longer it may take for Windows 11 to install as it needs to migrate and reconfigure various settings and files. Removing unnecessary files and applications beforehand can streamline the upgrade process, resulting in a quicker transition to Windows 11. Considering these factors and taking appropriate actions can contribute to a smoother and more efficient upgrade experience. With an understanding of these factors, you can prepare your system for a prompt and successful upgrade to Windows 11.Optimizing Upgrade Time
Upgrading to Windows 11 can be a smooth and efficient process if you optimize the upgrade time by performing certain tasks and utilizing the Windows 11 Upgrade Assistant. By following these steps, you can ensure a hassle-free upgrade experience.
Performing Pre-upgrade Tasks
Before initiating the upgrade to Windows 11, it is essential to perform pre-upgrade tasks to ensure a seamless transition. These tasks include:
- Backing up important files and data to prevent any potential loss during the upgrade.
- Checking for and installing any available updates for the current Windows version to address potential compatibility issues.
- Removing any unnecessary programs or temporary files to free up disk space and optimize the system for the upgrade.
Preparing For The Upgrade
Preparation is key to a successful upgrade to Windows 11. To prepare for the upgrade, consider the following:
- Verifying the system requirements for Windows 11 to ensure compatibility.
- Reviewing hardware and software compatibility with Windows 11 to identify any potential issues.
- Creating a system restore point to revert to the previous Windows version in case of unexpected problems during the upgrade.
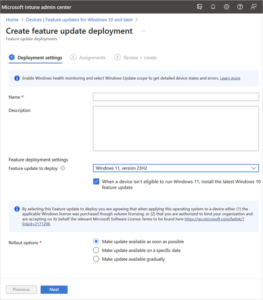
Utilizing Windows 11 Upgrade Assistant
The Windows 11 Upgrade Assistant is a valuable tool for streamlining the upgrade process. It offers:
- Compatibility checks to identify any potential issues before initiating the upgrade.
- Step-by-step guidance to ensure a smooth transition to Windows 11.
- Automatic download and installation of Windows 11, minimizing manual intervention.
Estimated Upgrade Time
The estimated upgrade time to Windows 11 varies depending on the system specifications and internet speed. On average, the upgrade process can take anywhere from 1 to 3 hours. It is recommended to ensure a stable internet connection and back up important files before initiating the upgrade.
Estimated Upgrade Time When it comes to upgrading your operating system, one of the most important considerations is the time it will take. After all, no one wants to be stuck waiting around for hours on end. In this blog post, we will explore the estimated upgrade time for Windows 11. Understanding how long the upgrade process will take can help you plan accordingly and minimize disruption to your work or personal activities.Fast Upgrade Scenarios
If you’re lucky, you might fall into the category of fast upgrade scenarios, where the process is quick and seamless. These scenarios typically apply to devices that meet the minimum system requirements for Windows 11. With compatible hardware and software already in place, the upgrade can be completed smoothly. In such cases, the estimated upgrade time is relatively short, ranging from 30 minutes to an hour.Average Upgrade Times
For most users, the upgrade process will fall into the category of average upgrade times. This includes scenarios where the system requires some updates or modifications to meet the necessary requirements for Windows 11. The estimated time for these upgrades is usually around 1 to 2 hours. It’s important to note that this duration can vary depending on factors such as internet speed and the performance of your device.Longer Upgrade Times
Certain situations may lead to longer upgrade times. For example, if your device requires significant hardware modifications or updates, the process can take several hours. Additionally, if you have a large amount of data or files that need to be transferred or backed up, it can further extend the upgrade time. In these cases, it’s best to allocate a sufficient amount of time to ensure a smooth and successful upgrade experience. To summarize, the estimated upgrade time for Windows 11 can vary depending on several factors. Fast upgrade scenarios may take around 30 minutes to an hour, while average upgrade times typically range from 1 to 2 hours. Longer upgrade times may be necessary for devices requiring significant hardware modifications or backups of large amounts of data. Understanding these estimates can help you plan your upgrade effectively and minimize any inconvenience.
Credit: m.facebook.com
Tips For Faster Upgrades
Upgrade to Windows 11 faster with these tips. Clearing disk space, closing unnecessary programs, and having a stable internet connection can speed up the process. Ensuring your system meets the requirements beforehand can also reduce upgrade time.
Ensure Sufficient Disk Space
When it comes to upgrading to Windows 11, one of the most important things to consider is having enough disk space available on your device. Before initiating the upgrade process, it is essential to ensure that your computer has sufficient disk space to accommodate the new operating system and its files.
To determine the amount of disk space required, Microsoft recommends a minimum of 64 GB for the Windows 11 installation. However, it is advisable to have even more space available to prevent any potential issues during the upgrade process. Clearing up unwanted files, uninstalling unnecessary applications, and transferring files to an external storage device are some effective ways to create additional disk space on your computer. By doing so, you can optimize your device for a faster and more seamless upgrade experience.
Close Unnecessary Applications
Another tip for a faster upgrade to Windows 11 is to close any unnecessary applications running in the background on your computer. When you have multiple applications open, they consume valuable system resources, including memory, CPU, and disk usage. These resources are essential for a smooth and efficient upgrade process.
Before initiating the upgrade, take a moment to close any open applications that you are not using. This will help free up system resources and minimize any potential conflicts that may arise during the upgrade. Furthermore, by closing unnecessary applications, you can also reduce the risk of experiencing unexpected shutdowns or system errors, ensuring a more seamless transition to Windows 11.
Disable Antivirus Software
Disabling your antivirus software temporarily is another useful tip to expedite the upgrade to Windows 11. While antivirus programs are crucial for the security of your computer, they can sometimes interfere with the upgrade process by blocking certain installation files or triggering false positives.
Prior to the upgrade, consider disabling your antivirus software temporarily. Most antivirus programs have an option to temporarily disable real-time protection or to put the software into a silent mode. By doing so, you can minimize any potential conflicts and ensure a smoother, uninterrupted upgrade process.
Troubleshooting Slow Upgrades
Upgrading to Windows 11 can be a slow process, with the duration varying depending on several factors. Troubleshooting slow upgrades is crucial to ensure a smooth and efficient transition to the new operating system.
Checking System Compatibility
Before upgrading to Windows 11, it’s crucial to ensure that your system meets the necessary requirements. Checking system compatibility can help you identify potential issues that may slow down the upgrade process. Here’s how you can do it:
- Start by reviewing the official Windows 11 compatibility requirements from Microsoft.
- Compare these requirements with your system specifications, such as processor, RAM, and storage capacity.
- If your system falls short in any area, consider upgrading the necessary components or investing in a new device altogether.
By performing a thorough system compatibility check, you can address any potential roadblocks upfront and ensure a smoother Windows 11 upgrade experience.
Updating Drivers And Firmware
Outdated or incompatible drivers and firmware can significantly impact the speed and performance of your Windows 11 upgrade. To prevent slow upgrades, make sure to update your drivers and firmware before proceeding. Here’s what you need to keep in mind:
- Visit the official website of your device manufacturer to find the latest driver and firmware updates for your specific model.
- Download and install the updated drivers and firmware according to the manufacturer’s instructions.
- Restart your system to ensure the changes take effect.
Updating drivers and firmware not only enhances system stability but also maximizes the potential of your hardware, enabling a faster and more efficient upgrade to Windows 11.
Performing Clean Install
If you’re still experiencing slow upgrades despite checking system compatibility and updating drivers, performing a clean install can be an effective troubleshooting method. Here’s how to do it:
- First, make sure to back up all your important files and data, as a clean install will erase everything on your system.
- Download the Windows 11 installation media from the official Microsoft website.
- Create a bootable USB drive or DVD using the installation media.
- Boot your computer from the USB drive or DVD and follow the on-screen instructions to perform a clean install of Windows 11.
Note that performing a clean install requires reinstalling all your applications and settings, so it’s essential to have your licenses and product keys readily available.
By troubleshooting slow upgrades through methods like checking system compatibility, updating drivers and firmware, and performing a clean install, you can overcome potential obstacles and expedite the process of upgrading to Windows 11.

Credit: www.autonews.com
Frequently Asked Questions On How Long It Takes To Upgrade To Windows 11
How Long Does It Take To Upgrade To Windows 11?
The time it takes to upgrade to Windows 11 depends on several factors, including the speed of your internet connection, the performance of your computer, and the size of the update files. On average, the upgrade process can take anywhere from 30 minutes to a few hours.
What Are The System Requirements For Upgrading To Windows 11?
To upgrade to Windows 11, your computer must meet certain system requirements. These include a compatible processor, at least 4 GB of RAM, and 64 GB of storage. Additionally, your device must support TPM version 2. 0 and have a DirectX 12 compatible graphics card.
Can I Upgrade To Windows 11 For Free?
Yes, if your computer meets the system requirements, you can upgrade to Windows 11 for free. Microsoft has announced that Windows 10 users will be able to upgrade to Windows 11 without any additional cost. However, it’s worth noting that certain enterprise editions of Windows 10 may not be eligible for the free upgrade.
Conclusion
Upgrading to Windows 11 is a process that requires time and patience. The duration of the upgrade depends on various factors such as the speed of your internet connection, the specifications of your device, and the amount of data that needs to be transferred.
It is recommended to allocate sufficient time for the upgrade to ensure a smooth transition. Keep in mind that backing up your important files and preparing your system beforehand can help minimize any potential interruptions. Stay informed about the upgrade process and follow the instructions provided by Microsoft to make the transition as seamless as possible.