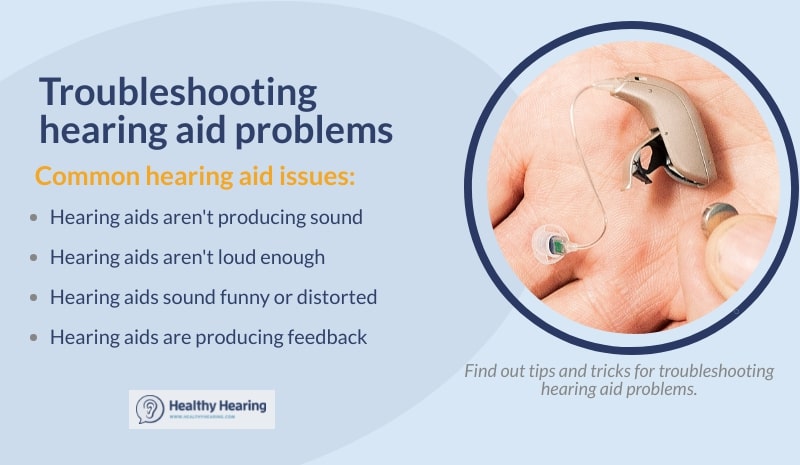
Hearing aid troubleshooting involves checking for common issues such as battery problems or earwax blockages. Regular maintenance can prevent many issues.
Hearing aids are essential devices for those with hearing loss, but they can sometimes experience problems. Common issues include battery failure, feedback noise, or reduced sound quality. Regularly cleaning the device and ensuring it is properly fitted can solve many problems.
Sometimes, a simple reset or adjustment is all that is needed. Consulting the user manual can provide specific troubleshooting steps for your model. If problems persist, seeking professional help from an audiologist or hearing aid specialist is advisable. Proper care and timely troubleshooting ensure your hearing aid functions optimally, improving your overall hearing experience.
Common Issues
Hearing aids sometimes have problems. These can be fixed easily. Let’s look at common issues. Each problem has a simple solution.
No Sound
No sound from your hearing aid is a common problem. Here are steps to fix it:
- Check if the device is turned on.
- Ensure the battery is charged and correctly placed.
- Inspect the earwax filter. Clean or replace if needed.
- Look at the volume settings. Increase if too low.
Distorted Sound
Distorted sound can be annoying. Follow these steps to clear it up:
- Check for earwax buildup in the device.
- Ensure the microphone is clean.
- Replace the battery if it’s low.
- Adjust the volume settings.
Intermittent Sound
Intermittent sound can break your focus. Here’s how to fix it:
- Check if the battery contacts are clean.
- Inspect the earpiece for any blockages.
- Ensure the device fits properly in your ear.
- Replace the battery if it’s old.
Battery Problems
Battery problems are common issues with hearing aids. A well-functioning battery ensures your hearing aid works properly. Troubleshooting battery issues can improve the performance of your device.
Battery Life
Battery life varies depending on the type of hearing aid and usage. On average, hearing aid batteries last between 3 to 10 days.
- Check the battery daily to ensure it has enough power.
- Use a battery tester to verify the remaining charge.
- Replace the battery if the hearing aid starts to beep or the sound quality decreases.
Battery Insertion
Proper battery insertion is crucial for hearing aid functionality. An incorrectly inserted battery can lead to device malfunction.
- Open the battery door gently.
- Insert the battery with the positive (+) side facing up.
- Close the battery door firmly to ensure a good connection.
Check the user manual for specific instructions for your hearing aid model.
Battery Contacts
Battery contacts must be clean for proper battery function. Dirty contacts can lead to poor performance.
Here are steps to clean battery contacts:
- Turn off the hearing aid and remove the battery.
- Use a dry cotton swab to gently clean the contacts.
- Avoid using water or cleaning solutions.
Regularly cleaning the battery contacts can extend battery life and improve hearing aid performance.
Feedback And Whistling
Hearing aids are great tools, but sometimes they have issues. One common problem is feedback or whistling. This noise can be annoying. It can also make it hard to hear well. Understanding why this happens can help fix it.
Causes Of Feedback
Feedback happens when sound from the hearing aid goes back into the microphone. This creates a loop. Several things can cause this.
- Loose fit: The hearing aid might not fit snugly.
- Earwax: Earwax build-up can block the sound.
- Volume: The volume might be too high.
- Microphone and receiver: They might be too close together.
Reducing Feedback
Reducing feedback is important for better hearing. Here are some tips.
- Check the fit: Make sure the hearing aid fits well.
- Clean the ear: Remove any earwax blocking sound.
- Lower the volume: Try lowering the volume a bit.
- Adjust the position: Move the microphone and receiver apart.
Proper Fit
A proper fit can stop feedback. It also makes the hearing aid more comfortable. Here are some ways to ensure a good fit.
| Action | Benefit |
|---|---|
| Visit a hearing specialist | Get a custom fit for your ear |
| Use soft ear molds | They can fit more snugly |
| Regular check-ups | Ensure the fit stays perfect |

Credit: www.noosahearing.com.au
Cleaning And Maintenance
Proper cleaning and maintenance of hearing aids ensure their longevity. Regular care can prevent malfunctions and keep sound quality optimal. Below are some tips to help with this process.
Cleaning Tools
Using the right tools is crucial. Common tools include:
- Soft, dry cloth – for wiping surfaces
- Hearing aid brush – for removing wax and debris
- Wax pick – for cleaning small openings
- Air blower – for drying moisture
Daily Cleaning
Daily cleaning helps maintain the device’s performance. Follow these steps:
- Turn off the hearing aid.
- Wipe the device with a soft, dry cloth.
- Use a brush to remove any earwax.
- Check the microphone and receiver openings.
- Use a wax pick for stubborn debris.
Professional Cleaning
Professional cleaning is essential for deep maintenance. Visit your audiologist at least twice a year. They will:
- Inspect the hearing aid thoroughly.
- Clean internal components.
- Adjust settings for optimal performance.
Regular professional cleaning can prevent major issues.
Moisture Issues
Dealing with hearing aids can be challenging, especially with moisture issues. Moisture can damage hearing aids, causing them to malfunction. Understanding how to manage moisture can extend the life of your hearing aids.
Humidity Effects
Humidity can cause significant problems for hearing aids. High humidity levels can lead to condensation inside the device. This condensation can affect the internal electronics, causing them to short-circuit.
- Reduced sound quality
- Intermittent functioning
- Complete device failure
Drying Methods
There are several methods to dry out your hearing aids. The most common method is using a hearing aid dehumidifier. These devices are specifically designed to remove moisture.
- Use a hearing aid dehumidifier overnight.
- Store the hearing aids in a dry container.
- Use silica gel packs to absorb moisture.
Another option is using a drying jar. Place your hearing aids in the jar with a drying agent. Leave them overnight for the best results.
Water Damage Prevention
Preventing water damage is crucial for the longevity of your hearing aids. Always remove your hearing aids before showering, swimming, or any water-related activities.
Water-resistant covers can provide extra protection. These covers are designed to keep moisture out while allowing sound to pass through.
| Preventive Measure | Effectiveness |
|---|---|
| Water-resistant covers | High |
| Dehumidifier | Moderate |
| Drying jar | Moderate |
Using a protective case when not in use can also help. These cases provide a dry and safe environment for your hearing aids.
Credit: www.hear.com
Connectivity Problems
Hearing aids are amazing devices. They help people hear better. But sometimes, they have connectivity problems. These issues can be frustrating. This guide will help you fix common problems. Let’s look at three main areas: Bluetooth issues, pairing devices, and signal interference.
Bluetooth Issues
Bluetooth issues are common with hearing aids. Here are some tips to resolve them:
- Ensure your hearing aid’s Bluetooth is on.
- Check your device’s Bluetooth settings.
- Restart both your hearing aid and device.
These steps often fix Bluetooth issues. If not, your device manual may have more help.
Pairing Devices
Pairing devices can sometimes be tricky. Follow these steps to pair your hearing aid:
- Turn on your hearing aid.
- Open the Bluetooth settings on your device.
- Select your hearing aid from the list.
If pairing fails, try resetting both devices. This often helps to clear any pairing problems.
Signal Interference
Signal interference can disrupt hearing aid function. Here are some common sources:
| Source | Solution |
|---|---|
| Wi-Fi routers | Move away from the router. |
| Microwave ovens | Turn off the microwave. |
| Other Bluetooth devices | Disconnect unused devices. |
Reducing interference can improve hearing aid performance. Always check your environment for these sources.
Sound Quality
Experiencing issues with your hearing aid’s sound quality can be frustrating. This section will guide you through troubleshooting steps to improve sound quality. We will cover adjusting settings, understanding environmental factors, and optimizing hearing aid programming.
Adjusting Settings
Check if your hearing aid’s volume is set correctly. Sometimes, adjusting the volume can resolve sound issues. Use the volume control button to increase or decrease the volume as needed.
- Volume Control: Ensure the volume is neither too high nor too low.
- Programs: Switch between different programs to find the best sound quality.
- Feedback: If you hear a whistling sound, adjust the fit.
Environmental Factors
The environment can affect hearing aid performance. High levels of background noise can interfere with sound quality. Move to a quieter area to see if the sound improves.
| Environmental Factor | Impact |
|---|---|
| Background Noise | Can cause difficulty in hearing speech. |
| Wind | May create a whooshing sound. |
| Distance | Sounds may seem faint if the source is far away. |
Hearing Aid Programming
Your hearing aid needs proper programming to ensure optimal performance. Visit your audiologist for a professional adjustment. They can fine-tune the settings to suit your specific hearing needs.
- Initial Setup: Ensure your hearing aid was programmed correctly at the start.
- Regular Check-Ups: Schedule regular visits to your audiologist.
- Software Updates: Ensure your hearing aid software is up-to-date.
Professional Help
Sometimes, troubleshooting hearing aids at home just isn’t enough. Professional help can ensure your hearing aids function perfectly. Audiologists are experts in diagnosing and fixing hearing aid issues.
When To See An Audiologist
There are several signs that indicate it’s time to visit an audiologist:
- Your hearing aids make a buzzing noise.
- They don’t turn on even with new batteries.
- The sound is distorted or unclear.
- There is physical damage to the device.
Audiologists can perform advanced diagnostics. They use specialized tools to identify issues.
Warranty And Repairs
Many hearing aids come with a warranty. Check your warranty before seeking repairs.
| Type of Warranty | Coverage |
|---|---|
| Manufacturer Warranty | Typically covers defects and malfunctions |
| Extended Warranty | May cover additional services and repairs |
If your warranty covers the issue, repairs may be free. Always check with your audiologist first.
Upgrading Hearing Aids
Sometimes, old hearing aids just can’t be fixed. Upgrading to a new model might be the best option.
- Consult your audiologist about the latest models.
- Consider your budget and insurance coverage.
- Test new hearing aids to find the best fit.
Newer models often have better sound quality and more features. Upgrading ensures you get the best possible hearing experience.

Credit: alexandriahearing.com
Frequently Asked Questions
How Do You Reboot A Hearing Aid?
To reboot a hearing aid, turn it off and remove the battery. Wait 10 seconds, reinsert the battery, and turn it on.
What Are Three Ways In Which A Hearing Aid Can Malfunction?
Hearing aids can malfunction due to battery issues, clogged microphones, or software glitches. Regular maintenance helps prevent these problems.
What Is The First Thing To Check When Troubleshooting A Dead Hearing Aid?
Check the battery first. Ensure it is properly inserted and fully charged. Replace if necessary.
Why Does My Hearing Aid Keep Cutting In And Out?
Your hearing aid may cut in and out due to low battery, poor fit, or device malfunction. Clean it regularly and check for damage. Consult your audiologist if the issue persists.
Conclusion
Troubleshooting your hearing aid can be simple with the right tips. Regular maintenance ensures optimal performance. If problems persist, consult your audiologist. Keeping your hearing aid in top condition will enhance your listening experience. Remember, a well-functioning hearing aid improves your quality of life.
Follow these steps to enjoy clear sound every day.