
To enable AHCI on Windows 11, you can do so through the BIOS settings. AHCI improves the performance of SATA drives by enabling advanced features like native command queuing and hot-swapping.
Switching to AHCI mode can enhance system performance and enable additional functionalities for SATA drives on Windows 11. By following a few simple steps in the BIOS settings, you can easily enable AHCI and experience improved speed and responsiveness in file transfers and multitasking.
We’ll guide you through the process of enabling AHCI on Windows 11 and explain the potential benefits of making this adjustment. Whether you’re a tech enthusiast or seeking to optimize your system’s performance, understanding how to enable AHCI on Windows 11 can greatly impact your computing experience.
What Is Ahci?
What is AHCI? Advanced Host Controller Interface (AHCI) is a technical standard that enables SATA drives to operate at higher speeds and with more advanced features. It is a crucial aspect of modern computing, especially in systems running Windows 11. Enabling AHCI on Windows 11 can significantly enhance the overall performance and efficiency of your storage devices.
Ahci Explained
AHCI stands for Advanced Host Controller Interface, a programming interface that allows software to communicate with Serial ATA (SATA) devices. In essence, it enables the operating system to better utilize the capabilities of modern storage devices. By enabling AHCI, Windows 11 can take advantage of features such as Native Command Queuing (NCQ) and hot swapping, leading to improved performance and flexibility.
Benefits Of Ahci
- Improved SATA drive performance
- Enhanced support for advanced features
- Native Command Queuing (NCQ) for optimized disk access
- Hot swapping capabilities for easy drive replacement
- Compatibility with modern storage technologies
Understanding Windows 11’s Restrictions
Windows 11 comes with certain restrictions that can impact your system’s performance. One of these restrictions is its default use of the Legacy IDE Mode. Understanding why Windows 11 uses IDE by default can help you make informed decisions about enabling AHCI on your Windows 11 system.
Legacy Ide Mode
The Legacy IDE Mode, a traditional method of data transfer, can limit your system’s performance capabilities. It operates at a slower speed compared to AHCI, affecting overall system responsiveness and data transfer rates.
Why Windows 11 Uses Ide By Default
Windows 11 maintains compatibility with older hardware by defaulting to IDE. This decision is aimed at ensuring that Windows 11 can run on a wide range of systems, including those with legacy hardware configurations.
By enabling AHCI on your Windows 11 system, you can unlock the full potential of your storage device, resulting in faster data transfer speeds and overall improved system performance.
Enabling Ahci On Windows 11
If you’re experiencing slow disk performance or compatibility issues on your Windows 11 computer, you may need to enable AHCI (Advanced Host Controller Interface) mode. AHCI is a more efficient storage mode that can provide faster data transfer speeds and better compatibility with modern storage devices. In this guide, we’ll walk you through the steps to enable AHCI on your Windows 11 system.
Check Ahci Compatibility
Before proceeding with the AHCI setup, it’s important to ensure that your computer’s hardware and system are compatible with AHCI mode. Here’s how you can check:
- Restart your computer and access the BIOS settings by pressing the designated key during startup (such as DEL or F2).
- Navigate to the Storage or SATA Configuration section in the BIOS menu.
- Look for an option related to AHCI mode. If you find it, your computer supports AHCI. If not, AHCI may not be available on your system.
If AHCI mode is not available, it may be due to an outdated BIOS or incompatible hardware. Check with your computer manufacturer for any BIOS updates or consult a professional for further assistance.
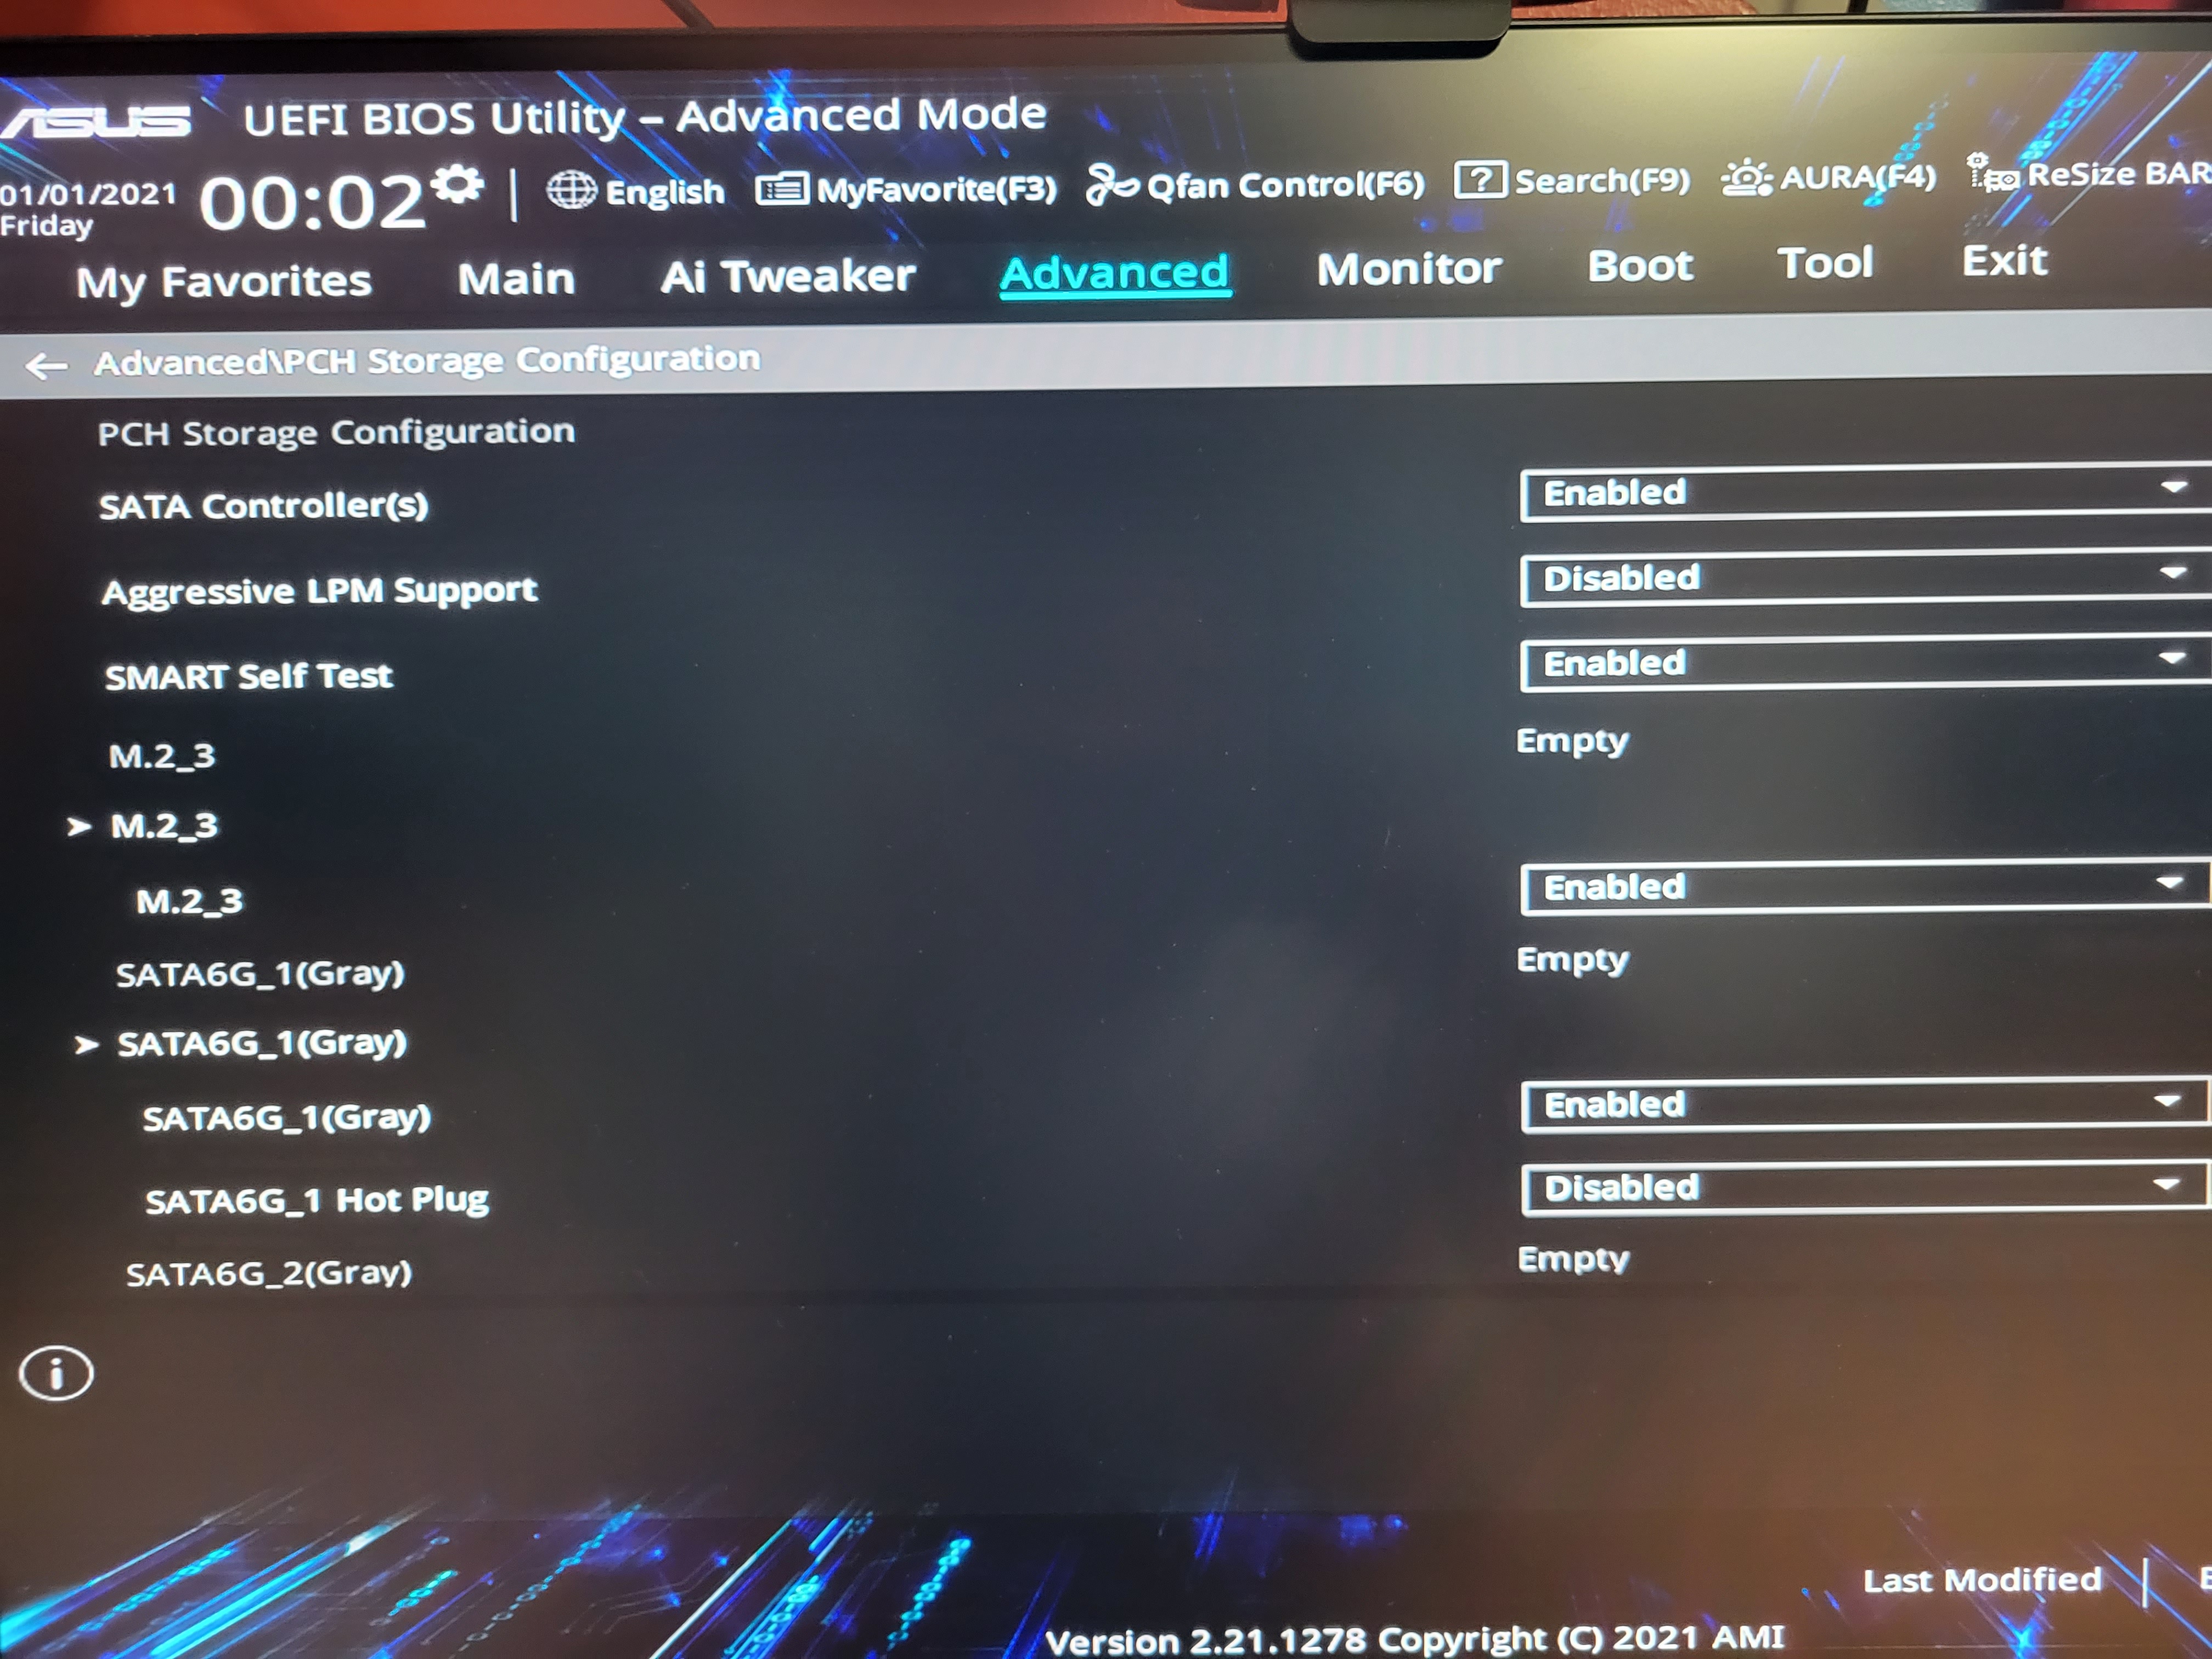
Changing To Ahci In Bios
If your computer supports AHCI mode, you can now proceed to change the storage mode in the BIOS. Follow these steps:
- Restart your computer and enter the BIOS settings.
- Navigate to the Storage or SATA Configuration section.
- Find the option for changing the storage mode.
- Select AHCI as the preferred mode.
- Save the changes and exit the BIOS.
- Your system will restart, and Windows 11 will now load using the AHCI mode.
Installing Ahci Drivers
Once you have enabled AHCI in the BIOS, you may need to install the AHCI drivers for your storage controller. Here’s how:
Note: It’s recommended to have the drivers ready before making any changes to the storage mode.
- Download the latest AHCI drivers from the manufacturer’s website.
- Extract the driver files if they are in a compressed format.
- Open the Device Manager by right-clicking the Start button and selecting “Device Manager”.
- Expand the “IDE ATA/ATAPI controllers” section.
- Right-click on the AHCI controller or SATA controller.
- Select the “Update driver” option.
- Choose “Browse my computer for drivers” and navigate to the location of the extracted AHCI driver files.
- Follow the on-screen instructions to complete the driver installation.
After installing the AHCI drivers, it’s recommended to restart your computer for the changes to take effect. Upon reboot, your Windows 11 system should be running in AHCI mode, providing improved performance and compatibility with your storage devices.
Credit: answers.microsoft.com
Potential Issues And Troubleshooting
When it comes to enabling AHCI on Windows 11, it’s important to be aware of potential issues that may arise. By understanding these problems and knowing how to troubleshoot them, you can ensure a smooth transition to AHCI and optimize your system’s performance. In this section, we will explore common compatibility problems, troubleshooting tips for resolving boot failure, and how to test AHCI performance.
Compatibility Problems
Before enabling AHCI on Windows 11, it’s crucial to ensure compatibility with your hardware. Certain older systems or specific components may not fully support AHCI, causing compatibility issues. Here are some potential problems you may encounter:
- Blue Screen of Death (BSOD) errors upon booting
- Device driver conflicts
- Incompatibility with certain storage devices
To check if your hardware supports AHCI, you can refer to the manufacturer’s documentation or visit their website for compatibility information.
Resolving Boot Failure
If you experience boot failure after enabling AHCI, don’t panic. There are a few troubleshooting steps you can take to resolve the issue:
- Enter BIOS settings: Restart your computer and access the BIOS settings by pressing a specific key (usually DEL or F2) during the startup process. Once in the BIOS, navigate to the storage or SATA configuration section.
- Enable AHCI: Locate the AHCI option and make sure it is enabled. Save the changes and exit the BIOS.
- Boot into safe mode: If your computer still fails to boot, try entering safe mode. This can help diagnose any driver conflicts or hardware compatibility issues.
- Update drivers: Ensure that you have the latest drivers installed for your storage devices and other hardware components. Visit the manufacturer’s website to download and install the most recent versions.
By following these steps, you can troubleshoot boot failure issues related to enabling AHCI on Windows 11.
Testing Ahci Performance
Once AHCI is enabled, you may want to test its performance to ensure optimal functionality. By comparing the performance of your storage devices before and after enabling AHCI, you can determine whether AHCI has made a positive impact. Here are a few ways to test AHCI performance:
- Benchmarking tools: Utilize benchmarking software such as CrystalDiskMark or AS SSD Benchmark to measure the read and write speeds of your storage device. Run the benchmark before and after enabling AHCI to observe any improvements.
- Real-world usage: Use your computer as you normally would and monitor the speed and responsiveness of file transfers, application launches, and overall system performance. Note any noticeable differences after enabling AHCI.
Regularly testing AHCI performance can help you assess the impact it has on your system and make informed decisions regarding further optimization.
Tips For Maximizing Ahci Performance
When it comes to maximizing AHCI performance on your Windows 11 computer, there are a few tips you can follow to ensure smooth and efficient operation. Updating firmware and drivers, as well as enabling advanced features, are key steps in optimizing the performance of AHCI. Let’s dive into these tips in more detail.
Updating Firmware And Drivers
One of the first steps you should take to maximize AHCI performance is to update your firmware and drivers. Firmware acts as the software that is embedded in hardware, and it plays a crucial role in the operation of AHCI. By keeping your firmware up to date, you can ensure compatibility with the latest technologies and enjoy improved performance.
Similarly, updating your AHCI drivers is vital for optimal performance. Drivers are the software that allows the operating system to communicate with and control the AHCI hardware. Outdated or incorrect drivers can lead to performance issues, slower data transfer rates, and even system instability. Make sure to regularly check for driver updates from the manufacturer’s website or through Windows Update.
Enabling Advanced Features
Another effective way to boost AHCI performance is by enabling advanced features. AHCI offers several advanced options that can enhance its capabilities and improve system responsiveness. To enable these features, you need to access your computer’s BIOS or UEFI settings.
One important advanced feature to enable is Native Command Queuing (NCQ). NCQ allows the AHCI controller to optimize the order in which commands are sent to the storage devices, reducing latency and increasing overall performance. By enabling NCQ, you can experience faster data transfers and improved multitasking capabilities.
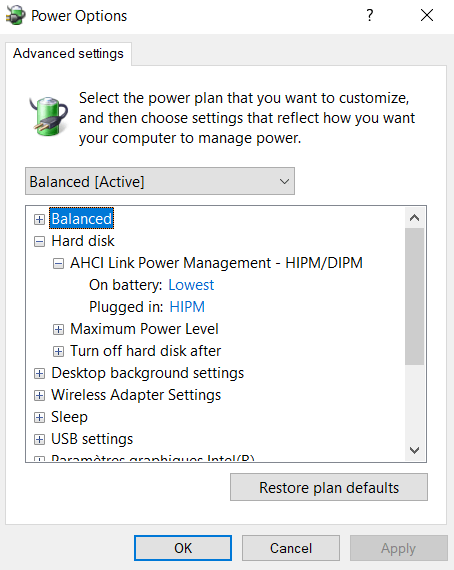
In addition to NCQ, you may also find options for Hot Plug and Link Power Management in your BIOS settings. Hot Plug permits you to connect or disconnect SATA devices while your computer is powered on, which can be useful for external drives or hot-swapping internal disks. On the other hand, Link Power Management allows for power-saving features, optimizing energy consumption and reducing heat generated by your system.
Credit: answers.microsoft.com

Credit: www.pitsdatarecovery.net
Frequently Asked Questions Of Enable Ahci On Windows 11
What Is Ahci And Why Is It Important For Windows 11?
AHCI stands for Advanced Host Controller Interface and it is important for Windows 11 because it allows the operating system to take advantage of advanced features and performance improvements of modern storage devices.
How To Check If Ahci Is Enabled On My Windows 11 Pc?
To check if AHCI is enabled on your Windows 11 PC, open Device Manager, expand the “IDE ATA/ATAPI controllers” section, and look for the SATA controller. If AHCI is enabled, the controller name will include “AHCI” in it.
Can I Enable Ahci On Windows 11 If It Wasn’t Enabled During Installation?
Yes, you can enable AHCI on Windows 11 even if it wasn’t enabled during installation. You will need to modify the Windows registry and make a BIOS change. It is recommended to backup your data and create a system restore point before making any changes.
How Can I Enable Ahci On Windows 11 After Installation?
To enable AHCI on Windows 11 after installation, first, make sure you have backed up your data and created a system restore point. Then, modify the Windows registry to enable AHCI mode and restart your PC. Once the PC restarts, go into the BIOS settings and change the SATA operation mode to AHCI.
Conclusion
To optimize your system’s performance and improve overall speed, enabling AHCI on Windows 11 is a crucial step. By following the simple steps outlined in this blog post, you can unlock the full potential of your hardware and experience faster data transfer rates.
Don’t let outdated settings hold you back – embrace AHCI and enjoy a smoother, more efficient computing experience. Start maximizing your Windows 11 experience today!