To enable AHCI in Windows 10, you can go to the BIOS settings and switch the SATA mode to AHCI. This change is necessary because AHCI allows for advanced features such as hot-swapping and Native Command Queuing, which can boost the performance of your storage devices.
Enabling AHCI in Windows 10 can be a beneficial tweak for improving the performance of your storage devices. By making this adjustment in the BIOS settings, you can take advantage of the advanced features that AHCI offers, such as hot-swapping and Native Command Queuing.
This can result in faster data transfers and better overall system responsiveness. We will guide you through the step-by-step process of enabling AHCI in Windows 10 and discuss the potential benefits of doing so.
Why Enable Ahci In Windows 10
Enabling AHCI (Advanced Host Controller Interface) in Windows 10 can greatly improve the overall performance of your computer system. By making this simple change, you can unleash the full potential of your hardware and benefit from advanced features that were previously unavailable. Let’s take a closer look at why enabling AHCI in Windows 10 is essential for optimizing your system.
Improves System Performance
Enabling AHCI in Windows 10 can significantly enhance the performance of your system. This is because AHCI allows for advanced features like hot swapping and native command queuing, which can speed up data transfer and reduce latency. With AHCI enabled, your storage devices can operate at their maximum potential, resulting in faster boot times, quicker file transfers, and overall smoother system performance.
Enables Advanced Features
Enabling AHCI in Windows 10 unlocks advanced features that were previously inaccessible. These features include hot swapping, which allows you to remove and replace storage devices without shutting down the system. Additionally, AHCI enables native command queuing, a feature that optimizes the order in which commands are executed, resulting in improved performance and reduced wear and tear on the storage devices. These advanced features can enhance the overall functionality and reliability of your system.

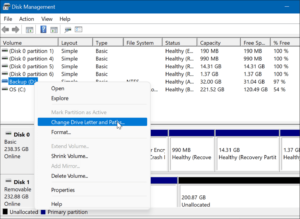
Credit: www.amazon.com
Check If Your System Supports Ahci
Before enabling AHCI in your Windows 10, it’s crucial to determine if your system supports AHCI. This can be done by checking your system’s BIOS settings to see if AHCI is supported.
Access Bios Settings
To access the BIOS settings, restart your computer and press the designated key – often displayed on the screen as the system boots up – to enter the BIOS menu.
Look For Ahci Support
Once in the BIOS settings, navigate to the storage or SATA configuration section to see if AHCI is supported. Look for an option related to AHCI – it may be labeled as “AHCI Mode” or “SATA Mode” – and check if it’s available to be enabled.
Backup Your Data
Enable AHCI in Windows 10 for better performance and backup your data securely. Follow these simple steps to enhance your system’s speed and protect your valuable files.
Importance Of Data Backup
Backing up your data is crucial to ensure the safety and security of your important files and documents. Whether you are a Windows 10 user or not, data loss can occur due to various reasons like hardware failure, system crashes, malware attacks, accidental deletion, or even natural disasters. It is therefore essential to have a backup of your data to protect against such unforeseen circumstances.
Choose A Backup Method
When it comes to choosing a backup method for your data in Windows 10, it is essential to consider your specific requirements and preferences.
Backup To An External Hard Drive Or Ssd
One of the most commonly used backup methods is to store your data on an external hard drive or SSD. This method allows you to create a separate copy of your files and keep them in a physically different location. In case your computer crashes or your files get accidentally deleted, you can easily restore them from the external drive.
Cloud Backup Services
Another popular method is to utilize cloud backup services. These services allow you to store your data on remote servers, accessible through the internet. With cloud backups, your files are securely stored off-site, reducing the risk of data loss caused by physical damage or theft. Additionally, most cloud services offer automatic backups, ensuring your data is continuously protected.
Windows Built-in Backup And Restore Feature
Windows 10 also provides a built-in backup and restore feature that allows you to create system image backups. System image backups capture your entire operating system, including all files, settings, and installed programs. In the event of a system failure, you can easily restore your computer to its previous state using the created system image.
Conclusion
Regardless of the backup method you choose, remember that regularly backing up your data is essential to prevent data loss and minimize the impact of unforeseen events. With multiple backup options available, it is crucial to determine which method suits your needs and provides the security and convenience you require.

Credit: www.amazon.com
Enable Ahci In Windows 10
Are you looking to enhance the performance of your Windows 10 computer? Enabling AHCI (Advanced Host Controller Interface) can significantly improve data transfer speeds and boost overall system efficiency. In this guide, we will walk you through the steps to enable AHCI in Windows 10.
Open Device Manager
To start the process, you need to access Device Manager. Here’s how:
- Press the Windows key and X simultaneously to open the Power User menu.
- From the menu, select Device Manager.
Once Device Manager is open, you’re ready to proceed with the next step.
Update Driver
Before changing the storage controller mode, it’s important to make sure you have the latest driver installed. Follow these steps:
- Locate your storage controller in the Device Manager window.
- Right-click on the controller and choose Update driver.
- Select the option to Search automatically for updated driver software.
- Windows will search for the latest driver and install it if available.
Now that you have the updated driver, it’s time to change the storage controller mode.
Change Storage Controller Mode
Here’s how you can switch the storage controller mode to AHCI:
- Open the Run dialog box by pressing the Windows key and R simultaneously.
- Into the Run dialog box, type in
regeditand hit Enter. - In the Registry Editor window, navigate to
HKEY_LOCAL_MACHINE\System\CurrentControlSet\Services\storahci\StartOverride. - Double-click on StartOverride to modify the value.
- In the Value data field, enter
0and click OK. - Close the Registry Editor and restart your computer.
After the restart, Windows 10 will automatically load the AHCI drivers, and you’ll be able to enjoy the benefits of this enhanced storage interface.
Enabling AHCI in Windows 10 is a simple yet effective way to optimize your computer’s performance. By following these steps, you can unlock the full potential of your storage controller and experience faster data transfers. Upgrade your system today and enjoy a smoother and more efficient computing experience!
Restart Your System And Verify Ahci
To enable AHCI in Windows 10, restart your system and verify the AHCI setting in the BIOS or UEFI. This will ensure that your system is running with AHCI enabled, allowing for better performance and compatibility with modern storage devices.
Restart Your Computer
To enable AHCI in Windows 10, you need to restart your computer. This will allow the changes you make to take effect. Follow these steps:
- Save any ongoing work and close all programs.
- Click on the “Start” button located at the bottom left corner of your screen.
- Select the “Power” icon and then choose “Restart”.
- Wait for your computer to shut down and start up again.
Check Ahci Status
Now that you’ve restarted your system, it’s time to verify if AHCI has been enabled. Here’s what you need to do:
- After your computer finishes restarting, press the “Windows” key and “R” simultaneously. This will open the Run dialog box.
- Type
regeditinto the dialog box and press Enter. This will launch the Registry Editor. - In the Registry Editor, navigate to
HKEY_LOCAL_MACHINE\SYSTEM\CurrentControlSet\Services\msahci. - Look for a key called
"Start"in the right-hand pane. Double-click on it to open its properties. - Make sure the value is set to 0 (zero). This indicates that AHCI is enabled. If the value is 3, it means that AHCI is not enabled.
If you find that AHCI is not enabled, don’t worry. You can change the value to enable it by following these steps:
- Right-click on the
"Start"key and select Modify. - In the Edit DWORD (32-bit) Value window, change the value data to 0 and click OK.
After making this change, you should restart your computer once again for the new AHCI settings to take effect. This will ensure that you can fully benefit from the improved performance AHCI offers.
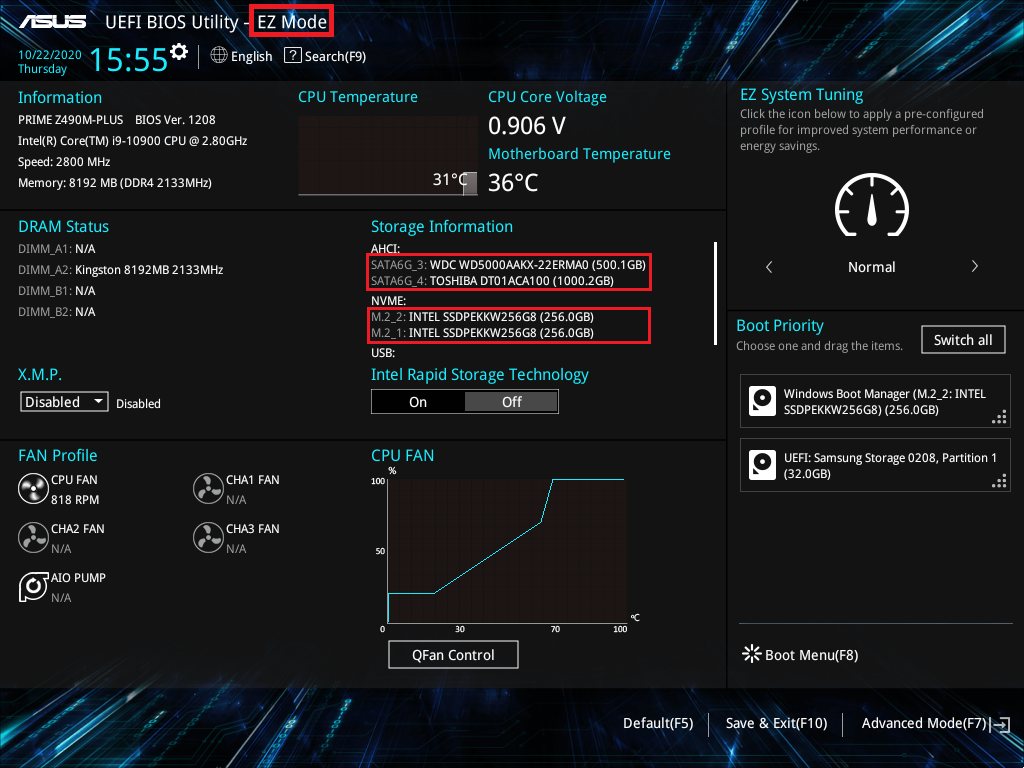
Credit: servers.asus.com
Frequently Asked Questions On Enable Ahci In Windows 10
How To Enable Ahci In Windows 10?
To enable AHCI in Windows 10, follow these steps: 1. Press Win + X and select Device Manager. 2. Expand the IDE ATA/ATAPI controllers category. 3. Right-click the SATA AHCI controller and select Update Driver Software. 4. Choose Browse my computer for driver software.
5. Select the Standard SATA AHCI controller and click Next.
Why Should I Enable Ahci In Windows 10?
Enabling AHCI in Windows 10 offers several benefits. It allows the use of advanced features such as hot swapping and Native Command Queuing, improving disk performance and reducing latency. AHCI also enables TRIM support for SSDs, ensuring optimal performance and longevity.
What Is Ahci And How Does It Work In Windows 10?
AHCI (Advanced Host Controller Interface) is a protocol that allows the operating system to communicate with SATA drives. It provides advanced features such as Native Command Queuing (NCQ) and hot swapping. In Windows 10, AHCI ensures better performance and reliability compared to the older IDE mode.
How Can I Check If Ahci Is Enabled In Windows 10?
To check if AHCI is enabled in Windows 10, follow these steps: 1. Press Win + R and type “regedit” to open the Registry Editor. 2. Navigate to HKEY_LOCAL_MACHINE\SYSTEM\CurrentControlSet\Services\iaStorV. 3. Check the Start value. If it is set to 0, AHCI is enabled.
If it is set to 3, AHCI is not enabled.
Conclusion
To sum up, enabling AHCI in Windows 10 is a crucial step for optimizing your system’s performance and enhancing the speed and efficiency of your storage devices. By following the straightforward steps outlined in this blog post, you can unlock the full potential of your hardware and experience smoother operations.
So why wait? Enable AHCI today and enjoy a seamless computing experience!