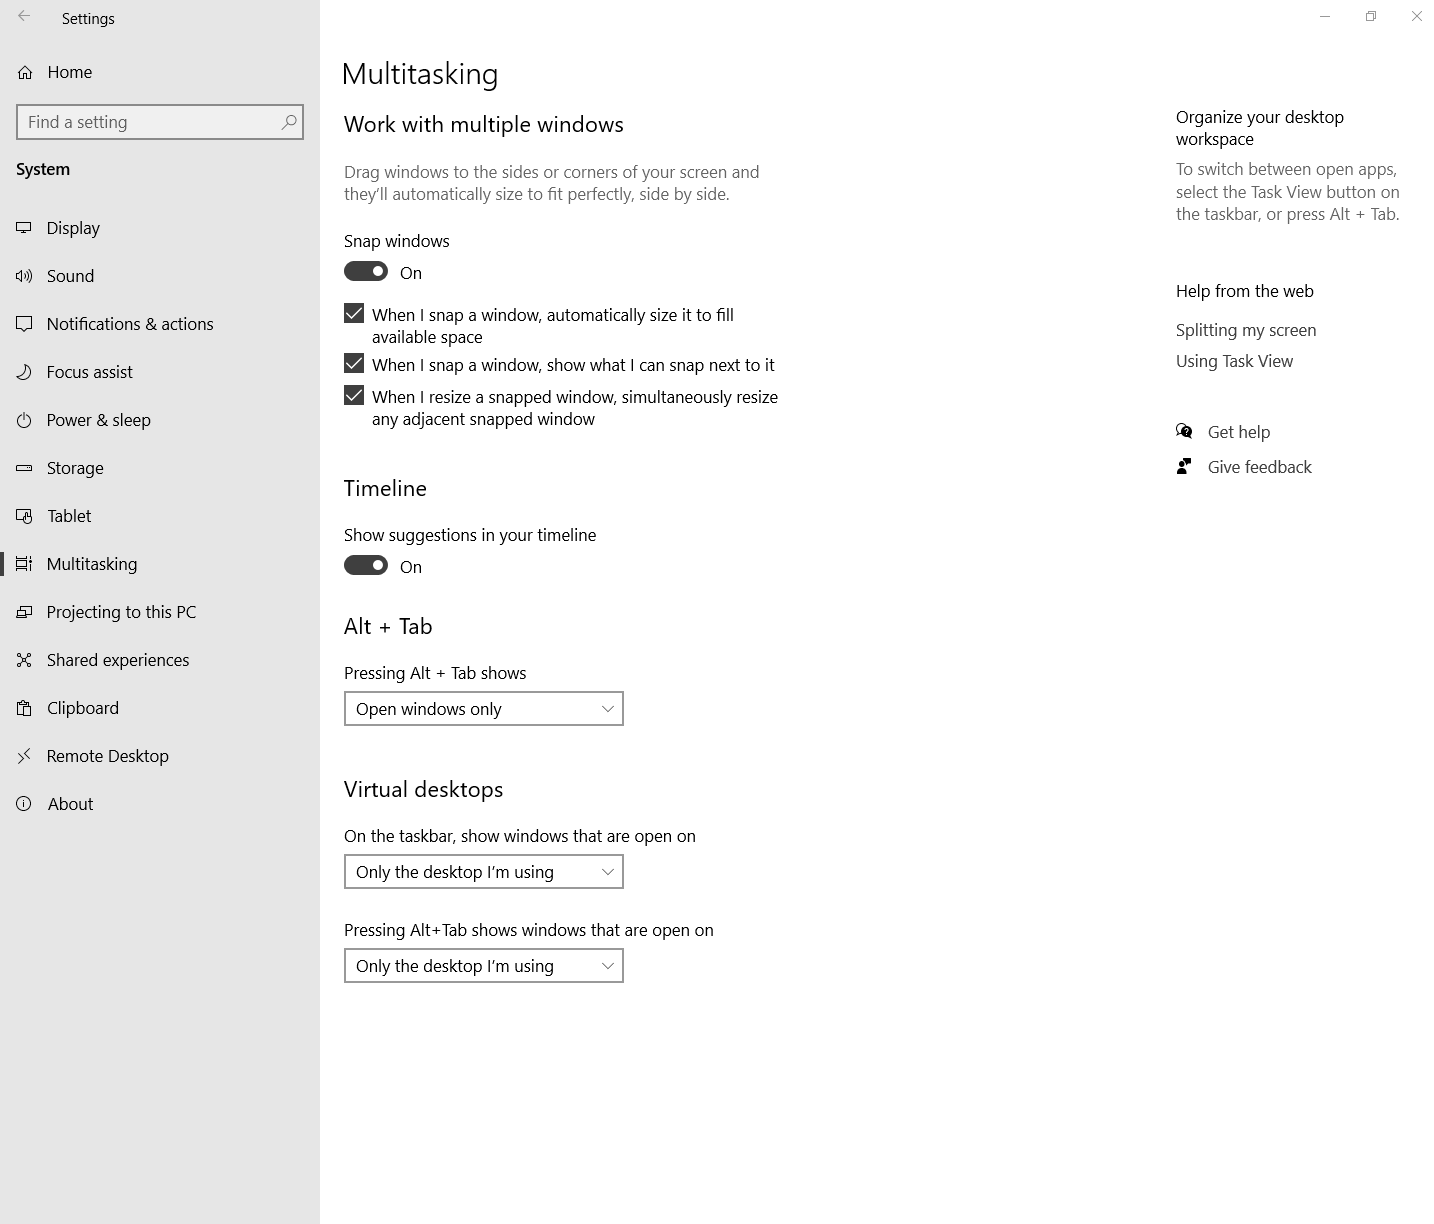
To disable Aero Shake on Windows 11, go to Settings, System, Multitasking, and toggle off “When I shake a window, minimize all other windows.” Aero Shake can be disabled in Windows 11 by accessing the Multitasking settings in the System section of the Settings app.
In Windows 11, Aero Shake can sometimes be an unnecessary feature that can disrupt workflow. Fortunately, it’s simple to disable Aero Shake to prevent accidental window minimizing when moving a window back and forth. By following a few easy steps in the system settings, you can quickly turn off this feature and improve your overall user experience on Windows 11.
Whether you’re new to the system or a seasoned user, knowing how to disable Aero Shake can help streamline your day-to-day computer activities.

Credit: www.amazon.com
Methods To Disable Aero Shake
Methods to Disable Aero Shake in Windows 11 can be accomplished through different approaches. Whether you prefer to use the Windows Settings or make modifications via the Registry Editor, there are multiple ways to prevent unintentional window minimizing and maximizing with the Aero Shake feature. Let’s explore these methods in more detail.
Using The Windows Settings
To disable Aero Shake using the Windows Settings, follow these simple steps:
- Click on the Start button and select Settings.
- In the Settings window, choose System.
- From the left-hand menu, click on Multitasking.
- Locate the section labeled Shake window minimization and ensure the switch is set to Off.
Disabling Aero Shake Via Registry Editor
If you prefer to disable Aero Shake through the Registry Editor, you can do so by following these steps:
- Press the Windows key + R to open the Run dialog box.
- Type Regedit and press Enter to open the Registry Editor.
- Navigate to the following key: HKEY_CURRENT_USER\Software\Microsoft\Windows\CurrentVersion\Explorer\Advanced.
- Right-click on an empty space within the right-hand pane and select New, then choose DWORD (32-bit) Value.
- Name the new DWORD DisallowShaking.
- Double-click on DisallowShaking and set the Value data to 1.
- Click OK and then close the Registry Editor.

Credit: pureinfotech.com

Credit: www.pcmag.com
Frequently Asked Questions For Disable Aero Shake On Windows 11
How Do I Disable Aero Shake On Windows 11?
To disable Aero Shake on Windows 11, go to the Settings app, choose “System,” then “Multitasking. ” Under the “Snap” section, toggle off the switch for “When I shake a window, minimize all other windows. ” Aero Shake will now be disabled, preventing unintentional window minimization.
What Is Aero Shake On Windows 11?
Aero Shake is a feature on Windows 11 that allows users to quickly minimize all other open windows when they shake a single window vigorously. This can be useful for decluttering the desktop or focusing on a specific window. However, some users may find this feature disruptive, hence the need to disable it.
Can I Re-enable Aero Shake On Windows 11?
Yes, if you want to re-enable Aero Shake on Windows 11, simply follow the steps mentioned earlier to access the “Multitasking” settings. Toggle the switch for “When I shake a window, minimize all other windows” back on, and Aero Shake will be enabled again, allowing you to use the feature as before.
Conclusion
Disabling Aero Shake on Windows 11 is a simple and effective way to enhance your user experience. By preventing accidental window minimizing and maximizing, you can work more efficiently and avoid unnecessary distractions. Follow the step-by-step guide provided in this blog post to disable Aero Shake and enjoy a smoother workflow on your Windows 11 system.
Experience fewer interruptions and stay focused on the task at hand.


