For Dexcom G7 troubleshooting, check sensor placement and verify the transmitter is secure. Restart your device if issues persist.
The Dexcom G7 is a crucial tool for continuous glucose monitoring, offering real-time insights for diabetes management. Ensuring its optimal performance is vital for accurate readings and effective health management. Users may occasionally encounter issues that disrupt its functionality. Proper sensor placement and secure transmitter attachment are common troubleshooting steps.
Restarting the device can also resolve minor glitches. Familiarity with these basic troubleshooting techniques can help maintain the device’s reliability. Keeping the sensor area clean and dry further enhances accuracy. Regularly updating the app ensures access to the latest features and improvements. Consistent monitoring leads to better health outcomes.
Credit: www.dexcom.com
Introduction To Dexcom G7
The Dexcom G7 is a continuous glucose monitoring (CGM) system. It helps people with diabetes manage their blood sugar levels. This advanced technology ensures real-time glucose tracking. It also provides alerts to prevent dangerous highs and lows.
Overview
The Dexcom G7 is the latest in CGM technology. It is designed for ease of use and accuracy. Users can monitor their glucose levels with their smartphone. It offers quick and reliable readings. The device is small, lightweight, and discreet.
Features
| Feature | Description |
|---|---|
| Real-Time Monitoring | Provides glucose readings every 5 minutes. |
| Smartphone Compatibility | Works with both Android and iOS devices. |
| Custom Alerts | Set personalized glucose level alerts. |
| Long Sensor Life | The sensor lasts up to 10 days. |
| Easy Application | Simple and painless sensor insertion. |
Credit: www.dexcom.com
Common Issues
The Dexcom G7 is a popular glucose monitoring system. Despite its reliability, users sometimes face common issues. This section will help you troubleshoot these problems.
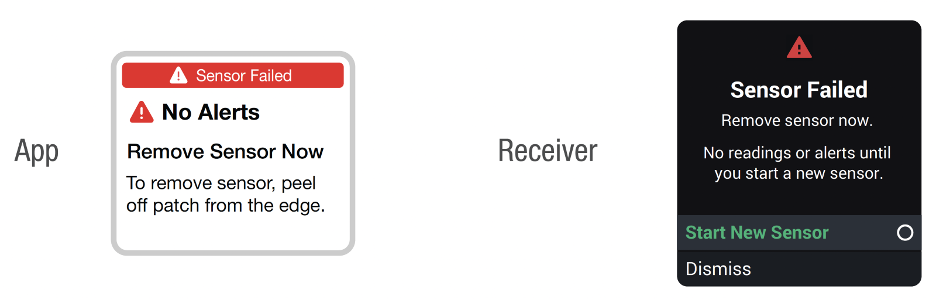
Sensor Failures
Sensor failures can be frustrating. Here are common reasons:
- Incorrect Placement: Ensure the sensor is placed correctly.
- Expired Sensor: Check the sensor’s expiration date.
- Insertion Error: Follow the insertion steps carefully.
If the sensor fails, try these steps:
- Remove the faulty sensor.
- Clean the insertion site.
- Insert a new sensor.
- Calibrate the new sensor.
For persistent issues, contact Dexcom support.
Signal Loss
Signal loss can interrupt monitoring. Check these factors:
- Distance: Keep the receiver close to the sensor.
- Obstructions: Avoid barriers between the sensor and receiver.
- Battery Life: Ensure both devices are charged.
To fix signal loss:
- Restart the receiver.
- Reposition the sensor if needed.
- Check for software updates.
Consistent signal issues may need professional help.
Sensor Calibration
Sensor Calibration is a crucial step in ensuring the accuracy of your Dexcom G7 continuous glucose monitoring system. Proper calibration helps the sensor provide precise glucose readings, which is vital for managing diabetes effectively. In this section, we will explore when to calibrate your sensor and provide a step-by-step guide to make the process easy.
When To Calibrate
Calibrating your Dexcom G7 sensor is not always necessary, but there are specific instances when calibration can enhance accuracy:
- Initial Setup: Calibrate your sensor during the initial setup for accurate readings.
- Sensor Errors: If you receive sensor error messages, calibration can resolve the issue.
- Inconsistent Readings: When glucose readings seem off or inconsistent, calibration can help.
Step-by-step Guide
Follow these simple steps to calibrate your Dexcom G7 sensor:
- Wash Your Hands: Ensure your hands are clean to avoid contamination.
- Check Blood Glucose: Use a glucose meter to measure your blood glucose level.
- Open the App: Launch the Dexcom G7 app on your smartphone.
- Select Calibration: Navigate to the calibration option in the app menu.
- Enter Reading: Input the blood glucose reading from your meter.
- Confirm Calibration: Verify and confirm the calibration in the app.
Calibration helps maintain the accuracy of your Dexcom G7 sensor. Ensure you follow these steps to get reliable glucose readings.
App Connectivity
App connectivity is crucial for a seamless Dexcom G7 experience. It ensures real-time glucose monitoring and timely alerts. Issues with connectivity can disrupt this flow. Below, we discuss common problems and solutions.
Bluetooth Problems
Bluetooth issues can interfere with the Dexcom G7 app’s connectivity. Here are some common problems and how to solve them:
- Bluetooth Not Turning On: Make sure your device’s Bluetooth is enabled. Go to your device’s settings and check the Bluetooth status.
- Device Not Pairing: Ensure the Dexcom G7 is within range (20 feet). Remove any other Bluetooth devices that might interfere.
- Connection Dropping: Restart your device. Sometimes, a simple restart can fix connection issues.
App Updates
Keeping your Dexcom G7 app updated is essential. Updates often fix bugs and improve performance. Follow these steps to ensure your app is up-to-date:
- Open your device’s app store.
- Search for “Dexcom G7”.
- Check if an update is available. If yes, click on “Update”.
Regular updates enhance functionality and security. Check for updates weekly to stay current.
Battery And Charging
The Dexcom G7 is a compact device. It is crucial to understand its battery and charging needs. This ensures the device works efficiently.
Battery Life
The Dexcom G7 battery typically lasts up to 10 days. This depends on usage. Always monitor the battery status on your device.
| Usage | Expected Battery Life |
|---|---|
| Normal Usage | 8-10 days |
| Heavy Usage | 6-8 days |
Charging Tips
- Use the original charger for your Dexcom G7.
- Avoid overcharging. Remove the device when fully charged.
- Charge the device in a cool environment.
- Do not use damaged charging cables.
Follow these tips to extend your device’s battery life. Always keep your device well-charged. This ensures it works when you need it most.
Table Representation
| Charging Tip | Benefit |
|---|---|
| Use original charger | Ensures optimal charging |
| Avoid overcharging | Prevents battery damage |
| Charge in cool environment | Maintains battery health |
| Avoid damaged cables | Ensures safe charging |

Credit: www.youtube.com
Error Codes
The Dexcom G7 is a trusted device for continuous glucose monitoring. Yet, users sometimes face error codes that disrupt its functionality. Understanding these error codes can help resolve issues quickly and restore the device’s performance.
Common Codes
Several error codes can appear on your Dexcom G7. Here are some of the most common:
- E01: Sensor failure
- E02: Calibration error
- E03: Signal loss
- E04: High glucose levels
How To Resolve
Each error code has a specific solution. Follow these steps to fix them:
| Error Code | Solution |
|---|---|
| E01: Sensor failure | Replace the sensor and restart the device. |
| E02: Calibration error | Calibrate the sensor using a blood glucose meter. |
| E03: Signal loss | Move closer to the receiver and avoid obstacles. |
| E04: High glucose levels | Check your glucose levels and take corrective action. |
Addressing these error codes ensures your Dexcom G7 operates smoothly. Keep this guide handy for quick troubleshooting.
Data Accuracy
Ensuring data accuracy with your Dexcom G7 is crucial. Accurate data helps you manage your glucose levels better. This section will guide you through ensuring accuracy and troubleshooting errors.
Ensuring Accuracy
To ensure data accuracy, start with proper sensor placement. Place the sensor on a flat area of your skin. Clean the area before applying the sensor. Use an alcohol wipe for cleaning.
Also, calibrate your Dexcom G7 regularly. Use a fingerstick glucose meter for calibration. Enter the readings into your device promptly. This helps the sensor stay accurate.
Avoid physical impacts to the sensor. High-impact activities can affect the sensor’s performance. Protect the sensor during sports or heavy tasks.
Troubleshooting Errors
If you notice data discrepancies, check the sensor first. Ensure it is not loose or damaged. Replace the sensor if needed.
Check your device’s software for updates. An outdated software can cause errors. Update your device to the latest version.
Maintain good hygiene around the sensor. Dirt or sweat can affect readings. Keep the sensor area clean and dry.
If errors persist, try restarting the device. Turn it off, wait a few seconds, then turn it back on. This simple step can resolve many issues.
If these steps don’t help, contact Dexcom support. They can provide further assistance and solutions.
| Steps | Actions |
|---|---|
| 1 | Check sensor placement |
| 2 | Calibrate with fingerstick |
| 3 | Update software |
| 4 | Maintain hygiene |
| 5 | Restart device |
Customer Support
Having issues with your Dexcom G7? Don’t worry, customer support can help. In this section, we’ll provide the necessary information to contact Dexcom’s customer support team. We’ll also guide you on when it’s best to reach out to them.
Contact Information
The Dexcom support team is ready to assist you. Below are the key details:
- Phone Number: +1-888-738-3646
- Email: support@dexcom.com
- Website: Dexcom Support
You can also reach out via their social media channels:
When To Reach Out
It’s important to know when to seek help from customer support. Here are some scenarios:
- Sensor Malfunction: If your sensor is not working.
- App Issues: If the Dexcom app crashes or shows errors.
- Delivery Problems: If you didn’t receive your order.
- Account Issues: If you can’t log into your Dexcom account.
Below is a table summarizing common issues and the best contact method:
| Issue | Contact Method |
|---|---|
| Sensor Malfunction | Phone |
| App Issues | |
| Delivery Problems | Phone |
| Account Issues |
Remember, the Dexcom support team is here to ensure a smooth experience for you.
Frequently Asked Questions
Why Is My Dexcom G7 Sensor Not Working?
Your Dexcom G7 sensor might not work due to improper insertion, expired sensor, or Bluetooth connectivity issues. Ensure correct placement and check device settings.
Can You Restart A Dexcom G7 Sensor?
No, you can’t restart a Dexcom G7 sensor. Each sensor is for single-use only and must be replaced.
Why Is My Dexcom G7 Losing Signal?
Your Dexcom G7 may lose signal due to Bluetooth interference, low transmitter battery, or being too far from your device.
Why Is My Dexcom G7 Giving False Readings?
Dexcom G7 may give false readings due to sensor placement issues, calibration errors, or expired sensors. Ensure proper installation and check sensor life.
Conclusion
Troubleshooting your Dexcom G7 can seem daunting, but with these tips, it’s manageable. Always ensure your device is clean and calibrated. Regular updates and proper sensor placement can prevent common issues. Stay proactive, and your Dexcom G7 will provide accurate readings, helping you manage your health effectively.