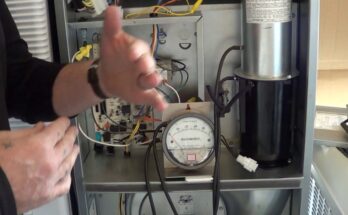
To troubleshoot a Curtis coffee brewer, check for proper power supply and ensure the water line is connected. Also, inspect for any blockages.
Curtis coffee brewers are known for their reliability, but like any machine, they can encounter issues. Troubleshooting your brewer can often be straightforward with the right steps. Common problems include power supply issues, water line blockages, or malfunctioning components. Start by ensuring the machine is plugged in and receiving power.
Next, verify that the water line is properly connected and free from obstructions. Regular maintenance and cleaning can prevent many common issues. Understanding these basics can save time and keep your coffee brewer functioning efficiently, ensuring you always have a fresh cup of coffee.

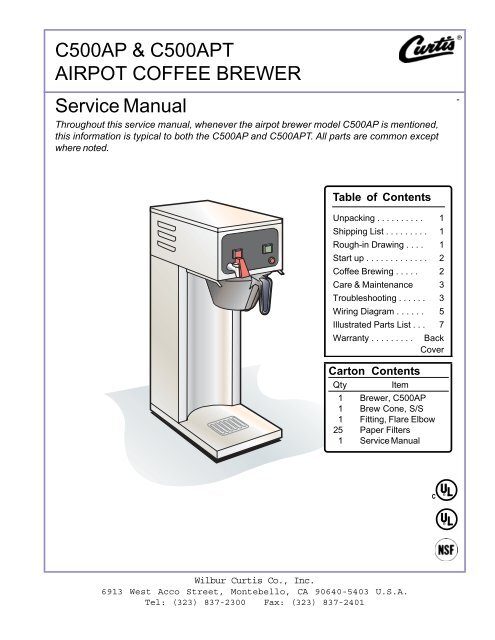
Credit: www.partstown.com
Common Issues
Many coffee lovers use Curtis Coffee Brewers daily. Sometimes, issues arise. This guide helps you troubleshoot common problems.
No Power
If your Curtis Coffee Brewer has no power, try these steps:
- Check if the brewer is plugged in properly.
- Look at the outlet for power. Try another device.
- Inspect the power cord for any damage.
- Check the circuit breaker. Reset it if needed.
Weak Coffee
- Use the correct coffee-to-water ratio. Too much water weakens coffee.
- Check the grind size. Finer grinds make stronger coffee.
- Clean the brewer regularly. Residue affects coffee strength.
- Ensure the water temperature is right. Hot water extracts more flavor.
Slow Brewing
Slow brewing can be frustrating. Address it with these tips:
- Clean the spray head. A clogged spray head slows brewing.
- Descale the brewer. Mineral buildup can slow the process.
- Check the water filter. Replace it if it’s old or clogged.
- Ensure the water line is not kinked or blocked.
Basic Maintenance
Ensuring your Curtis Coffee Brewer works well requires regular care. Basic maintenance involves cleaning, descaling, and replacing filters. These steps help keep your brewer in top shape.
Cleaning Steps
Cleaning your coffee brewer daily is crucial. Follow these steps for optimal performance:
- Turn off the brewer and unplug it.
- Remove the brew basket and wipe it clean.
- Wash the carafe with warm soapy water.
- Use a damp cloth to clean the exterior surfaces.
- Rinse all parts thoroughly and let them air dry.
Descaling Process
Descaling helps remove mineral deposits from your coffee brewer. Perform this process monthly:
- Mix one part vinegar with one part water.
- Pour the solution into the water reservoir.
- Run a brew cycle without coffee grounds.
- Discard the solution and rinse the carafe.
- Run two more cycles with fresh water to rinse.
Replacing Filters
Filters need regular replacement to ensure coffee quality. Follow these tips:
- Change the water filter every two months.
- Replace the coffee filter after every use.
- Ensure the filters fit properly to avoid leaks.
By following these basic maintenance steps, your Curtis Coffee Brewer will continue to make great coffee.
Error Codes
Curtis Coffee Brewers are known for their reliability. Yet, sometimes they display error codes. Understanding these codes is crucial for quick fixes. This section will guide you through understanding codes and resetting errors.
Understanding Codes
Error codes help diagnose issues with your Curtis Coffee Brewer. Knowing what each code means can save you time. Below is a table of common error codes and their meanings:
| Error Code | Meaning |
|---|---|
| ERR1 | Water temperature too high |
| ERR2 | Water temperature too low |
| ERR3 | Water level sensor issue |
| ERR4 | Brewer overheating |
Recognizing these codes can help you take immediate action. For example, ERR1 means the water temperature is too high. You should check the heating element.
Resetting Errors
Resetting error codes is straightforward. Follow these steps to reset your Curtis Coffee Brewer:
- Turn off the machine.
- Unplug the power cord.
- Wait for 30 seconds.
- Plug the power cord back in.
- Turn on the machine.
After these steps, the error code should disappear. If the error persists, you might need professional help. Always refer to the user manual for more details.
Here are some quick tips to prevent errors:
- Regularly clean the brewer.
- Check the water level sensor.
- Ensure proper ventilation.
By understanding and resetting error codes, you can maintain your Curtis Coffee Brewer easily.
Credit: www.yumpu.com
Water Supply Problems
Facing water supply problems with your Curtis Coffee Brewer? A steady water supply is crucial for optimal brewing. Issues can cause inconsistent brewing or machine damage. Let’s troubleshoot these problems step-by-step.
Checking Connections
Ensure all connections are secure. Loose connections can disrupt water flow. Check the following:
- Water inlet: Ensure the inlet hose is properly attached.
- Filter: Inspect the water filter for clogs.
- Valves: Make sure all valves are open.
Flow Rate Issues
The flow rate affects brewing quality. An inconsistent flow rate can cause brewing issues. Here’s how to address flow rate issues:
- Check for blockages in the water line.
- Ensure the pump is functioning correctly.
- Inspect the spray head for clogs or damage.
Maintaining a steady flow rate ensures optimal coffee extraction. Regularly clean and inspect all components.
Temperature Concerns
Experiencing temperature issues with your Curtis Coffee Brewer? Temperature consistency is crucial for a perfect cup of coffee. Let’s explore common temperature concerns and solutions.
Adjusting Settings
Start by checking the brewer’s temperature settings. Adjusting the settings may solve the problem. Follow these steps:
- Turn off the brewer and unplug it.
- Locate the temperature control panel.
- Adjust the temperature to the desired level.
- Plug in and turn on the brewer. Test the water temperature.
If the temperature is still off, further troubleshooting may be needed.
Thermostat Issues
The thermostat controls the water temperature. A malfunctioning thermostat may cause temperature fluctuations. To troubleshoot:
- Turn off and unplug the brewer.
- Check the thermostat for visible damage.
- If damaged, replace the thermostat.
- If not damaged, use a multimeter to test for continuity.
A faulty thermostat often needs replacement. Consult the user manual for specific instructions.
| Symptom | Possible Cause | Solution |
|---|---|---|
| Water too hot | Thermostat set too high | Adjust thermostat setting |
| Water too cold | Thermostat malfunction | Replace thermostat |
Temperature concerns can affect coffee quality. Ensure your Curtis Coffee Brewer operates at the correct temperature for the best results.
Brewing Consistency
Ensuring a consistent brew is essential for any coffee enthusiast. Curtis Coffee Brewers are known for their reliability. Still, achieving the perfect cup every time requires attention to detail. Below, we explore key factors that influence brewing consistency.
Grind Size
Grind size significantly impacts your coffee’s flavor and strength. Too coarse a grind results in weak coffee. Too fine a grind can make it bitter. Use a medium grind for most Curtis Coffee Brewers. This allows for optimal extraction.
| Grind Size | Effect |
|---|---|
| Coarse | Weak Coffee |
| Fine | Bitter Coffee |
| Medium | Balanced Flavor |
Water Quality
Water quality is crucial for brewing consistency. Hard water can affect the coffee’s taste. Soft water may not extract flavors well. Use filtered water for the best results. This helps maintain the brewer’s performance.
- Hard Water: Can make coffee taste off.
- Soft Water: May lead to under-extraction.
- Filtered Water: Ideal for balanced flavor.
Testing water quality is simple. Use a water hardness test kit. Aim for a balanced mineral content. This ensures consistent, delicious coffee every time.
Advanced Troubleshooting
Advanced troubleshooting for the Curtis Coffee Brewer can save time and money. This section will guide you through deeper diagnostics and solutions.
Component Testing
Testing individual components can pinpoint specific issues. Here are steps to follow:
- Check the heating element: Use a multimeter to test continuity.
- Inspect the thermostat: Ensure it regulates temperature correctly.
- Examine electrical connections: Look for loose or corroded wires.
- Review the water pump: Confirm it moves water effectively.
Use a multimeter for electrical tests. Follow safety protocols to avoid accidents.
Professional Help
Some issues may require professional assistance. Here’s when to call an expert:
| Issue | When to Call a Professional |
|---|---|
| Persistent Electrical Problems | If fuses or breakers keep tripping |
| Water Leaks | If you notice consistent leaking |
| Complex Component Failures | If the machine won’t start |
Professionals have the tools and expertise to address complex issues. Regular maintenance by experts can also prevent future problems.
Preventative Tips
Keeping your Curtis Coffee Brewer in top shape requires some preventative measures. These steps help avoid unexpected breakdowns and ensure a consistent coffee experience. Follow these essential tips to maintain your coffee brewer efficiently.
Regular Inspections
Performing regular inspections helps identify issues early. Check the machine’s exterior for any visible damage. Inspect the power cord for wear and tear. Ensure all buttons and switches function properly.
Look inside the brewer for any residue buildup. Clean the brew basket to avoid clogs. Verify that the water reservoir is free from contaminants.
Scheduled Maintenance
Following a scheduled maintenance routine can extend the life of your coffee brewer. Create a maintenance calendar to track important tasks.
| Maintenance Task | Frequency |
|---|---|
| Descale the brewer | Monthly |
| Replace water filter | Every 3 months |
| Clean brew basket | Weekly |
Use a descaling solution to remove mineral deposits. Replace the water filter every three months to ensure clean water. Clean the brew basket weekly to prevent residue buildup.
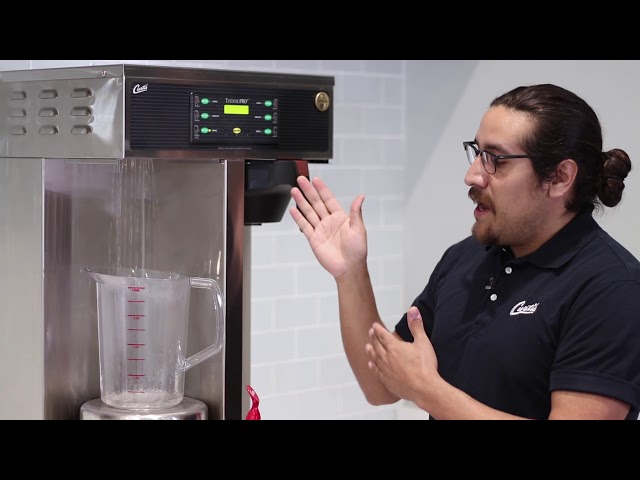
Credit: www.youtube.com
Frequently Asked Questions
Why Is My Coffee Maker On But Not Brewing?
Your coffee maker might not brew due to clogged filters, insufficient water, or a faulty pump. Clean the machine regularly.
Why Is My Coffee Machine Not Working?
Your coffee machine may not be working due to power issues, clogged filters, or water reservoir problems. Check power supply, clean filters, and ensure the water tank is full. If problems persist, consult the user manual or contact customer support.
How Long Does It Take A Curtis Coffee Maker To Heat Up?
A Curtis coffee maker typically takes about 5-7 minutes to heat up. This ensures optimal brewing temperature.
How Do You Unclog A Coffee Maker That Won’t Brew?
To unclog a coffee maker, mix equal parts water and vinegar. Run a brewing cycle, then flush with water. Repeat if needed.
Conclusion
Regular maintenance of your Curtis Coffee Brewer ensures optimal performance. Address common issues promptly to avoid disruptions. Use this troubleshooting guide to keep your machine running smoothly. A well-maintained coffee brewer delivers consistent quality, enhancing your coffee experience. Stay proactive and enjoy hassle-free brewing every day.