To check the DPI of an image on Windows 11, right-click on the image file, select “Properties,” go to the “Details” tab, and look for the “Image DPI” information. This will provide you with the DPI (dots per inch) value of the image.
When working with digital images, it’s crucial to know the DPI as it determines the quality and resolution of the image. Whether you’re designing graphics for a website, preparing images for print, or simply analyzing the quality of an image, understanding the DPI is essential for achieving the desired results.
By following the simple steps on Windows 11, you can quickly access the DPI of any image and ensure that your visual content meets the required standards for various applications. Having this knowledge empowers you to create and utilize images effectively across different platforms and mediums.
What Is Dpi?
What is DPI?
DPI, or dots per inch, refers to the measurement of the printed dots on an inch of a physical print. In the context of digital images, DPI represents how many pixels are squeezed into a linear inch of an image. Understanding DPI is essential when working with digital images, as it directly affects the print and display quality. In this blog post, we will delve into the significance of DPI in images and guide you on how to check the DPI of an image on Windows 11.
Understanding Dpi
DPI plays a crucial role in determining the quality and clarity of an image when it is printed or displayed on a screen. It is a common misconception that higher DPI always equates to better image quality, but this is not always the case. It is important to consider the viewing distance and the intended use of the image when determining the appropriate DPI for a particular project.
Importance Of Dpi In Images
The DPI of an image is vital when it comes to ensuring that the printed or displayed image appears crisp and detailed. Images with low DPI may appear pixelated or fuzzy when printed, while excessively high DPI can result in unnecessarily large file sizes that may not be optimally displayed or printed. It is essential to strike a balance and consider the specific requirements of each project to determine the optimal DPI for an image.
Credit: riverdi.com
Checking Dpi On Windows 11
Checking DPI on Windows 11 is crucial for ensuring the quality and clarity of your images. Whether you want to know the resolution of an image for printing or to assess its suitability for digital use, Windows 11 offers convenient ways to check the DPI of an image with just a few clicks.
Using Windows 11 File Explorer
To check the DPI of an image using File Explorer in Windows 11:
- Locate the image file on your computer.
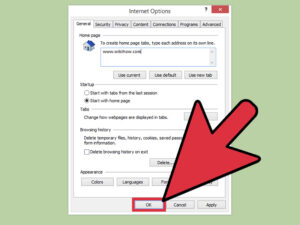
- Right-click on the image file to open the context menu.
- Select “Properties” from the menu to open the properties dialog.
- Navigate to the “Details” tab in the properties dialog.
- Scroll down to find the “Image” section, where you can view the DPI information.
Using Windows 11 Photos App
If you prefer using the Photos app to check the DPI of an image on Windows 11, you can follow these steps:
- Open the Photos app and navigate to the image you want to inspect.
- Click on the image to open it in full view.
- Next, select the three-dot menu icon in the top-right corner and choose “Info” from the dropdown.
- In the image information panel, you can find the DPI details under the “Image” section.
Methods To Change Dpi On Windows 11
Want to check the DPI of an image on Windows 11? Here are some methods to easily change the DPI settings and get accurate results. Find out the DPI of your images effortlessly.
Windows 11 comes with a variety of customization options that allow users to personalize their experience. One such customization is changing the DPI (dots per inch) of an image. DPI refers to the resolution of an image and affects its clarity and sharpness on the screen.
Changing Dpi Through Display Settings
To change the DPI on Windows 11, follow these steps:
- Click on the Windows Start menu and select “Settings”.
- In the Settings window, click on “System”, then select “Display”.
- Scroll down and click on the “Advanced display settings” link.
- Under the “Advanced display settings” section, click on the “Change resolution” link.
- You will see a slider labeled “Scale and layout”. Adjust the slider to change the DPI of your screen.
- Click on “Apply” to save the changes.
- Windows may ask you to sign out and sign back in to apply the new DPI settings.
Changing Dpi Through Registry Editor
If you prefer a more advanced method, you can change the DPI through the Registry Editor. Here’s how:
- Press the Windows key + R to open the Run dialog box.
- Type “regedit” and press Enter to open the Registry Editor.
- In the Registry Editor, navigate to the following path:
HKEY_CURRENT_USER\Control Panel\Desktop - Look for the entry named “LogPixels” in the right-hand pane. If it doesn’t exist, right-click in the right-hand pane and select “New” > “DWORD (32-bit) Value”.
- Double-click on “LogPixels” and enter the desired DPI value. The default value is 96 DPI, and higher values increase the DPI.
- Click “OK” to save the changes.
- Sign out and sign back in to apply the new DPI settings.
By following these methods, you can easily change the DPI of an image on Windows 11, ensuring optimal viewing experience and readability.
Common Issues With Dpi
Struggling with DPI issues on Windows 11? Checking the DPI of an image can be a common headache. It’s important to ensure the image displays correctly on different screens, so knowing how to check and adjust DPI is essential for optimal resolution.
DPI (dots per inch) is an important aspect when it comes to the clarity and resolution of images and text on your Windows 11 device. However, there are some common issues that users may encounter related to DPI settings. In this article, we will discuss two major issues that can arise: blurry images at different DPI settings and incompatibility with certain applications.
Blurry Images At Different Dpi Settings
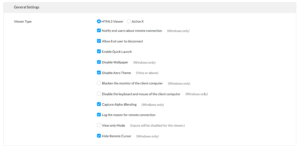
One of the frustrating issues that users may face is the appearance of blurry images when adjusting the DPI settings on their Windows 11 device. This usually happens when the DPI scaling is not properly applied to all elements of the image, resulting in a distorted or pixelated appearance. This can be particularly noticeable when you switch between different DPI settings, causing images to lose their sharpness or clarity.
In order to address this issue, it is important to ensure that the image you are working with is of high resolution and suitable for the desired DPI setting. Additionally, some applications may have their own DPI settings that need to be adjusted separately. It is recommended to consult the application’s documentation or support resources to properly configure DPI settings for optimal image quality.
Incompatibility Issues With Certain Applications
Another issue that can arise with DPI settings on Windows 11 is the incompatibility of certain applications. Some older applications or software may not be fully optimized to work with high DPI settings, resulting in distorted or improperly displayed content. This can include issues such as misaligned text, overlapping elements, or even inoperable features within the application.
To address this issue, it is advisable to check for updates or patches from the application developer that specifically address compatibility with Windows 11 and high DPI settings. In some cases, you may need to adjust the compatibility settings for the application to ensure it works smoothly with your current DPI configuration. Alternatively, you can also try running the application in compatibility mode or explore alternative software options that are designed to work seamlessly with high DPI settings.
Tips For Handling Dpi On Windows 11
Optimizing images for different DPI settings is crucial to ensure that they look their best on various devices and screen resolutions. When images are not optimized, they can appear pixelated or stretched, resulting in a poor user experience.
To optimize your images for different DPI settings on Windows 11, consider the following tips:
- Use high-resolution images: Start with high-resolution images as they will provide better quality when scaled down.
- Understand DPI scaling: Familiarize yourself with the concept of DPI scaling and how it affects the appearance of images. DPI scaling refers to the adjustment of the size of text, apps, and other items on your screen based on your screen resolution.
- Test across different devices: Test your images on various devices with different screen resolutions to ensure they retain their quality and clarity.
- Use image optimization tools: Utilize image optimization tools to compress and resize your images without compromising their quality. These tools can help reduce the file size of your images, making them load faster on different devices.
- Consider responsive design: Implement responsive design techniques that automatically adjust the size and resolution of your images based on the device or screen resolution. This ensures that your images look optimal regardless of the DPI settings.
When it comes to editing images on Windows 11 and adjusting their DPI, it’s important to use software that is compatible with the operating system. This ensures that you have access to the necessary features and tools to handle DPI effectively. Here are a few recommendations:
- Adobe Photoshop: Adobe Photoshop is a popular choice among professionals for image editing and manipulation. It offers advanced features that allow you to adjust DPI, resize images, and optimize them for different screen resolutions.
- GIMP: GIMP (GNU Image Manipulation Program) is a free and open-source image editing software that is compatible with Windows 11. It provides a wide range of tools for editing, resizing, and optimizing images.
- Paint.NET: Paint.NET is a user-friendly image editing software that is suitable for beginners. It supports Windows 11 and offers basic editing features, including DPI adjustment and image resizing.
By using compatible software for image editing, you can simplify the process of adjusting DPI settings and ensure that your images maintain their quality and clarity across different devices.

Credit: keys.direct

Credit: www.amazon.com
Frequently Asked Questions Of Check The Dpi Of An Image On Windows 11
How Do I Check The Dpi Of An Image On Windows 11?
To check the DPI of an image on Windows 11, you can use the built-in File Explorer. Simply right-click on the image file, select “Properties,” go to the “Details” tab, and look for the “Horizontal resolution” and “Vertical resolution” values under the “Image” section.
What Is The Significance Of Dpi In Images?
DPI stands for Dots Per Inch, and it measures the resolution of an image. A higher DPI means more dots, resulting in a higher quality and clearer image. DPI is important for printing purposes as it determines the level of detail in the printed output.
Can I Change The Dpi Of An Image On Windows 11?
Unfortunately, Windows 11 does not have a built-in feature to change the DPI of an image. However, there are various third-party image editing software available that allow you to modify the DPI settings. Simply open the image in the editing software, locate the DPI settings, and make the desired changes.
Why Is It Important To Know The Image Dpi?
Knowing the DPI of an image is crucial for various reasons. It helps determine the print quality and size of an image, ensuring it appears sharp and clear when printed. Additionally, some platforms and applications have specific DPI requirements, so knowing the image DPI helps ensure compatibility and optimal display.
Conclusion
To wrap up, checking the DPI of an image on Windows 11 is a simple yet important step in ensuring optimal visual quality. By following the methods discussed in this blog post, you can easily determine the DPI of any image.
Remember, understanding the DPI helps you make informed decisions when it comes to printing, resizing, or using images in various digital projects. Start utilizing this knowledge today and take control of your image optimization efforts with Windows 11.