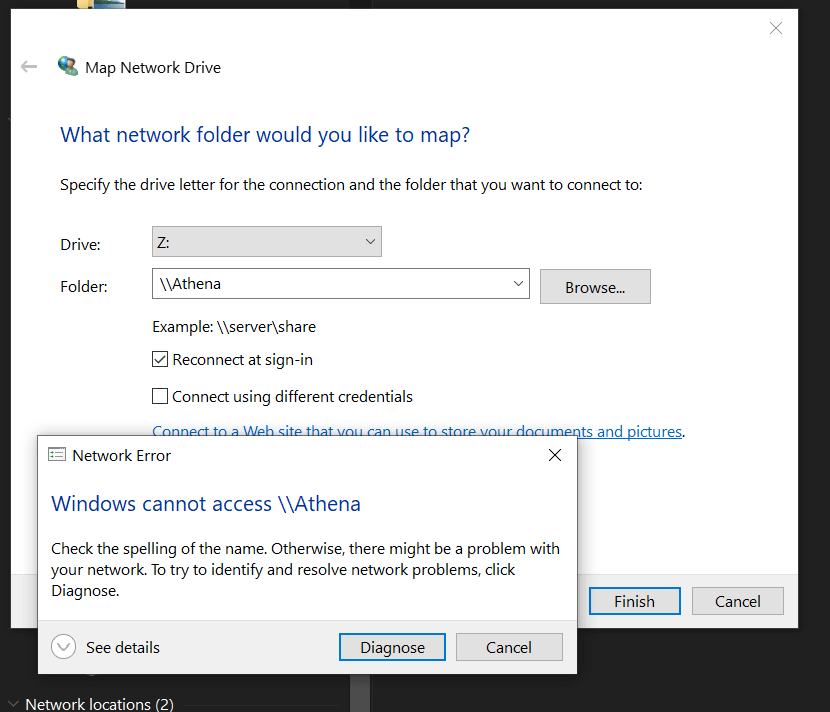
Facing issues mapping a network drive on Windows 10? You can resolve this problem by ensuring that both the network location and the credentials are correctly set up.
When mapping a network drive on Windows 10, it is essential to ensure that the network location is accessible and that the correct credentials are used to establish the connection. This process involves verifying the network path and ensuring that the appropriate permissions are in place.
By following these steps, you can successfully map a network drive on Windows 10 and access the shared files and folders on the network.
Common Issues With Mapping Network Drives In Windows 10
When mapping network drives in Windows 10, users may encounter several common issues that can hinder the process. Understanding these challenges and learning how to resolve them is crucial for a seamless experience while mapping network drives in Windows 10.
Incorrect Network Path
One of the most frequent issues when attempting to map a network drive in Windows 10 is entering an incorrect network path. Sometimes, users may mistakenly type the wrong network address, leading to a failed connection. Ensuring the accuracy of the network path is vital to successful mapping.
Authentication And Permissions
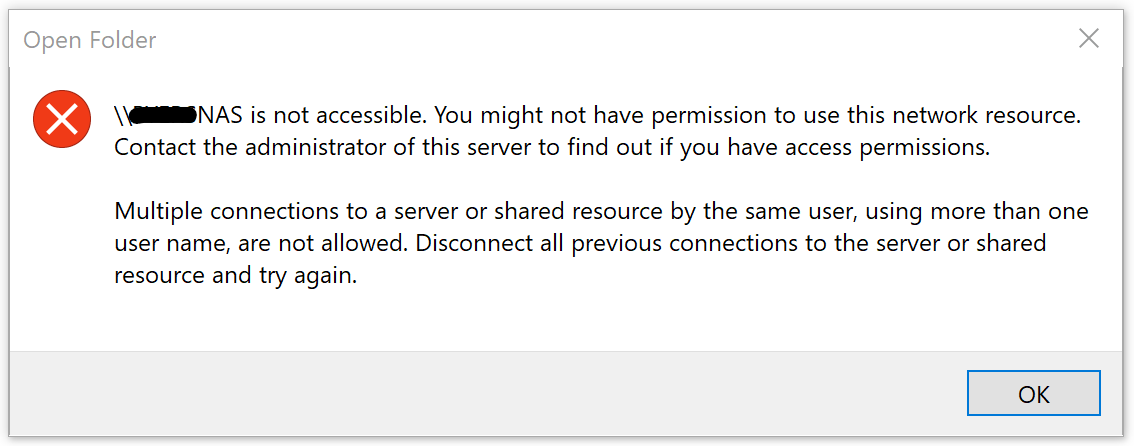
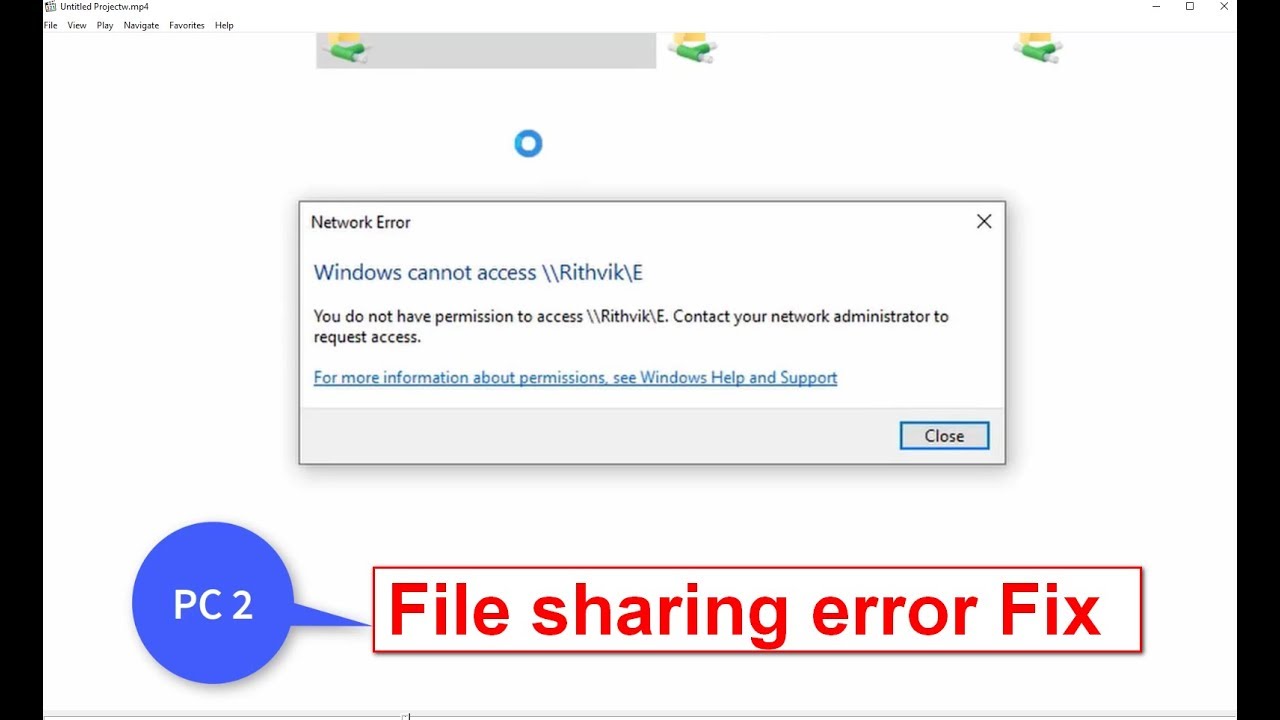
Another common stumbling block is authentication and permissions. When mapping a network drive, it’s essential to have the appropriate permissions to access the shared folder. Additionally, incorrect authentication details can impede the mapping process. Confirming the user credentials and permissions is critical for overcoming this obstacle.
Firewall And Antivirus Settings
Firewall and antivirus settings can also cause issues with mapping network drives in Windows 10. Sometimes, the firewall settings may block the communication to the network drive, leading to connection failures. Similarly, overzealous antivirus software may interfere with the mapping process. Adjusting these settings can often resolve the issue and facilitate successful network drive mapping.
Credit: answers.microsoft.com
Solutions To Fix Network Drive Mapping Issue In Windows 10
When encountering network drive mapping issues in Windows 10, it can be frustrating to troubleshoot and resolve. Here, we will explore valuable solutions to address common problems and ensure smooth network drive mapping in your Windows 10.
Verifying The Network Path
If you are unable to map a network drive in Windows 10, the first step is to verify the network path to ensure it is accessible. Open the Command Prompt and use the “ping” command to test the connectivity to the network path. Use the following format: ping network_path. If the ping is successful, the network path is accessible, otherwise, it may be a network connectivity issue that needs to be resolved.
Checking Authentication And Permissions
Another common cause of network drive mapping issues is authentication and permissions. Ensure that the user account you are using has the necessary permissions to access the network drive. Check the sharing permissions on the remote server and verify that the user account has been granted appropriate access rights. If necessary, contact your network administrator to verify and adjust the permissions.
Adjusting Firewall And Antivirus Settings
Firewall and antivirus software can sometimes block the network drive mapping process. Check the firewall settings on both your Windows 10 computer and the remote server to ensure that the necessary ports and protocols are allowed for file sharing. Additionally, temporarily disable your antivirus software to see if it is causing the issue. If disabling the antivirus resolves the problem, adjust its settings to allow network drive mapping.
Using Command Prompt To Map Network Drives
Having trouble mapping a network drive in Windows 10? Learn how to easily resolve the issue by using Command Prompt, allowing you to efficiently access your shared files and resources. Expertly follow our step-by-step guide for a seamless solution.
Mapping network drives on Windows 10 can be easily accomplished using Command Prompt. Command Prompt is a powerful tool that allows users to interact with the operating system through textual commands. In this section, we will explore how to map network drives using Command Prompt and various commands.
Using ‘net Use’ Command
The ‘net use’ command in Command Prompt is widely used to map network drives. It is a simple yet effective way to connect to network shared folders and access them as local drives. To use the ‘net use’ command, follow these steps:
- Open the Command Prompt by typing ‘cmd’ in the Windows search bar and selecting the Command Prompt app.
- Once the Command Prompt window is open, type the following command:
- Press Enter, and if the command is executed successfully, you will see a message stating that the command completed successfully.
- You can now go to File Explorer and navigate to the mapped network drive, which will appear as a new drive with the assigned drive letter.
net use \\network_path /user:username password
Replace \\\\network_path with the path to the network folder you want to map, username with your network username, and password with your network password. The asterisk () in the command represents an available drive letter that can be automatically assigned.
Persistent Mapping With ‘net Use’
If you want to ensure that the mapped network drive remains connected even after a system reboot, you can use the ‘net use’ command with the ‘/persistent:yes’ parameter. This will make the mapping persistent. Follow these steps to create a persistent mapping with the ‘net use’ command:
- Open the Command Prompt as described earlier.
- Type the following command:
- Press Enter, and if the command is executed successfully, the mapping will be persistent.
- Now, even after a system restart, the mapped network drive will be automatically connected.
net use \\network_path /user:username password /persistent:yes
Mapping Network Drives With Drive Letter
By default, when using the ‘net use’ command, an available drive letter is automatically assigned to the mapped network drive. However, if you want to specify a specific drive letter, you can do so by modifying the command. Here’s how:
- Open the Command Prompt.
- Type the following command:
- Replace Z: with the desired drive letter you want to assign to the network drive.
- Press Enter, and if the command is executed successfully, the network drive will be mapped with the specified drive letter.
- You can now access the network folder by simply going to the drive letter you assigned.
net use Z: \\network_path /user:username password

Credit: learn.microsoft.com
Troubleshooting Mapping Issues In Windows 10
Encountering issues while mapping a network drive on Windows 10? Don’t worry! Troubleshooting mapping problems can be done swiftly by checking network connectivity, ensuring proper permissions, and using the correct path. By following these steps, you can resolve the inability to map a network drive on Windows 10.
Clearing Cached Credentials
One common issue that can cause network drive mapping problems in Windows 10 is cached credentials. Cached credentials are stored login credentials that are used to automatically sign in to network resources without having to enter a username and password every time. However, if the cached credentials are outdated or incorrect, they can prevent the mapping of network drives.
To clear the cached credentials, follow these simple steps:
- Press the Windows key + R to open the Run dialog box.
- Type control keymgr.dll and press Enter.
- In the Credential Manager window, click on Windows Credentials.
- Under the Generic Credentials section, locate the credentials related to the network drive that is not mapping correctly.
- Click on the credential entry and select Remove.
- Restart your computer and try mapping the network drive again.
Checking Network Adapter Settings
Another potential cause of mapping issues in Windows 10 is incorrect network adapter settings. If the network adapter is not configured properly, it can prevent the successful mapping of network drives.
To check and adjust network adapter settings, follow these steps:
- Right-click on the Start button and select Network Connections.
- In the Network Connections window, locate the network adapter that is connected to the network.
- Right-click on the network adapter and select Properties.
- In the Properties window, ensure that the checkbox for File and Printer Sharing for Microsoft Networks is checked.
- Click OK to save the changes.
- Restart your computer and try mapping the network drive again.
Updating Network Drivers
Outdated or incompatible network drivers can also cause network drive mapping problems in Windows 10. It is essential to keep your network drivers up to date to ensure smooth network operations.
To update network drivers in Windows 10, follow these simple steps:
- Right-click on the Start button and select Device Manager.
- In the Device Manager window, expand the Network Adapters category.
- Right-click on the network adapter and select Update driver.
- Choose the option Search automatically for updated driver software.
- Windows will search for the latest drivers and install them if available.
- Restart your computer and try mapping the network drive again.
Alternative Methods For Accessing Network Shares
Are you experiencing trouble mapping a network drive on Windows 10? Don’t worry, there are alternative methods you can try to access network shares easily. In this blog post, we will explore three alternative methods that can help you overcome the issue and access your network shares without any hassle. Let’s dive in!
Using Ip Address Instead Of Network Path
If you are having trouble mapping a network drive using the network path, an alternative method is to use the IP address of the target device. This method can be particularly helpful when the network path is not functioning correctly. To use this method, follow these simple steps:
- First, you need to find the IP address of the device you want to access. You can do this by opening the Command Prompt and typing ‘ipconfig’ followed by pressing Enter.
- Once you have the IP address, open File Explorer on your Windows 10 computer and click on ‘This PC’.
- Next, click on the ‘Computer’ tab on the top left corner of the File Explorer window and select ‘Map Network Drive’ from the dropdown menu.
- In the ‘Folder’ field, enter the IP address of the device you want to access in the following format: ‘\\
\share’. - Click ‘Finish’ to map the network drive using the IP address. You should now be able to access the shared folder on the network.
Creating Shortcut To Network Share
Another alternative method for accessing network shares is by creating a shortcut directly to the network share. This eliminates the need to map the network drive. To create a shortcut to a network share, follow these steps:
- Open File Explorer on your Windows 10 computer and navigate to the location where you want to create the shortcut.
- Right-click on an empty space in the File Explorer window and select ‘New’ from the context menu. Then select ‘Shortcut’.
- In the ‘Create Shortcut’ window, click on the ‘Browse’ button and navigate to the network share you want to create a shortcut for.
- Select the network share and click ‘OK’.
- Click ‘Next’ and then enter a name for the shortcut.
- Click ‘Finish’ to create the shortcut. You can now access the network share by simply double-clicking on the shortcut.
Using Third-party Network Mapping Tools
If the first two methods didn’t solve your problem, you can consider using third-party network mapping tools. These tools provide advanced features and options for mapping network drives on Windows 10. Some popular third-party network mapping tools include NetDrive, ExpanDrive, and WebDrive.
These tools offer a user-friendly interface and allow you to easily map network drives using various protocols such as FTP, SFTP, WebDAV, and more. They can help you establish a stable connection to your network shares and provide additional functionalities to enhance your file sharing experience.
By using these alternative methods, you can overcome the issue of not being able to map a network drive on Windows 10. Whether it’s using the IP address, creating a shortcut, or utilizing third-party network mapping tools, you now have multiple options to access your network shares with ease. Give these methods a try and enjoy seamless file sharing on your Windows 10 computer!
Credit: m.youtube.com
Frequently Asked Questions For Cant Map Network Drive Windows 10
Can’t Map Network Drive In Windows 10?
If you’re unable to map a network drive in Windows 10, it could be due to various reasons. Make sure you’re connected to the correct network, check your network settings, and ensure that the network drive is accessible and functioning properly.
If the issue persists, try restarting your computer and router, or reach out to your network administrator for further assistance.
Why Won’t Windows 10 Let Me Map A Network Drive?
Windows 10 may not let you map a network drive due to several factors. Check if you have proper permissions to access the network drive, ensure that your device is connected to the network, and check for any firewall or antivirus settings that may be blocking the connection.
If the problem persists, try restarting your computer or contact your network administrator for assistance.
How Do I Fix The Error “cannot Find Network Drive” In Windows 10?
To fix the error message “Cannot find network drive” in Windows 10, start by ensuring that the network drive is properly connected and accessible. Double-check the spelling of the network path and verify that you have the necessary permissions to access the drive.
You can also try restarting your computer or mapping the drive using the IP address instead of the hostname.
What Are The Common Causes Of Network Drive Mapping Issues In Windows 10?
Common causes of network drive mapping issues in Windows 10 include incorrect network settings, lack of proper permissions, network connectivity problems, firewall or antivirus software blocking the connection, or outdated network drivers. Troubleshoot these factors to pinpoint the cause of the issue and resolve it accordingly.
Conclusion
To wrap it up, troubleshooting network drive mapping issues on Windows 10 can be a frustrating experience. However, by following the steps outlined in this blog post, you can overcome these challenges and successfully map your network drive. Remember to ensure your device’s network and sharing settings are properly configured, and use the correct credentials when accessing shared folders.
With a little patience and the right approach, you’ll be able to seamlessly connect and access your network drive on Windows 10.