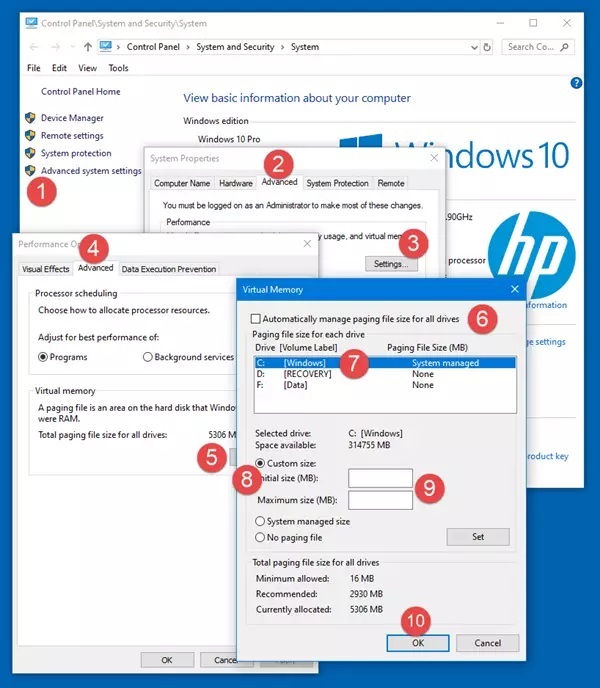
To adjust the page file in Windows 10, go to Control Panel, choose System and Security, then click on System. Open Advanced system settings, go to the Advanced tab, and click Settings under Performance.
Then, go to the Advanced tab, click Change under Virtual memory, uncheck “Automatically manage paging file size for all drives”, select the drive you want to adjust, and choose “Custom size”. Input the initial size and maximum size for the page file, and click Set then OK.
In Windows 10, adjusting the page file is straightforward. By customizing the virtual memory settings, you can optimize the performance of your system. This guide will walk you through the step-by-step process of adjusting the page file to suit your specific needs and enhance the overall functionality of your Windows 10 operating system.
Credit: support.esri.com
Why Adjusting Page File Is Important
Adjusting page file in Windows 10 is crucial for optimizing system performance and ensuring smooth operation. Understanding the significance of page file and how it impacts your computer’s performance can help in making informed decisions for improving efficiency. Let’s delve into the following key aspects related to page file in Windows 10.
What Is Page File?
Page file, also known as virtual memory, is a space on the hard drive that Windows uses as if it were RAM. When the physical RAM in a computer is fully utilized, Windows starts using the page file to store data temporarily. It allows the system to continue running without sufficient physical memory.
How Page File Affects System Performance
The page file significantly influences system performance. When the physical memory (RAM) is exceeded, the system relies on the page file, which can lead to slower performance. Adjusting the size of the page file can help optimize system resources and enhance overall performance by preventing excessive reliance on virtual memory.
Determining The Ideal Page File Size
When it comes to optimizing page file size in Windows 10, it’s crucial to determine the ideal size to ensure smooth system performance. Understanding the current page file usage and calculating the recommended page file size are essential steps in this process.
Understanding Current Page File Usage
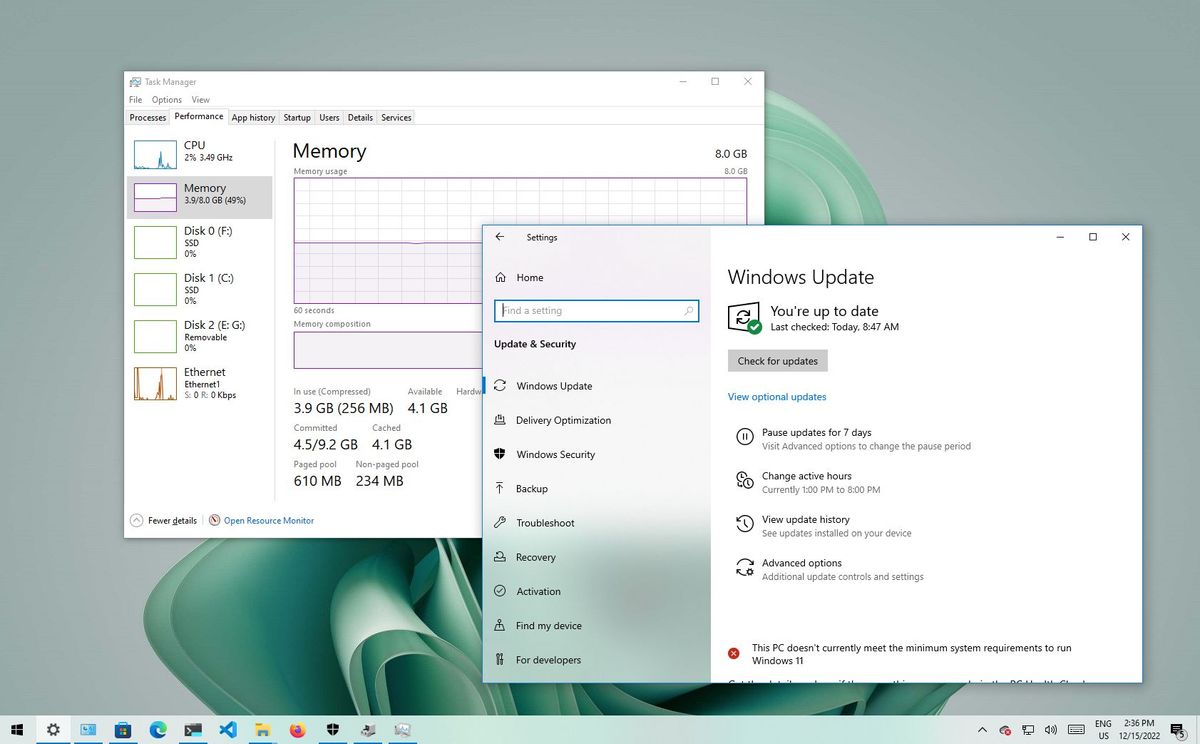
Before determining the ideal page file size, it’s important to understand how the current page file is being utilized. You can monitor the page file usage in the Performance tab of the Task Manager. Look for the “Commit Charge” section to gain insights into your system’s current memory and virtual memory usage. This information will help you make an informed decision about the page file size.
Calculating Recommended Page File Size
Calculating the recommended page file size involves considering various factors such as the amount of physical RAM installed on the system and the specific usage patterns of your applications. A general rule of thumb is to set the initial size of the page file to be 1.5 times the size of your installed RAM, with the maximum size being 3 times the physical RAM amount.
Adjusting Page File In Windows 10
Adjusting Page File in Windows 10 allows users to optimize virtual memory, enhancing their computer’s performance. By adjusting the page file, users can allocate space on their hard drive for storing temporary data, ensuring smooth multitasking and faster system response.
Adjusting the page file in Windows 10 is a crucial step in optimizing your computer’s performance. The page file, also known as the virtual memory, acts as a temporary storage space that helps your computer handle tasks effectively. By adjusting the page file size, you can ensure that your system has enough memory to run efficiently. In this blog post, we will guide you through the process of accessing the system properties and changing the page file size on your Windows 10 system.Accessing System Properties
To adjust the page file size on your Windows 10 system, you first need to access the system properties:- Right-click on the Start button and select System from the context menu.
- In the System window, click on the Advanced system settings link situated on the left side of the window.
- A new System Properties window will open with the Advanced tab selected.
Changing Page File Size
Follow these steps to adjust the page file size on your Windows 10 system:- In the System Properties window, click on the Settings button, located under the Performance section.
- A new Performance Options window will open with the Advanced tab selected.
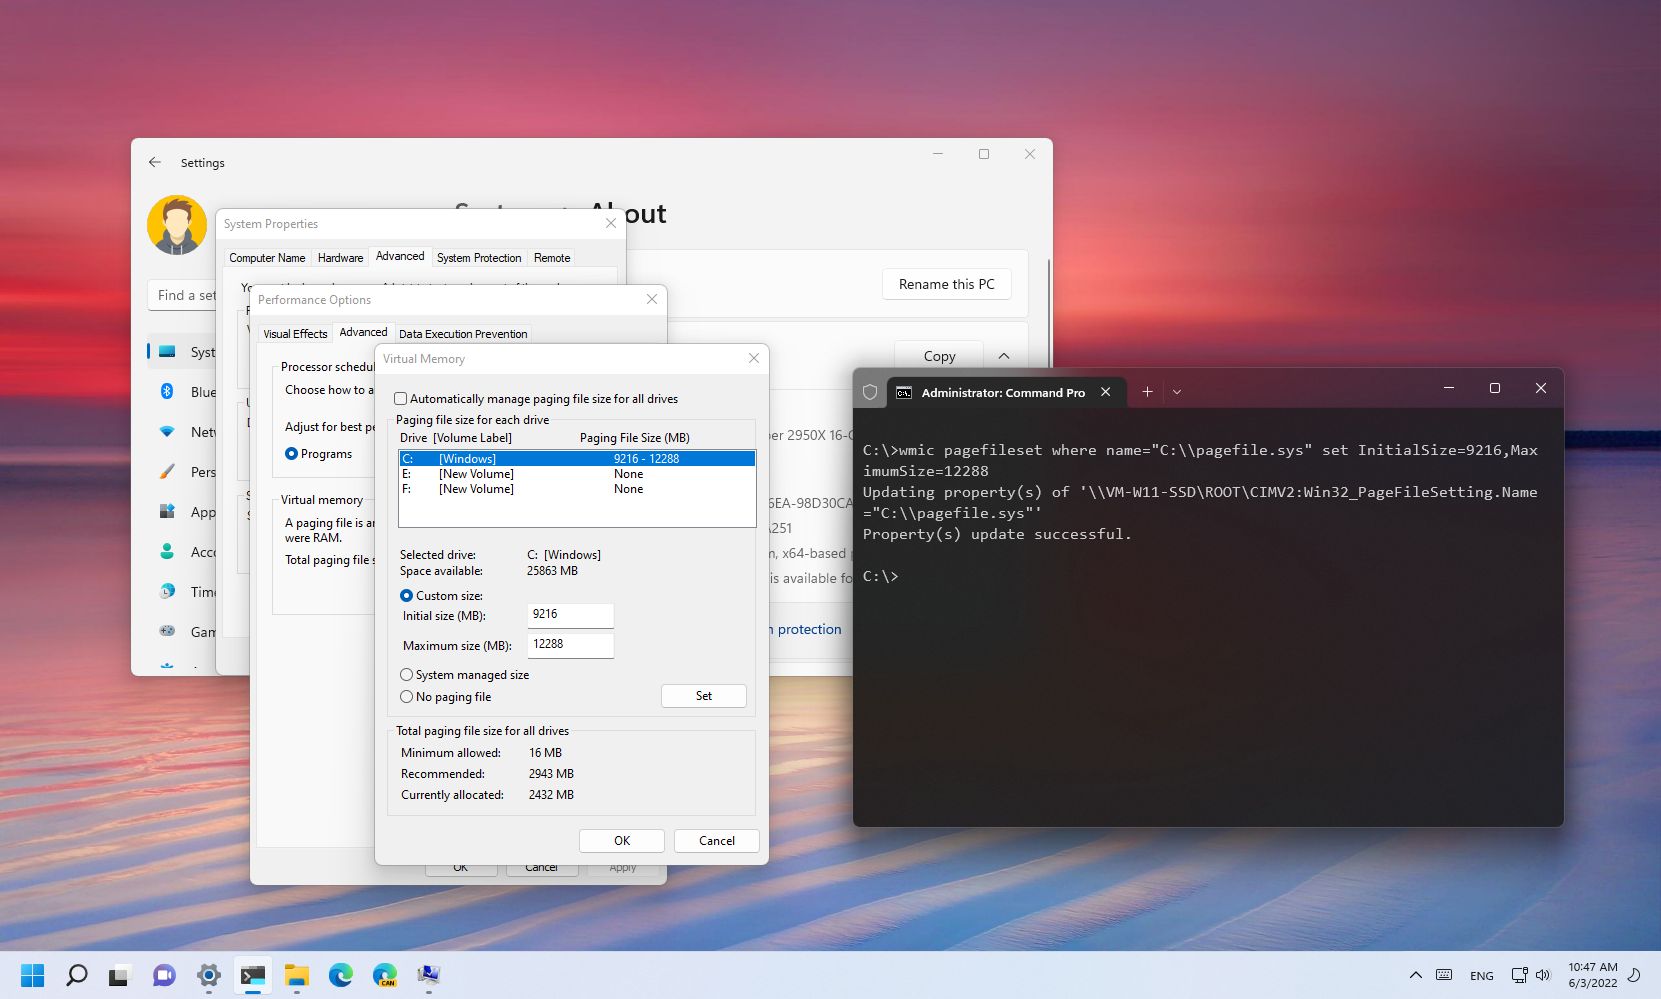
- In the Virtual memory section, click on the Change button.
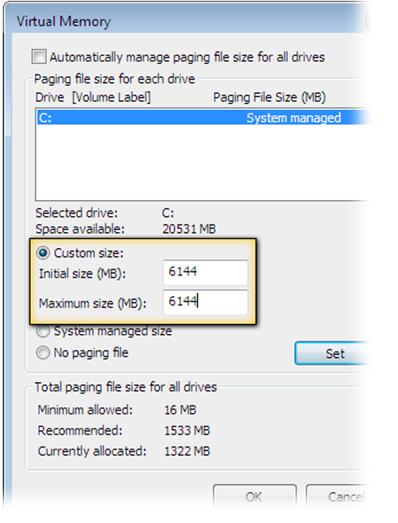
- Uncheck the Automatically manage paging file size for all drives option.
- Select the drive for which you want to adjust the page file size and choose the Custom size option.
- Enter the desired Initial size and Maximum size values in megabytes (MB).
Credit: www.windowscentral.com
Best Practices For Page File Management
Adjusting the page file settings in Windows 10 can greatly improve system performance and prevent crashes or slowdowns caused by insufficient memory. By properly managing the page file, you can ensure that your computer has enough virtual memory to handle demanding tasks. In this article, we will explore the best practices for page file management in Windows 10.
Keeping Page File On Primary Drive
One of the best practices for page file management in Windows 10 is to keep the page file on the primary drive. The primary drive usually refers to the drive where the operating system is installed, typically the C: drive. Placing the page file on the primary drive ensures faster access times and reduces the chances of errors or system slowdowns.
Setting Page File To System Managed
Setting the page file to system managed is another recommended practice for page file management in Windows 10. When the page file is set to system managed, Windows automatically adjusts the size of the page file based on the system requirements. This helps optimize system performance and ensures that sufficient virtual memory is available for running various applications and processes.
Monitoring Page File Performance
Monitoring the performance of the page file is essential to detect any issues or bottlenecks that may be hindering the system’s performance. By keeping an eye on the page file usage, you can identify if the system requires additional virtual memory or if the page file size needs adjustment.
To monitor the page file performance in Windows 10, you can open the Task Manager by pressing Ctrl + Shift + Esc and navigating to the “Performance” tab. From there, click on “Memory” in the left-hand side panel to view the page file usage and related statistics.
Keeping these best practices in mind, you can effectively manage the page file in Windows 10 and optimize your system performance for a smoother computing experience.
Other Performance Boosting Techniques
Adjusting the page file in Windows 10 is just one way to optimize your system’s performance. There are several other techniques you can employ to squeeze out every last drop of speed and responsiveness from your PC. In this section, we’ll explore three additional methods that can help enhance your computer’s performance even further.
Upgrading Hardware Components
When it comes to improving your PC’s performance, upgrading certain hardware components can make a world of difference. By investing in a faster processor, additional RAM, or a solid-state drive (SSD), you can significantly boost your computer’s processing speed and overall performance. These upgrades can provide a noticeable difference, particularly when running resource-intensive applications or multitasking.
Optimizing Startup Programs
One common cause of sluggish startup and slow system boot times is the presence of too many unnecessary programs running in the background. By optimizing your startup programs, you can reduce the burden on your computer’s resources and speed up your system’s startup process. To accomplish this, open the Task Manager, navigate to the Startup tab, and disable any programs that you do not require to launch automatically.
Cleaning Temporary Files
Over time, temporary files can accumulate on your computer, taking up valuable disk space and slowing down your system. To ensure optimal performance, it is important to regularly clean out these temporary files. On Windows 10, you can use the built-in Disk Cleanup utility to quickly identify and delete unnecessary files. This will not only free up storage space but also improve your computer’s performance by reducing clutter.
Credit: www.windowscentral.com
Frequently Asked Questions For Adjust Page File In Windows 10
How Do I Adjust The Page File In Windows 10?
To adjust the page file in Windows 10, go to the Control Panel, click on System and Security, then click on System. Next, click on Advanced system settings, and under the Performance section, click on Settings. In the Performance Options window, go to the Advanced tab, and under the Virtual Memory section, click on Change.
Here, you can adjust the page file size according to your needs.
What Is The Page File In Windows 10?
The page file, also known as the virtual memory file, is a hidden system file on your hard drive that Windows 10 uses as a temporary storage area for data that cannot fit into your computer’s RAM. It acts as an extension of your computer’s physical memory, allowing the system to store and retrieve data when the RAM becomes full.
Why Would I Need To Adjust The Page File In Windows 10?
Adjusting the page file in Windows 10 can help optimize your computer’s performance and prevent crashes. By increasing the page file size, you allow Windows to use more virtual memory when the RAM is running low, ensuring that your system can handle demanding applications and processes without slowing down or experiencing errors.
Conversely, if you have ample RAM, reducing the page file size can free up disk space.
Conclusion
To optimize your Windows 10 system, adjusting the page file can greatly enhance performance. By allocating the page file appropriately, you can ensure that your computer efficiently uses its virtual memory. Remember to follow the step-by-step guide provided in this blog post to adjust your page file settings correctly.
Increasing the page file size can prevent crashes and improve overall system responsiveness. Implement these adjustments and enjoy a smoother computing experience.