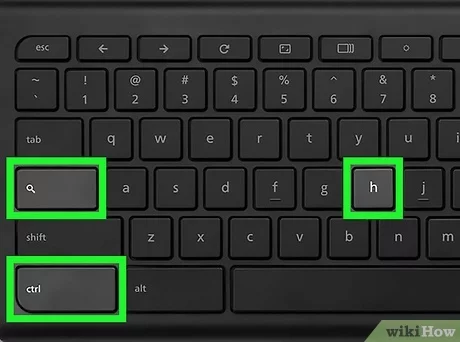
To reset your Chromebook, press and hold the Refresh key, and then press the Power button. Release both keys once the device starts.
Resetting your Chromebook can resolve technical issues and return the device to its original state. A factory reset is a quick solution for those experiencing software problems or preparing to sell their Chromebook. By initiating a powerwash, all locally stored data will be erased to ensure privacy and optimal performance.
This process is often necessary when troubleshooting persistent issues or to wipe personal information from the system. Performing this task is straightforward, requiring only a few steps, and is an essential skill for Chromebook users seeking to maintain their device’s efficiency and security.

Credit: www.google.com
Introduction To Chromebook Resets
Chromebooks are known for their simplicity and efficiency. Yet, like all devices, they sometimes require a fresh start. Resetting a Chromebook can resolve many issues. It can bring a sluggish system back to life or prepare your device for a new user. In this guide, we will walk through the reasons for a reset and the different types of resets you can perform on your Chromebook.
Why A Reset Might Be Necessary
- Performance issues: Fixes slowdowns and crashes.
- Software glitches: Solves unexpected behavior or errors.
- Preparation for sale: Removes personal information safely.
- Update problems: Corrects failed or stuck updates.
Types Of Resets For Chromebooks
Two main reset options exist for Chromebooks:
-
Powerwash: This factory reset erases all the data on your device. It returns the Chromebook to its original state.
-
Hard reset: It restarts the hardware and refreshes the system. It does not erase your files.
Below is a comparison between Powerwash and Hard reset:
| Type of Reset | What it Does | When to Use |
|---|---|---|
| Powerwash | Erases all data | New user setup |
| Hard Reset | Refreshes system | Quick fix issues |
Credit: www.google.com
Pre-reset Preparations
Resetting a Chromebook is a big step. Before you commence, complete these key pre-reset steps. This will ensure that your reset is smooth and risk-free. Keeping your data safe and your device ready is crucial. Follow this guide to prepare your Chromebook for reset.
Backing up your dataBacking Up Your Data
Backing up your data is vital. Before resetting, ensure all important files are safe. Use Google Drive or an external storage device. Here’s how to get started:
- Open Google Drive.
- Click ‘New’ then ‘File upload’ or ‘Folder upload’.
- Select your files
- Click ‘Open’ to upload.
For using external storage:
- Connect the storage device to your Chromebook.
- Open the Files app.
- Drag files to your storage device.
Ensuring Power For The Process
Keep your Chromebook plugged in during the reset. This prevents any interruptions that could cause issues. Check the steps below:
- Connect your Chromebook to its charger.
- Ensure the power outlet is functioning.
- Look for the battery icon to confirm charging.
Soft Reset For Quick Fixes
Is your Chromebook acting up? A soft reset might be just what it needs. This simple step can fix many issues without losing your data. You can do this quick fix in a matter of minutes. It’s like giving your device a fresh start. Ready to breathe new life into your Chromebook? Let’s walk through the steps together.
Performing A Simple Reboot
Rebooting your Chromebook is easy. Follow these simple steps:
- Turn off your Chromebook by clicking your account photo.
- Select the Power icon.
- Wait a few seconds, then press the power button.
This process closes all running apps and clears temporary data. Most minor glitches and issues disappear after a reboot.
Troubleshooting Common Issues Post-soft Reset
Still having trouble after a soft reset? Check out these tips:
- Check your internet connection: Is your Wi-Fi on?
- Update your Chromebook: Go to Settings > About Chrome OS.
- Clear your browser cache: This can solve browser-related problems.
Look for error messages and search for Chromebook support online. You’ll find plenty of help!
Hard Reset To Solve Deep-rooted Problems
Is your Chromebook slow, unresponsive, or just acting strangely? A hard reset might be just what it needs. Think of it as a magic reboot button that can give your Chromebook a fresh start, tackling problems that a normal restart can’t fix.
Step-by-step Hard Reset Instructions
A hard reset forces your Chromebook’s hardware to restart fresh. This can clear out persistent issues. Always back up important files before a hard reset.
- Turn off your Chromebook completely.
- Locate the Refresh key (looks like a circular arrow) on the keyboard.
- Press and hold the Refresh key, then press the Power button.
- Keep holding the Refresh key until the Chromebook starts up.
- Once it turns on, release the Refresh key.
- If prompted, log in and proceed.
Post-hard Reset: What To Expect
Heart racing? Breathe easy. Your Chromebook will boot up like it’s brand new. Here’s what comes next:
- Welcome Screen: Just like the first time you opened your Chromebook.
- Initial Setup: You’ll need to connect to Wi-Fi and enter your Google account info.
- Sync: Your settings and apps will start syncing, assuming you’ve been backing up to Google Drive.
Remember, a hard reset could wipe data from your device. Always check that your files are safely stored elsewhere, like Google Drive or an external hard drive.
Powerwash: The Ultimate Cleaning Solution
Is your Chromebook sluggish or having issues? Fear not! Powerwash is here to save the day. This factory reset option erases all the data from your device, giving it a fresh start without any glitches or clunky behavior. Think of it as a thorough spring cleaning for your Chromebook. With just a few clicks, you can bring back that out-of-the-box feel and performance.
Initiating A Powerwash
To start a Powerwash on your Chromebook, follow these steps:
- Sign out of your Chromebook.
- Press the keys
Ctrl+Alt+Shift+rtogether. - Select ‘Restart’ in the box that appears.
- Click ‘Powerwash’ and then ‘Continue’ to confirm.
Your Chromebook will restart and begin the Powerwash process.
Reconfiguring Chromebook After Powerwash
Once the Powerwash is complete, you’ll need to set up your Chromebook again. It’s like starting anew. Here’s what to do:
- Select your language and keyboard settings.
- Connect to a Wi-Fi network.
- Sign in with your Google Account.
| Step | Action |
|---|---|
| 1 | Choose Language & Keyboard |
| 2 | Connect to Wi-Fi |
| 3 | Login with Google Account |
Remember to reinstall any apps and sync your files from Google Drive after logging in.
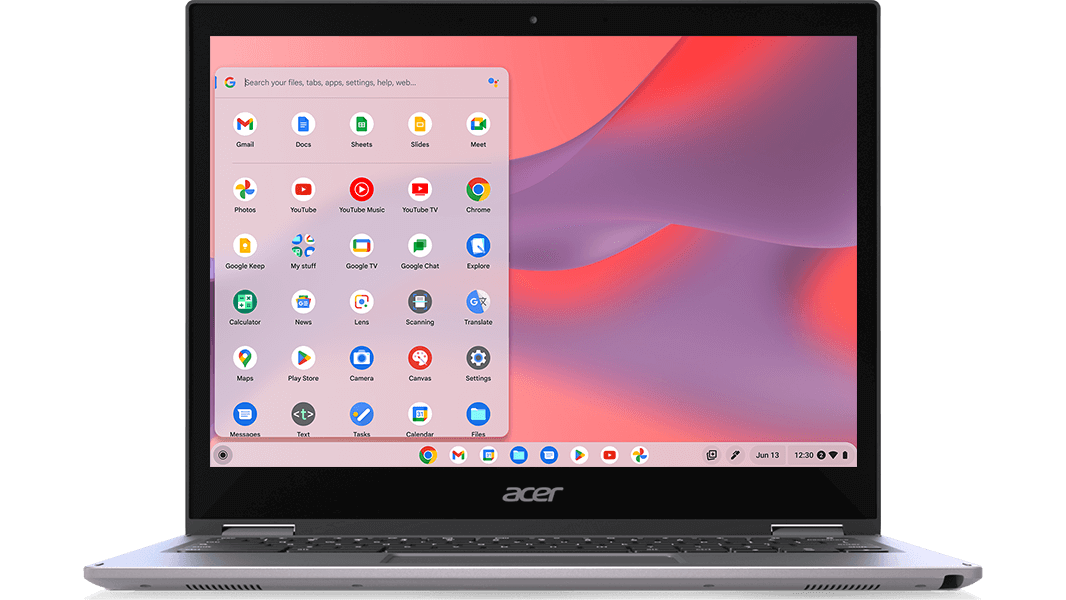
Credit: www.samsung.com
Troubleshooting Post-reset Issues
Resetting a Chromebook can feel like a fresh start, but sometimes glitches follow. This section guides you through common hiccups encountered after a reset.
Identifying And Solving Common Post-reset Problems
After resetting your Chromebook, you may face issues such as:
- Wi-Fi won’t connect: Check if other devices can connect. If not, reset your router.
- Account sync problems: Ensure you’re logged in with the correct Google account.
- Chrome OS isn’t updating: Connect to a stable internet source and try updating manually.
- Peripheral devices not working: Try disconnecting and reconnecting.
Follow these steps to solve the issues:
- Power Cycle: Turn off your Chromebook, wait, and turn it back on.
- Hard Reset: Press the reset button or hold
Refresh + Power. - Check for Updates: Go to
Settings > About Chrome OSto update. - Access Help: Use the ‘Get Help’ app for interactive solutions.
When To Seek Professional Help Or Contact Support
Seek help if:
- The quick fixes above don’t work.
- You see error messages like “Chrome OS is missing or damaged.”
- Performance issues: continue after reset and updates.
Contact Google’s support team or a certified technician in these cases. They provide expert solutions for complex problems. Keep your device’s warranty and service information handy.
| Issue | Quick Fix | When to Contact Support |
|---|---|---|
| Login Problems | Ensure correct account details. | If account recovery fails. |
| Sound Issues | Check volume settings and audio output. | When no sound after troubleshooting. |
| Display Glitches | Adjust display settings or perform a hard reset. | If screen remains distorted. |
Frequently Asked Questions On How To Reset Chromebook
How Do You Reset A Locked Up Chromebook?
To reset a locked-up Chromebook, press and hold the Refresh key, then tap the Power button. Release the Refresh key when the device starts up again.
How Do I Reset My Chromebook As Administrator?
To reset your Chromebook as an administrator, first sign in to your admin account. Then press and hold Ctrl + Alt + Shift + r, click “Restart,” and select “Powerwash. ” Follow the on-screen instructions to complete the reset process.
How Do You Unlock A Chromebook When You Forgot The Password?
Reset your Chromebook password by doing a Powerwash or factory reset, which erases all local data. To initiate this, press and hold Ctrl + Alt + Shift + r simultaneously, then follow the on-screen instructions. Remember, this will delete all data on the device.
How Do I Do A Factory Reset?
To perform a factory reset, navigate to your device’s settings menu. Locate ‘System,’ ‘Backup & reset,’ or similar. Select ‘Factory data reset’ and confirm. Follow on-screen instructions to complete the process. Remember, this will erase all data on your device.
Conclusion
Resetting your Chromebook can rejuvenate its performance and solve persistent issues. This guide has walked you through each step clearly and succinctly. Remember to back up your data to avoid any loss. Ready for a fresh start? Your Chromebook is now set to deliver optimal functionality.
Happy computing!