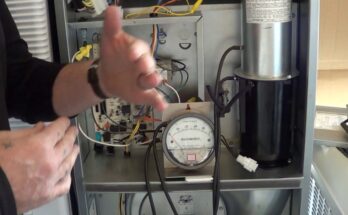
For Drive Scout Scooter troubleshooting, first check the battery connections and ensure they are fully charged. Inspect the fuses and wiring for any damage.
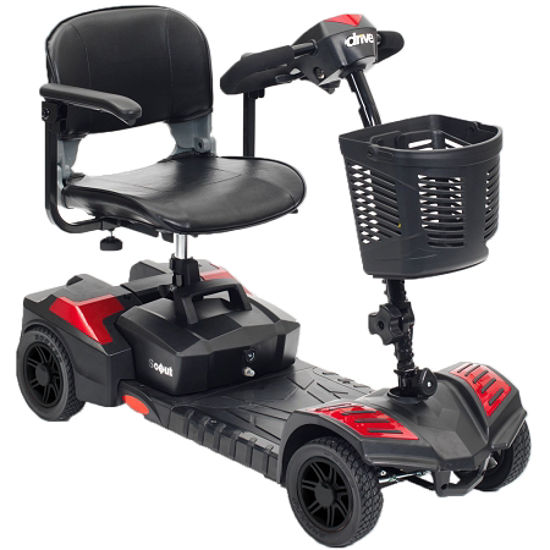
Drive Scout Scooters are reliable mobility aids designed for comfort and ease of use. Despite their durability, occasional issues may arise. Common problems include battery issues, wiring faults, and fuse malfunctions. Regular maintenance can prevent many of these issues. Always check the battery connections first, as loose connections often cause power problems.
Inspect fuses and wiring for visible damage. If problems persist, consult the user manual or seek professional help. Timely troubleshooting keeps your scooter running smoothly and extends its lifespan. Proper care ensures optimal performance and safety. Keep your Drive Scout Scooter in top condition with regular checks and maintenance.
Common Startup Issues
Starting up your Drive Scout Scooter can sometimes be tricky. Knowing the common startup issues can save you time and frustration. This section covers the most frequent problems and their solutions.
Battery Problems
The battery is the heart of your scooter. If your scooter won’t start, check the battery first.
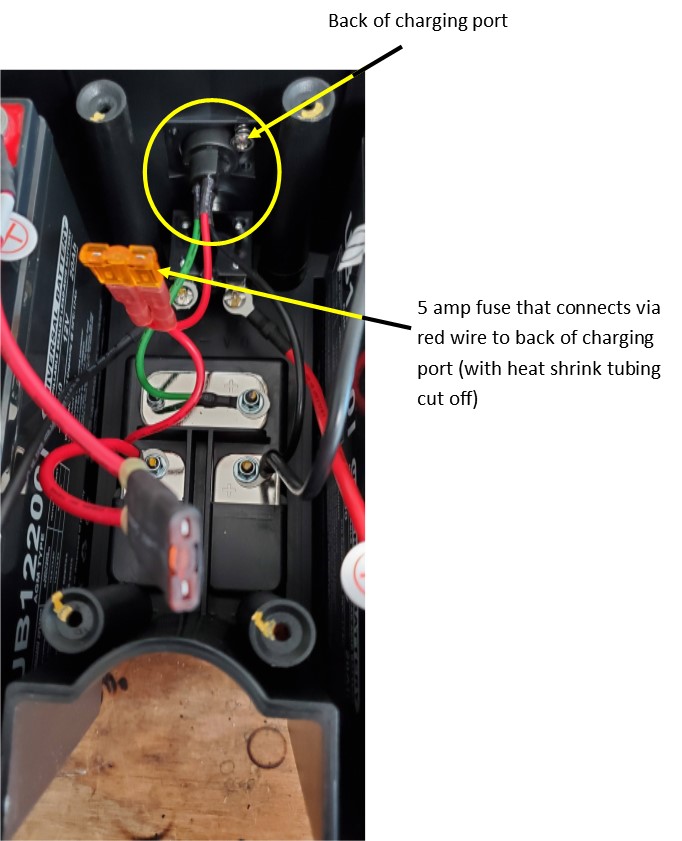
- Battery not charging: Ensure the charger is plugged in correctly. Check for any damage to the charger or battery.
- Low battery: Charge the battery fully before starting.
- Battery connections: Make sure the battery connections are tight and free from corrosion.
Power Button Malfunctions
The power button is crucial for starting your scooter. Issues with the power button can prevent startup.
| Issue | Solution |
|---|---|
| Button not responding | Check if the button is stuck or damaged. |
| Button loose | Tighten the button or seek professional help. |
| Electronic fault | Consult the user manual or a technician. |
Credit: vidacura.zendesk.com
Battery Charging Tips
Keeping your Drive Scout Scooter battery healthy is crucial. Proper charging ensures a long-lasting battery. Follow these tips to maintain your scooter’s power.
Proper Charging Techniques
Always use the charger provided by the manufacturer. Plug the charger into the wall socket before connecting to the scooter. Ensure the charger is firmly connected.
Charge the battery after every use. Never let the battery fully discharge. Disconnect the charger once the battery is fully charged to avoid overcharging.
- Use only the original charger.
- Connect to the wall socket first.
- Charge after every use.
- Do not let the battery fully discharge.
- Disconnect after full charge.
Signs Of A Faulty Charger
Recognizing signs of a faulty charger is essential. A faulty charger may not light up when connected. The battery might not charge or could charge slowly.
Inspect the charger for physical damage. Look for frayed wires or broken plugs. If the charger makes unusual sounds or smells, replace it immediately.
| Signs | Action |
|---|---|
| Charger does not light up | Check connections and replace if needed |
| Battery charges slowly | Inspect for damage or replace |
| Unusual sounds or smells | Stop using and replace immediately |
Handlebar And Steering Fixes
The Drive Scout Scooter is a reliable and popular mobility aid. Sometimes, the handlebar and steering system may need fixes. These issues can often be solved quickly. Below, we’ll dive into some common problems and solutions.
Loose Handlebar Solutions
A loose handlebar can be dangerous. Tightening the handlebar is crucial for safe steering. Follow these steps to fix it:
- Locate the adjustment bolt on the handlebar stem.
- Use a wrench to tighten the bolt.
- Check if the handlebar is secure.
Frequent tightening may indicate a worn-out bolt. In that case, consider replacing the bolt for better safety.
Steering Alignment Tips
Proper steering alignment is essential for smooth rides. Misalignment can lead to uneven steering and discomfort. Follow these tips to align the steering:
- Make sure the front wheel points straight forward.
- Check if the handlebar is parallel to the front wheel.
- If misaligned, loosen the steering clamp bolt.
- Align the handlebar with the front wheel.
- Tighten the steering clamp bolt securely.
Regular checks can prevent steering issues. Always ensure the handlebar and wheel are aligned.
By following these simple steps, you can maintain your Drive Scout Scooter. Proper handlebar and steering adjustments ensure safety and comfort.
Wheel And Tire Maintenance
Proper wheel and tire maintenance is essential for your Drive Scout Scooter’s performance. Maintaining the wheels and tires ensures smooth rides and prevents breakdowns. This section focuses on how to keep your scooter’s tires in top shape.
Inflating Tires Correctly
Inflating your tires to the correct pressure is crucial. Under-inflated tires can make steering difficult and affect the battery life. Over-inflated tires can burst, leading to accidents.
- Use a pressure gauge to check tire pressure.
- Refer to the user manual for the recommended PSI.
- Inflate the tires using a hand pump or air compressor.
- Check tire pressure regularly to maintain optimal levels.
| Step | Action |
|---|---|
| 1 | Check tire pressure with a gauge. |
| 2 | Compare it to the recommended PSI. |
| 3 | Use a pump to inflate if needed. |
| 4 | Recheck with the gauge. |
Replacing Worn Tires
Worn tires can be dangerous. They affect your scooter’s stability and increase the risk of accidents. Inspect your tires for wear regularly.
- Look for cracks, punctures, or uneven wear.
- If the tread is low, replace the tires.
- Remove the wheel using a wrench.
- Slide the old tire off the rim.
- Place the new tire onto the rim.
- Reattach the wheel to the scooter.
Always use the right tire size for your Drive Scout Scooter. Check the user manual for specifications.
Regular maintenance of your wheels and tires will keep your scooter running smoothly and safely.
Brake System Adjustments
Adjusting the brake system on your Drive Scout Scooter is essential. It ensures safety and smooth operation. This section will guide you through brake system adjustments, focusing on Tightening Loose Brakes and Brake Pad Replacement.
Tightening Loose Brakes
Loose brakes can reduce stopping power. Follow these steps to tighten them:
- Locate the brake adjustment screw near the brake handle.
- Turn the screw clockwise to tighten the brake.
- Test the brake by squeezing the handle.
- Repeat until the brake feels firm.
If the brake is still loose, inspect the brake cable. Ensure it is not frayed or damaged. Replace if necessary.
Brake Pad Replacement
Worn brake pads can compromise your safety. Replace them with these steps:
- Remove the wheel to access the brake pads.
- Unscrew the bolts holding the brake pads.
- Take out the old brake pads.
- Insert new brake pads in the same position.
- Screw the bolts back in place.
- Reattach the wheel.
After replacing the brake pads, test the brakes. Ensure they engage correctly.
Credit: scootaroundstore.com
Motor And Throttle Issues
Experiencing motor and throttle issues with your Drive Scout Scooter? Don’t worry! This guide will help you identify and fix these common problems. Follow these steps to keep your scooter running smoothly.
Motor Overheating Prevention
Motor overheating can cause severe damage to your scooter. Here are some tips to prevent it:
- Check the motor vents: Ensure they are not blocked. Clean them regularly.
- Avoid long rides: Give your scooter breaks to cool down.
- Monitor motor temperature: If it feels hot, stop and let it cool.
- Inspect motor wiring: Look for any loose or damaged wires. Fix them immediately.
Throttle Response Fixes
If your scooter’s throttle response is slow or jerky, try these solutions:
- Check the throttle cable: Ensure it is tight and properly connected.
- Inspect the throttle lever: Make sure it moves smoothly. Lubricate if needed.
- Test the battery: A weak battery can affect throttle response. Charge or replace it.
- Examine the controller: Look for any signs of damage or wear. Replace if necessary.
Use this table to quickly reference potential throttle issues and their fixes:
| Issue | Potential Fix |
|---|---|
| Slow throttle response | Tighten throttle cable |
| Jerky movement | Lubricate throttle lever |
| Throttle not working | Check battery and controller |
Led Display Troubles
The LED display on your Drive Scout Scooter is crucial. It shows important information about your scooter. Sometimes, the LED display might have issues. This section will help you fix those problems.
Screen Flickering Solutions
Screen flickering can be annoying. It usually means a loose connection or a low battery. Here are some easy fixes:
- Check the battery level. If it’s low, charge it fully.
- Inspect the connections. Make sure all wires are tight.
- Clean the display screen. Dust can sometimes cause flickering.
Error Code Interpretations
Error codes can appear on the LED display. Knowing what they mean is important. Here is a list of common error codes and their meanings:
| Error Code | Meaning |
|---|---|
| E1 | Battery voltage too high |
| E2 | Battery voltage too low |
| E3 | Motor issue |
| E4 | Throttle issue |
If you see an error code, follow these steps:
- Turn off the scooter.
- Check the battery and connections.
- Turn the scooter on again.
- If the code persists, contact customer service.
Routine Maintenance Tips
Maintaining your Drive Scout Scooter ensures it runs smoothly. Proper care can prevent many common issues. Follow these routine maintenance tips to keep your scooter in top shape.
Regular Cleaning Practices
Regular cleaning keeps your scooter free of dirt and debris. Use a damp cloth to wipe down the exterior. Avoid using high-pressure water as it can damage electrical parts. Check the wheels for any trapped debris and clean them thoroughly.
- Wipe the scooter with a damp cloth.
- Do not use high-pressure water.
- Clean the wheels regularly.
Lubrication Points
Proper lubrication is key to a smooth ride. Ensure you lubricate the following points:
| Part | Frequency |
|---|---|
| Wheel Axles | Every 3 months |
| Steering Column | Every 6 months |
| Brake Levers | Every 6 months |
Use a silicone-based lubricant for best results. Apply a small amount to the specified points. Wipe off any excess to prevent dirt accumulation.
- Apply silicone-based lubricant.
- Use a small amount.
- Wipe off excess.

Credit: www.waltonmedical.com
Frequently Asked Questions
Why Is My Drive Scout Scooter Beeping?
Your Drive Scout scooter beeps due to low battery, a loose connection, or an error code. Check the manual for troubleshooting.
Where Is The Reset Button On A Power Scooter?
The reset button on a power scooter is usually located under the seat or on the battery pack. Check the user manual for exact location.
Why Will My Drive Scooter Not Move?
Your drive scooter may not move due to a dead battery, loose connections, or motor issues. Check the power supply and wiring first. If the problem persists, consult a technician.
Why Does My Electric Scooter Turn On But Not Move?
Your electric scooter may not move due to a low battery, motor issue, or faulty wiring. Check these components first.
Conclusion
Troubleshooting your Drive Scout Scooter can be simple with the right steps. Follow our guide to ensure smooth rides. Regular maintenance prevents common issues. Keep this guide handy for quick fixes. Enjoy a hassle-free experience with your scooter by staying proactive and informed.
Happy scooting!